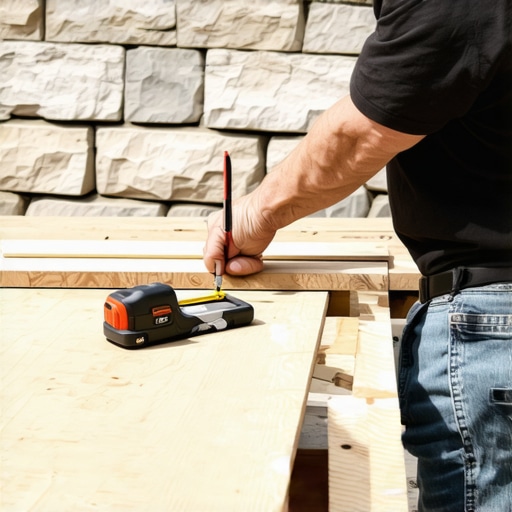
Have you ever stood in front of a stubborn stone wall during a deck project, scratching your head because the boards just won’t line up? I remember my first attempt—thinking I could eyeball the cuts, only to end up with gaps, uneven lines, and a whole lot of frustration. That lightbulb moment hit me hard: perfect deck boards against irregular stone siding require more than just a saw and some patience; they need a precise technique called scribing. And let me tell you, once I cracked that code, my outdoor space transformed from a DIY mess into a seamless showcase of craftsmanship.
Why Scribing is a Game-Changer for Your Deck
In my experience, the biggest headache in building decks near uneven surfaces isn’t just cutting the boards—it’s making those cuts look intentional, not like a rushed afterthought. Irregular stone siding, with all its dips and rises, poses a real challenge. Without proper scribing, gaps form, water can seep in, and the aesthetic suffers. But when you master the art of scribing, each board hugs the contours of your stone wall perfectly. This isn’t magic; it’s a skill that elevates your craftsmanship and ensures a durable, professional-looking finish.
Could This Simple Step Save Your Project?
I’ll admit, early in my decking journey, I overlooked scribing, thinking that a straight cut would be enough. That mistake made me realize that quick fixes often lead to bigger issues down the line. According to professional contractors, a well-scribed board not only looks better but also helps prevent structural problems caused by uneven support or shifting surfaces. If you’re tired of seeing gaps or dealing with stubborn boards that refuse to sit flush, it’s time to learn this essential technique.
In the sections ahead, I’ll guide you through the step-by-step process of scribing deck boards against irregular stone siding. Whether you’re a weekend warrior or a seasoned DIYer, these tips will help you achieve a flawless fit and a stunning outdoor space. Ready to turn your deck into a masterpiece? Let’s dive in!
.
Measure and Mark the Contours Accurately
Start by placing the deck board on the support joists in its intended position near the stone wall. Use a pencil to trace along the edge of the uneven stone surface onto the underside of the board, following its dips and rises. Think of it as sketching a topographic map; the goal is to capture every contour. Make sure to use a flexible measuring tool, like a contour gauge, to record the irregularities precisely. During my first attempt, I overlooked this step, leading to a board that only partially fit, forcing me into awkward adjustments later. Proper measurement saves time and results in a seamless fit.
Use a Contour Gauge for Precision
A contour gauge molds easily to the surface’s shape, providing a clear template for cutting. Press the gauge against the stone surface, allowing its pins to conform to every dip and bump. Once molded, transfer this shape onto your deck board with a pencil. This method ensures the cut reflects the exact height variations of your stone wall. When I used this tool for the first time, I was surprised at how much more accurate my cuts became, drastically reducing gaps and gaps that previously plagued my project.
Cut the Board with the Right Tools
Use a fine-tooth saw, like a jigsaw with a wood blade, to follow your traced line. Secure the board firmly on sawhorses to prevent movement. Cut slowly and steadily, following the marked contour. Remember, it’s better to make multiple shallow cuts than one deep cut to maintain control and precision. In my initial attempt, rushing the cut caused splintering, which affected the final appearance. Patience here pays off by producing a smooth, flush edge that hugs the stone surface perfectly.
Test Fit and Fine-Tune the Fit
Place the cut board against the stone wall and check the fit. If gaps still exist, gently sand or trim the edge where needed. For small adjustments, a hand file or rasp can refine curves without damaging the wood. I recall doing this after my first scribing attempt, and while it added a few extra minutes, it resulted in a pristine, professional look—almost impossible to distinguish from custom-milled wood. Remember, iterative fitting ensures a polished appearance and a snug fit that prevents water seepage.
Secure the Board Effectively
Once satisfied with the fit, fasten the board using corrosion-resistant screws. Pre-drill holes to avoid splitting, especially near the scribed edge. Fasten the board tightly to the support joists, but avoid over-tightening, which can cause splitting. This step locks the contour in place, maintaining the precise fit you’ve worked hard to achieve. During one project, I found that proper fastener placement prevented twisting or shifting over time, preserving the deck’s integrity and appearance.
Applying these steps consistently will elevate your deck-building skills, especially when working with irregular surfaces like stone siding. Mastering scribing provides not only a visually appealing result but also enhances the durability and longevity of your outdoor space. For inspiration on integrating composite decking with natural stone features, check out latest composite decking trends. If you’re planning a comprehensive outdoor project, consulting a professional can offer tailored insights—visit Contact us to connect with experts. Want to design stairs that complement your scribed boards? Explore modern outdoor stair design ideas for seamless integration.While many DIY enthusiasts believe that choosing durable materials like composite decking automatically ensures a long-lasting outdoor space, the reality is more nuanced. Proper installation techniques, understanding the environment, and advanced design considerations are often overlooked, leading to premature wear and unexpected problems. For example, many assume that standard fasteners suffice; however, using high-quality, corrosion-resistant fasteners significantly extends the lifespan of your deck—especially in wet climates. Don’t underestimate the importance of skillful framing and precise measurements, which are critical for safety and aesthetics in complex outdoor projects. **Are uneven terrain and structural integrity more your concern?** The truth is, mastering advanced framing techniques and custom detailing can prevent common issues like sagging stairs or unstable railings. Experts point out that cutting corners during planning or neglecting specific nuances can result in costly fixes later on, sometimes requiring complete dismantling. To avoid these pitfalls, consulting professional insights can make all the difference; a skilled deck builder can transform your outdoor space into a durable sanctuary. For instance, integrating innovative outdoor living ideas with composite decking trends not only elevates style but also boosts functionality. Discover the latest trends in composite decking for 2025 to stay ahead. Moreover, small but significant mistakes—such as incorrect joist spacing or inadequate flashing—often go unnoticed but can compromise safety and longevity. It’s essential to understand that every project is an opportunity to refine your approach; superficial solutions rarely stand the test of time. Want to ensure your stairs and deck transition seamlessly into your outdoor living space? Check our guide on designing perfect transitions. Consider this: investing time in advanced planning and technique not only enhances aesthetics but can also save you money and headaches. Don’t fall prey to myths that emphasize speed over quality; the true secret lies in meticulous craftsmanship. Have you ever fallen into this trap? Let me know in the comments.Maintaining your outdoor deck over time requires the right tools and a strategic approach to ensure durability and aesthetic appeal. I personally rely on a combination of high-quality power tools and specialized maintenance products to keep my composite decking looking pristine. For example, a **cordless oscillating multi-tool** with different attachments allows me to perform detailed cleaning and spot repairs without dismantling entire sections, saving both time and effort.
When it comes to cleaning, I prefer using a **pressure washer with adjustable settings**, along with a cleaning solution formulated specifically for composite materials. This combo is gentle enough not to damage the surface but effective in removing dirt, mold, and moss that can accumulate over time. I make it a practice to schedule annual deep cleans, especially before winter, to prevent long-term damage and maintain slip resistance.
For ongoing inspections, I incorporate a **digital moisture meter** to detect areas where moisture might be trapped beneath the surface or support structure. This proactive step helps prevent rot and structural issues, particularly if your deck integrates complex features like stairs or built-in seating. I’ve found that catching these issues early can save significant renovation costs later.
Planning for scale and future expansion involves using **modular decking systems** designed for easy reconfiguration. These systems typically feature concealed fasteners that allow seamless adjustments and extensions without harming existing structures. Personally, I use **Stainless Steel Hidden Fasteners** for their corrosion resistance, especially in humid environments. They also provide a cleaner look, which is essential for contemporary outdoor designs.
Looking ahead, the trend in outdoor living emphasizes smart maintenance solutions. I predict an increase in **integrated sensor systems** embedded within decking to monitor moisture, temperature, and even structural shifts, communicating real-time data to homeowners via smartphone apps. Incorporating such tech could revolutionize how we approach long-term upkeep, making maintenance more predictive and less reactive.
How do I maintain composite decking effectively over time? I recommend adopting a routine that combines gentle cleaning with targeted inspection tools like a moisture meter, and planning for scalability using modular systems. This approach not only extends the lifespan of your deck but also simplifies future modifications, whether adding stairs or integrating outdoor kitchens. For more innovative outdoor ideas that leverage these tools and techniques, explore latest trends in composite decking. If you’re ready to take your project further, consider consulting a professional—visit our contact page to connect with experienced deck builders who can help you scale your outdoor living space with confidence. And don’t forget to try out one advanced tip: invest in a moisture meter to identify hidden issues early and prevent costly repairs down the line.
Reflecting on my journey, the toughest lesson I learned was that perfection in deck building isn’t about rushing through the cuts—it’s about embracing meticulous detail, especially when working against uneven surfaces. I once believed that a straight cut would suffice near stone siding, only to end up with unsightly gaps. That experience taught me the importance of patience and precise scribing. Looking back, I realize that mastering these subtle skills elevates not just the appearance but also the longevity of your outdoor projects. Don’t underestimate the power of small adjustments; they make a significant difference.
What No One Tells You About Expert Deck Crafting
- Going Beyond Basic Measurements: I found that using a contour gauge transformed my ability to replicate complex curves, preventing those annoying gaps that spoil the overall look. It’s a simple tool, but its impact is profound, making every cut resemble a custom fit crafted by professionals.
- Patience Over Speed: Rushing through cuts often leads to splintering and uneven edges. Slowing down, making shallow passes, and fine-tuning with a rasp ensures a seamless hug around irregular stone surfaces. This patience is the secret ingredient to a flawless finish that stands the test of time.
- Iterative Testing as Your Ally: The most surprising lesson was that fitting and refitting a board before fastenings can save a lot of frustration. Fine adjustments with sanding or trimming refine your work, resulting in a deck that feels integrated into its environment rather than looking like an afterthought.
Tools and Resources I Can’t Leave Out
- Latest composite decking trends: Staying updated with industry innovations helps me choose materials that are both beautiful and durable, ensuring my projects age gracefully.
- Designing safe and stylish stairs: Proper stair integration complements scribed edges, creating unity throughout the outdoor space.
- Consulting professionals: When in doubt, a seasoned deck builder’s insight can prevent costly mistakes and provide tailored solutions for complex terrains.
- Innovative decking ideas: Inspiration fuels creativity, turning a basic deck into a personal oasis that matches your lifestyle and environment.
Seize the Moment and Build Confidently
Your outdoor space deserves the best craftsmanship, and with the right techniques like precise scribing, you can achieve stunning results that blend natural beauty with professional durability. Remember, every detail counts—it’s in the subtle curves, the perfect fit, and the thoughtful touches that turn a good deck into a masterpiece. Don’t wait for perfection to find you; start today with confidence, knowing the skills you develop will serve your outdoor living dreams for years to come. Looking forward to seeing your transformation—what’s the first step you’ll take to perfect your deck installation? Let me know below!
,