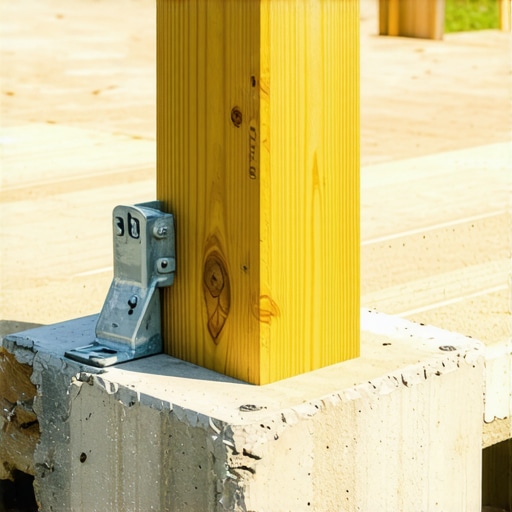
It was a bright Saturday morning when I got that dreaded call from my wife—”The deck post is wobbly again!” I remember walking out to see a once-sturdy support now leaning ominously. That moment hit me hard. I realized I’d ignored the basics of anchoring my deck posts properly and paid the price with ongoing stability issues. But more than that, I faced the unsettling prospect of wood rot and structural failure if I didn’t find a reliable fix.
Say Goodbye to Wobbly, Rot-Prone Deck Posts
Have you ever struggled with deck posts that feel only half-secure or worry about them rotting from the bottom up? I get it. It’s a common issue among homeowners—water seeping into poorly sealed posts, causing decay and jeopardizing safety over time. Today, I’ll share a tried-and-true method to secure your deck post to concrete confidently, sidestepping the rot and wobble.
Is Bolting to Concrete Really Worth The Hype?
When I first started, I mistakenly thought that simply anchoring a post with basic brackets was enough. Turns out, I overlooked the importance of proper drainage and sealing, which are crucial for longevity. According to the [National Association of Home Builders](https://www.nahb.org), poor foundation connections are the leading cause of deck failures in residential structures. The key is to combine solid anchoring with thoughtful moisture management.
What you do right now can extend your deck’s lifespan for decades. No more replacing rotted posts every few years or worrying about safety. Instead, you’ll be taking a step towards a maintenance-free, durable outdoor space that your family can enjoy without a second thought. Ready to learn how I finally nailed down that stubborn post? Stay tuned—we’re diving into the details that will transform your outdoor project from shaky to solid.
Start with a Solid Foundation
Before attaching your deck post, ensure the concrete footing is clean, dry, and level. Use a stiff brush to remove debris and a level to verify flatness. I once hurried through this step, only to discover uneven footing caused wobbling months later. Taking time here saved me from future headaches and rework.
Choose the Right Post Base
Opt for a post base designed for concrete, such as a metal post cap with a sleeve or a galvanized metal post bracket. These are adjustable and provide excellent moisture protection. I used a 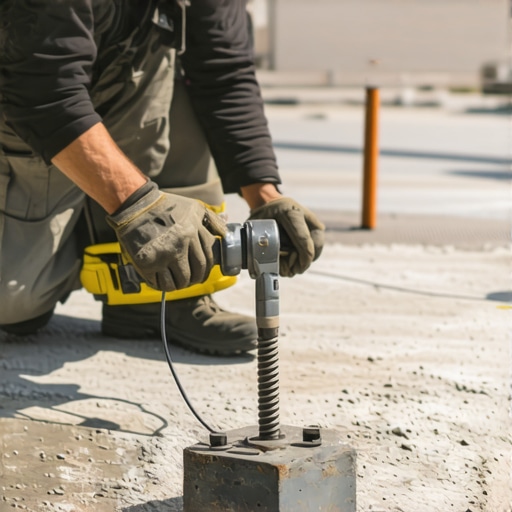 of a metal post bracket installation on my deck, which showed how proper hardware can make a difference between shaky and sturdy.
Secure the Post Base to the Concrete
Drill holes into the concrete using a hammer drill with a masonry bit matching your anchors. Insert concrete anchors or expansion bolts, then tighten securely with a wrench. I prefer expanding anchors because they grip firmly under tension, preventing any shift over time. Remember, a loose connection is the main culprit behind wobbly posts.
Seal and Protect the Connection
Apply a high-quality waterproof sealant around the base to prevent water infiltration that accelerates rot. Use a rubber gasket or sealant gasket if your hardware provides one. In my experience, neglecting this step led to water pooling at the base, hastening decay. Proper sealing extends the post’s lifespan significantly.
Ensure Accurate Post Placement and Alignment
Position the post vertically using a leveling tool. Set temporary braces to keep it steady while you verify all measurements. Once aligned, tighten all hardware. I once mistakenly installed a post slightly tilted, which affected the entire deck’s levelness; this taught me the importance of meticulous adjustment.
Perform Final Check and Maintenance
After securing the post, give it a gentle shake to test stability. Check the level again. Periodically inspect the connection, especially after heavy weather. Maintaining these connections prevents future problems and keeps your outdoor space safe.
By following these concrete anchoring steps, you’ll create a reliable foundation that withstands the test of time. For more ideas on outdoor living improvements, consider exploring outdoor living ideas or integrating stairs seamlessly into your design. Proper anchoring is the first stride toward a durable, beautiful deck that enhances your home for years to come.While many believe that choosing the right composite decking material is as simple as picking a color or texture, the truth runs much deeper. A common misconception is that all composite decks are equally durable and low-maintenance, but advanced homeowners and professional deck builders know that nuances in product composition significantly impact longevity. For example, some brands use mineral core technology to resist moisture and fading better, which isn’t widely appreciated outside expert circles.
Another trap is oversimplifying the role of stairs in outdoor design. Many assume that standard railing and step height suffice, but precision in these details guarantees safety and aesthetic harmony. Improper stair framing or incorrect riser heights can lead to unsafe, uneven steps that diminish your deck’s overall appeal. Don’t fall for the myth that all stairs are created equal; investing in proper design is critical. For advanced insights, check out this detailed guide on outdoor stairs.
What Advanced Mistakes Do Most Homeowners Make When Planning Outdoor Spaces?
One common oversight involves neglecting proper drainage when installing composite decking or constructing stairs. Poor drainage leads to water pooling, which accelerates material degradation and invites mold or rot, especially around the substructure. Proven strategies involve sloping the deck slightly away from the house and incorporating concealed drainage systems—details that even experienced DIYers often overlook. In fact, an expert study by the National Association of Home Builders highlights that improper water management is the leading cause of deck failure and costs homeowners thousands annually. Therefore, collaborating with an experienced deck builder can ensure these nuances are not missed.
Furthermore, understanding the latest trends in composite decking, such as anti-UV and fade-resistant materials, makes a significant difference in outdoor longevity. Many homeowners buy based on looks alone but neglect that some products are better suited for high-exposure areas. Read about upcoming innovations in the 2025 trends for composite decking to stay ahead.
Finally, when considering stairs and their integration with deck design, a small detail like proper stair stringer framing seals the deal. Incorrect framing can cause squeaking, instability, and unsafe footing. To avoid these pitfalls, explore integrative stair design tips that provide a safe and stylish transition between levels.
Remember, the devil is in the details—overlooking these advanced nuances could cost you time, money, and safety. Have you ever fallen into this trap? Let me know in the comments, and I’ll help you steer clear of common pitfalls on your outdoor living journey.Maintaining a durable outdoor deck requires more than just periodic cleaning; it hinges on using the right tools and adopting effective methods that ensure long-term performance. One essential tool I personally swear by is a high-quality cordless angle grinder fitted with a brushless motor. It allows me to remove rust from metal post brackets and smooth out uneven surfaces efficiently. The advantage is the mobility it provides, enabling me to work across the entire deck area without being tethered to an extension cord, which is especially helpful for larger projects. For sealing and protecting your deck, I recommend a premium, elastomeric waterproofing spray. I use it because it creates a seamless, breathable barrier that prevents water ingress while allowing moisture to escape—critical for long-lasting composite decking. Applying this with a sprayer not only speeds up the process but ensures even coverage, reducing the chance of missed spots that could lead to rot or mold. When it comes to inspecting and repairing, a digital moisture meter becomes invaluable. Detecting spots with elevated moisture levels early can save you from costly repairs down the line and prioritize maintenance efforts effectively. I’ve found that regular moisture readings, especially around stair stringers and post bases, help catch issues before they escalate, prolonging the aesthetic and structural integrity of your deck. Looking ahead, the trend in deck maintenance tools points toward integration with smart technology. Future tools may provide real-time data via Bluetooth, alerting you instantly when certain thresholds are crossed—making maintenance proactive rather than reactive. Don’t overlook the importance of proper equipment; investing in quality tools not only makes maintenance easier but significantly extends the life of your outdoor living space. Make it a habit to keep your tools well-maintained to prevent malfunctions that could jeopardize your project. For instance, cleaning your power tools after each use and lubricating moving parts ensures optimal performance and longevity. If you’re eager to take your maintenance routine further, I recommend integrating a moisture meter into your regular inspections, as detailed in professional decking guidelines. Why not challenge yourself today to test a concealed area of your deck with a moisture meter? Small steps like this can lead you toward a more resilient, beautiful outdoor space that stands the test of time, while also giving you peace of mind that your investment is protected from hidden damage.
Lessons From a Wobbly Post That Changed My Perspective
The hardest lesson I learned about outdoor living was realizing that quick fixes often lead to long-term problems. I once relied solely on basic brackets to secure my deck posts, only to face instability and rot years later. That experience taught me the importance of embracing detailed, well-planned solutions—like proper concrete anchoring—to ensure safety and durability.
Another insight was understanding that craftsmanship matters more than shortcuts. Skimping on sealing or precise measurements can turn a simple project into a hazardous liability. It’s the small details—such as correct post placement and quality hardware—that make a significant difference over time.
Finally, I discovered that ongoing maintenance isn’t optional but essential. Regular inspections with tools like moisture meters help catch issues early, saving money and preserving your outdoor oasis. These lessons transformed my approach, turning a shaky deck into a reliable extension of my home.
Tools and Resources That Elevate Outdoor Living Projects
For anyone serious about building or maintaining a deck, I recommend investing in a high-quality cordless angle grinder. It simplifies rust removal from metal brackets and keeps your hardware in top shape. Additionally, a good waterproofing spray is invaluable for long-lasting protection—speeding up application and ensuring even coverage. I trust this guide on seamless stair integration for designing safe, stylish stairs that complement your deck’s aesthetic.
To stay ahead of potential problems, a digital moisture meter is a game-changer. Detecting hidden moisture before it causes rot has saved me countless repairs. Combining quality tools and expert advice allows you to extend your deck’s lifespan and enjoy peace of mind.
The Power of Taking Action Today
Your outdoor space is a reflection of your care and vision. By applying these lessons and leveraging trusted tools, you’re on the path to creating a durable, stunning deck that enhances your home for years to come. Remember, the keys to success are attention to detail and proactive maintenance. Now is the perfect time to assess your current setup and implement improvements that will pay off in safety and beauty.
Have you ever identified a small issue that turned out to be a major problem later? Share your experience below—I’d love to hear how you tackled it and continue building an outdoor space you love.