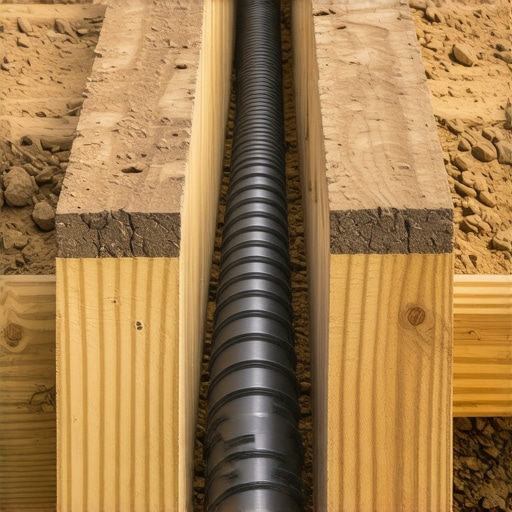
I stood there, hands on my hips, sweating through my favorite work shirt, looking at a masterpiece that felt like a complete fraud. My new deck was perfectly level, the miters were tight, and the low-maintenance composite decking glowed in the twilight. But right there, poking out from under the rim joist, was a tangled mess of black poly-pipe that looked like a nest of angry snakes. I had spent three weeks building a dream, only to have the plumbing remind me of the mess I had literally swept under the rug. It wasn’t just an eyesore; it was a ticking time bomb for my foundation. I realized then that a skilled deck builder does not just think about what is on top of the joists; they obsess over what is hidden underneath. If you are about to lay down boards over a sprinkler system, take a breath. We are going to make sure your outdoor living space stays beautiful without sacrificing the health of your lawn or your home.
Stop your irrigation lines from being a total eyesore
The temptation to just ignore the pipes and hope for the best is strong, especially when you are tired and the finish line is in sight. But trust me, those pipes will not just disappear once the deck is finished. They will sit there, catching leaves, attracting critters, and eventually, they will leak. According to the American Society of Landscape Architects (ASLA), improper water management near a home’s foundation is the leading cause of structural settling and wood rot in adjacent structures. When you build a deck, you are essentially changing the ecosystem of your yard. You are creating a shaded, damp environment where pipes can degrade or be shifted by frost. My goal today is to show you how to route these lines so they are accessible but invisible, ensuring your yard stays green without the clutter of exposed plastic. Have you ever looked at a beautiful backyard and noticed one single ugly pipe that just ruined the whole vibe? It is a common headache, but it is one we can easily avoid with a little foresight.
Is it really worth the extra day of labor?
I get it. You want to be sitting in a lounge chair with a cold drink, not digging more trenches. You might be asking if all this rerouting and sleeve-work is overkill. The short answer is: only if you never plan on having a leak. The long answer is that irrigation systems are mechanical, and mechanical things fail. By integrating your pipes into the sub-structure correctly, you are protecting your investment. If you are already looking into innovative outdoor living ideas, you know that the best designs are the ones that feel seamless. A pipe sticking out of the ground like a sore thumb is the opposite of seamless.
The mistake that cost me a Saturday and two cases of beer
Years ago, I made the classic rookie move. I buried a master irrigation valve right in the center of a 12×12 platform with absolutely no way to get to it. I thought, “It is a new valve, what could go wrong?” Three years later, a hairline crack turned the ground under my deck into a literal swamp. I had to play a high-stakes game of hide-and-seek with a circular saw, cutting through my beautiful boards just to find the leak. It was heartbreaking. Since then, I never build over a junction without knowing the best way to frame a trap door for easy access. Now, I use PVC sleeves attached to the joists to carry lines across the deck span. It keeps them off the dirt and away from the mower, and if I ever need to pull a new line, I just slide it through the sleeve. It is a simple move that saves your back and your sanity later on. We are about to dive into the nitty-gritty of trenching, sleeving, and securing, so grab your shovel and let’s get to work.
You need to treat your irrigation pipes like the electrical wiring in a house—you wouldn’t just throw live wires on the floor and hope for the best. The first rule of thumb is to get those lines out of the way of your footings before you even start digging. I once watched a contractor try to wiggle a post hole digger around a live 1-inch main line. It went exactly as you would expect: a six-foot geyser, a flooded job site, and a very unhappy homeowner. Before you even think about choosing the right composite decking, you need a literal map of what is happening in the dirt. If a pipe runs directly through where a 6×6 post needs to sit, you move the pipe. No exceptions.
Reroute lines to the perimeter for easier maintenance
Ideally, you want your irrigation lines to follow the perimeter of the deck rather than crisscrossing underneath it. If you can move the lines so they run just outside the rim joist, you have won the game. But sometimes, the layout of your yard forces you to go under. When that happens, you have to prevent the ground from becoming a swamp. I have found that protecting your deck frame from underground termite damage starts with keeping the soil dry. If a pipe leaks directly under a joist, you are creating a buffet for pests. Use a trenching tool to drop those lines at least 12 inches deep, or better yet, transition them from the ground up into the floor system itself using structural supports.
PVC sleeves keep your plumbing off the ground and out of the mud
This is my secret sauce for high-end outdoor living projects. Instead of letting the poly-pipe sit in the dirt where it can be crushed by settling or chewed by rodents, I strap 2-inch PVC sleeves to the sides of the joists using galvanized conduit straps. Think of these as a subway system for your water. You slide your irrigation lines through the PVC. It keeps them bone-dry, protected from UV rays if the deck is elevated, and most importantly, it keeps them accessible for future pulls.
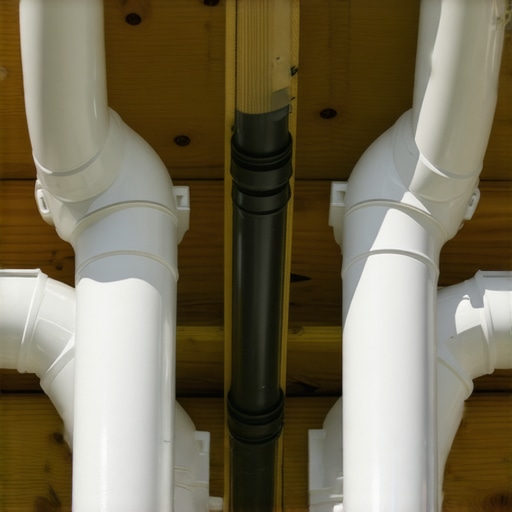
I remember a project in a tight suburban lot where the homeowner wanted a wrap-around staircase. We ran three separate sleeves—one for the sprinkler line, one for wiring the deck for sound, and a spare one just in case. Two years later, they decided they wanted a gas fire pit. Because we had that spare sleeve, we did not have to pull up a single board or crawl through the mud. That is the difference between a simple DIY job and a professional deck builder who plans for the long haul.
Don’t build a deck that you have to tear apart for a $5 valve
If you have a manifold or a master valve under the footprint, you have two choices: move it or frame around it. Moving it to the edge of the deck is always the smarter play, but if the plumbing is too complex, you must build an access point. This is not just about functionality; it is about structural integrity. You need to know the best way to frame a trap door so it does not become a weak spot. If the framing is not doubled up around that hatch, you will end up wondering why your deck feels bouncy every time you walk near the valve box. Use joist hangers and proper blocking to ensure that the removable part of your deck is just as solid as the rest. To keep it looking sharp, I always suggest using picture framing around the hatch. It turns a utility necessity into a design feature that looks intentional rather than like an afterthought.
Common wisdom says that the more stringers you pack under a set of stairs, the more solid they feel. I am here to tell you that is a half-truth that leads to a lot of wasted lumber and a false sense of security. You can have five stringers on a 36-inch wide staircase, but if you have not used the bracket that makes your deck stairs feel rock-solid, the whole assembly will eventually pull away from the frame. The real secret isn’t just vertical support; it is lateral tension. According to the North American Deck and Railing Association (NADRA), the ledger-to-stair connection is one of the most frequent points of failure in residential decks. I have seen overbuilt stairs that still wobbled because the builder did not understand the structural reason your stairs feel like they are leaning.
The expansion gap myth that ruins composite decks
Another nuance people miss is the ‘throat’ of the stringer. If you over-cut that notch by even a quarter inch to make the tread sit level, you have effectively turned a 2×12 into a 2×6. This is exactly why your deck stair stringers are cracking at the throat. It is a silent killer for your outdoor living space. Have you ever fallen into this trap? Let me know in the comments.
How do you stop your stair treads from sounding like a haunted house?
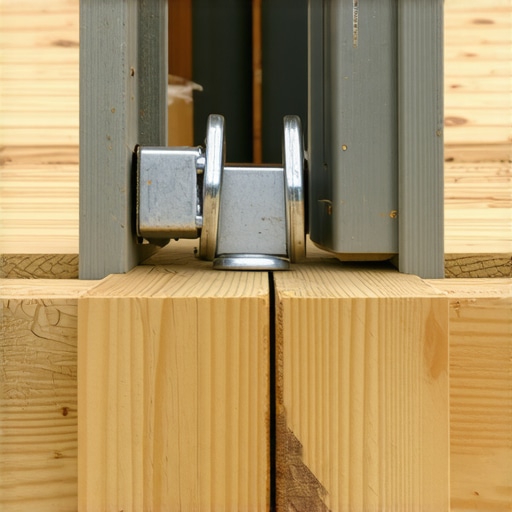
Most folks think a few extra screws will kill a squeak. In reality, why stair treads need more than just screws to stay quiet comes down to the friction between the tread and the stringer. On high-end projects, I always apply a bead of subfloor adhesive or joist tape before laying down the low-maintenance composite decking. This creates a gasket that stops the wood-on-wood rub. If you skip this, the seasonal expansion—which is also why your composite boards are expanding more than expected—will turn your beautiful stairs into a percussion instrument every time someone walks on them.
Professional secrets for a cleaner finish
The mistake that keeps me up at night is the ‘forgotten gap.’ People install their boards tight against the house for a clean look, but how to stop composite boards from expanding into your vinyl siding is a lesson usually learned after the siding starts to buckle in July. Professional deck builder insights suggest leaving at least a 1/2 inch gap at the house wall, masked by a trim board or picture framing, to allow the material to breathe. It is these small, unsexy details that separate a skilled deck builder from a weekend warrior. If you are planning a complex layout, why a digital designer is the best move is because it catches these clearance issues before you ever pick up a saw.
I remember the day I retired my old impact driver from driving 6-inch lag bolts. My wrist still aches thinking about the pre-drilling and the sheer force required. If you want to elevate your game, you need to understand the reason we use structural screws instead of old-fashioned lag bolts. These screws are heat-treated and do not require a pilot hole, which sounds like a small win until you are forty screws deep into a ledger board. According to the Simpson Strong-Tie ‘Deck Connection and Fastening Guide,’ structural screws provide a load-rated connection that offers more consistent pull-down than traditional lags. This isn’t just about speed; it’s about the structural integrity of your outdoor living sanctuary.
How do I keep my composite looking new for decades?
Low maintenance does not mean ‘no maintenance.’ I have seen $50,000 decks look like scrap yards after two years of neglect. You need a plan for the daily wear and tear. If you love grilling, you are eventually going to spill something. Knowing how to clean grease stains off composite without ruining the finish is the difference between a permanent blemish and a floor that looks fresh for years. For daily grime, a soft-bristle brush and a simple mix of soap and warm water works wonders. Don’t let organic matter sit; the best way to clean bird droppings off dark brown composite boards is to hit them with water before the sun bakes the acid into the grain. If you want to go the extra mile, learn how to protect your deck frame from rot for thirty years by using joist tape. It is a minor investment that effectively doubles the life of your substructure.

Software is the new shovel
In the past, we sketched designs on napkins and hoped the math worked. Today, I will not even buy a single 2×10 without running the project through a 3D model. This is why a digital designer is the best move for planning a complex backyard deck—it allows you to see how the sun hits your boards and where the shadows fall. I predict the next big leap in innovative outdoor living ideas will be AR (Augmented Reality) integration, where you can walk your finished deck via your phone before the footers are even poured.
Scaling for the future
As you look at composite decking trends for 2025, you will notice a shift toward integrated technology. We are talking about built-in sensors for moisture or even heating elements for snow melt. It sounds futuristic, but a skilled deck builder is already prepping for these ‘smart decks.’ If you are ready to take the leap and scale your project, my best advice is to start with your stairs. Try using the bracket that makes your deck stairs feel rock-solid on your next build. Once you feel that lack of wobble, you will never go back to old-school framing methods again.
The secret life of a deck that actually lasts thirty years
After years of building, I have realized that the most impressive decks are not just the ones with the most expensive boards; they are the ones where the builder thought about the long game. First, always remember that water is your deck’s greatest enemy. Learning how to protect your deck frame from rot for thirty years is not just a suggestion—it is the foundation of your investment. Second, hardware matters more than you think. I learned the hard way that the reason we use structural screws instead of old-fashioned lag bolts is to ensure the ledger stays tight through decades of seasonal expansion. Finally, do not ignore the little noises. A squeak in the stairs is a sign of friction that will eventually lead to wear, so take the extra ten minutes to glue those treads down properly.
My go-to gear for a flawless finish
I never step onto a job site without a few essential resources. I treat the Simpson Strong-Tie ‘Deck Connection and Fastening Guide’ as the law of the land; it ensures every connection is safe and compliant. For the planning phase, I always lean on 3D modeling tools. This is why a digital designer is the best move for planning a complex backyard deck, as it allows you to visualize clearances for things like irrigation pipes before you ever dig a hole. For the actual construction, I cannot stress enough the importance of stability hardware. On every project, I use the bracket that makes your deck stairs feel rock-solid because it eliminates that nagging wobble that plagues DIY builds.
#IMAGE_PLACEHOLDER_E#
Time to build something that moves you
Your backyard is more than just a project; it is an extension of your home and a sanctuary for your family. Whether you are collaborating with a skilled deck builder or picking up the circular saw yourself, the attention you pay to the hidden details—like the plumbing under the joists and the tension in the stairs—will pay off every time you step outside. Your outdoor living space should be a source of pride, not a list of chores. Now, go take those expert outdoor living tips and create the space you have always dreamed of. Have you ever found a surprising mess buried under an old deck or structure? Let me know in the comments below!