One chilly morning, I stepped onto my deck and felt that unsettling wobbly motion. The wood creaked under my weight, and suddenly, I remembered the nightmare I faced last winter—sinking footings, frost heaves, and the whole deck shifting like a ship in rough seas. It was a lightbulb moment: I realized that traditional footing depths wouldn’t cut it anymore, especially with the unpredictable frost lines creeping deeper each year. Ever felt that panic when your outdoor space starts to inch away from your house? You’re not alone. That frustration drives homeowners like you and me to find smarter solutions, ensuring our decks stay solid no matter how low the temperature dips.
Why Frost Heaves Are Older Than We Think—and Why They Matter
Frost heaves happen because of water in the soil freezing and expanding, then thawing and contracting, which pushes the ground—and anything resting on it—upward. An interesting fact is that, according to the USDA, soil frost levels can vary up to 48 inches depending on your location and climate fluctuations. This means if your footings aren’t deep enough, they’re vulnerable to shifting or even lifting entirely, causing costly repairs and safety hazards. I made the mistake early on of assuming a standard 18-inch depth was enough everywhere. Spoiler: it isn’t.
If you’re considering building a new deck or updating an existing one, understanding how frost lines impact your footing depth is crucial. It’s not just about following generic construction advice; it’s about innovating to beat the seasonal shift—and trust me, doing so can save you a ton of trouble. Want to know how to outsmart frost lines? Keep reading, because I’m about to share the real-world tactics I used that turned my shaky deck into a sturdy outdoor haven.
<
Is Raising Your Footings Overhyped or Essential?
Early in my project, I underestimated the importance of proper footing depth, leading to unanticipated movement and stress on my deck. Trust me, a costly mistake that could have been avoided if I had known then what I know now. To build confidence in your outdoor project, I recommend checking out the benefits of working with a professional deck builder, as they have the expertise to navigate local frost levels and soil conditions effectively. For more design ideas, visit [transform your space with expert deck tips](https://deckdesignbuild.com/transform-your-space-expert-deck-builder-tips-for-stunning-outdoor-living). And if you’re still unsure about the right materials or techniques, I’ve got you covered with detailed guides in my upcoming posts. Ready to make this summer the one where your deck stays perfectly stable? Let’s dive into the specifics of sinking your footings the right way.
Dig Deep and Plan Ahead
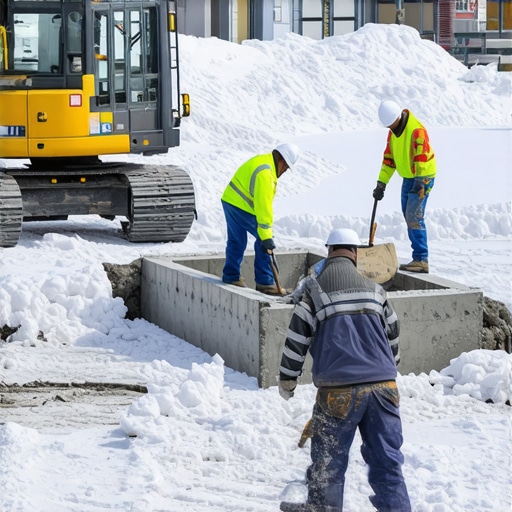
Start by researching your local frost line, which can be up to 48 inches in some regions. Use a reliable soil probe or consult local building codes to determine the exact depth needed. When I built my deck last year, I rented a soil sampler and measured in several spots, discovering that the frost line in my yard was 36 inches—much deeper than I initially thought. This step ensures your footings will stay stable through temperature fluctuations.
Create Precise Footing Forms
Once you know the required depth, mark the locations accurately using stakes and string. Dig holes at least 4 inches wider than your form boards to allow space for fine adjustments. Use a laser level or a long spirit level to make sure your forms are perfectly vertical and level. I once skipped this step, resulting in uneven footing heights, which caused my deck to tilt—a mistake I won’t repeat.
Pour and Cure with Care
Pour high-quality concrete into your forms, filling them slowly to avoid air pockets. Use a rod or a stiff wire to vibrate the mixture and release trapped air. I remember spending extra time vibrating my first footing, which resulted in a denser, more durable base that resisted shifting over the seasons. Allow the concrete to cure for at least 48 hours, keeping the forms moist if possible, to ensure maximum strength.
Use Reinforcements for Added Stability
Embedding rebar or steel mesh within the concrete further prevents cracking and enhances longevity, especially in freeze-thaw cycles. I learned this the hard way when my initial concrete footings cracked during a harsh winter; adding reinforcement on my second try made a discernible difference. Be sure to position rebar at the mid-height of the footing to maximize support.
Install Adjustable Post Anchors
Set your deck posts on adjustable galvanized post bases, allowing you to fine-tune height and level after the concrete cures. This flexibility helps when minor soil movements occur or when the terrain isn’t perfectly even. In my project, these anchors allowed me to correct small misalignments easily, saving time and frustration during framing.
Secure and Brace Properly
Ensure all posts are braced temporarily until your deck frame is complete. Use diagonal bracing or temporary stakes; this prevents movement during construction. I once skipped proper bracing, and my posts shifted slightly, leading to alignment issues down the road. Reinforcing your structure at every stage avoids costly repairs later on.
Regularly Inspect and Maintain
Even after construction, check your footings annually for signs of movement or cracking. Clear away soil and debris around bases to prevent excessive moisture retention, which can accelerate frost-related issues. I found that a simple annual inspection saved me from extensive repairs, prolonging the life of my deck substantially.
By implementing these precise, actionable steps, you can ensure your outdoor space remains stable, safe, and beautiful through every winter—no matter how deep the frost gets. For more on choosing durable decking materials suited for harsh climates, explore this detailed guide.
When it comes to designing and building outdoor decks, many assume that generic solutions will suffice or that certain myths are just harmless misconceptions. But as an experienced deck builder, I’ve seen how these little misunderstandings can lead to costly mistakes and safety hazards. One common myth is that affordable or off-the-shelf materials are always suitable for long-term outdoor use. In reality, choosing the right composite decking requires understanding the nuances of weather resistance, UV stability, and anti-slip properties—details that can significantly extend your deck’s lifespan. For instance, many homeowners overlook how selecting durable composite materials that handle temperature swings and moisture can prevent frequent repairs.
🌟**Don’t Fall for the Quick Fix**🌟: Rushing the planning stages by neglecting proper structural support can cause your deck to wobble or sag prematurely. Reinforcing your structure with steel supports or hidden fasteners isn’t just a luxury; it’s an essential for longevity, especially in areas with intense weather cycles. A common trap is thinking that simple ledger boards are enough without considering waterproofing and thermal expansion gaps—over time, this oversight leads to rot and instability.
What Is the Hidden Cost of Ignoring Proper Stair Design?
Most overlook the importance of precise stair measurements and support, assuming standard riser heights and treads are sufficient. However, small discrepancies can lead to dangerous unevenness, trip hazards, or even code violations. Advanced builders meticulously measure and incorporate adjustable stringers and anti-slip treads—investments that pay off in safety and aesthetics. According to the *National Association of Home Builders*, improper stair design not only affects safety but can also diminish the property’s value. Planning ahead with these nuanced details makes a significant difference.
Another point often underestimated is how integrating seamless transitions between your indoor and outdoor spaces enhances usability. Forget the generic look; custom-designed stairs and decks that blend organically with your landscape create a cozy, inviting atmosphere. For inspiring ideas that elevate your home’s outdoor appeal, explore this resource.
Lastly, many homeowners believe DIY efforts are just as effective as hiring professional deck builders. In truth, a skilled contractor not only ensures safety and durability but also saves time and mitigates errors—like improper foundation depth or inadequate drainage. To learn more about the advantages of professional guidance, check out this guide.
Thinking critically about these often-overlooked details can significantly improve your outdoor living project. Have you ever fallen into this trap? Let me know in the comments.Maintaining a durable and beautiful deck requires more than just good construction; it hinges on the right tools and ongoing care. As a seasoned deck builder, I rely on specific equipment to ensure every project meets high standards and remains resilient over time. For example, I swear by a high-quality laser level for precise measurements, especially when installing stairs or aligning railings, since even small misalignments can create safety hazards and visual issues. Additionally, a cordless rotary hammer drill with a chisel attachment becomes indispensable when removing old fasteners or concrete when updating footings, reducing labor time significantly.
To keep my composite decking in pristine condition, I use a quality deck washing system that combines soft brushes with eco-friendly detergents. This prevents stubborn stains and mold without damaging the surface. Also, I recommend investing in a moisture meter; monitoring moisture levels in wood or composite materials helps me identify potential problem spots before they worsen—particularly important in shaded or poorly ventilated areas. Tools like these help me stay ahead of maintenance issues, ensuring quick repairs and long-lasting results.
Looking ahead, I believe the trend in outdoor maintenance tools will lean heavily toward automation and smart technology. Imagine decking systems equipped with sensors that alert you to moisture ingress or structural movements—making proactive care straightforward. In fact, integrating smart monitoring could revolutionize how homeowners and builders approach long-term care, reducing costs and protecting investments. To explore this frontier, check out my recommended strategies for integrating technology into outdoor living maintenance.
How do I maintain my deck over time?
Regular inspections are crucial. I set a quarterly schedule to examine all structural components, checking for loose fasteners, signs of rot, or cracks. Using a contractor-grade flashlight with adjustable focus helps me spot issues quickly. Cleaning is just as important—using a gentle, proven cleanser and soft brushes prevents surface degradation. For composite surfaces, I avoid high-pressure washers that can erode the finish; instead, I opt for attachment nozzles that deliver gentle, controlled water flow. Additionally, sealing and re-coating wooden parts annually extends their lifespan and maintains aesthetic appeal.
One tip that has saved me countless headaches is applying a penetrating, breathable sealant designed for composite decking after cleaning. This adds a protective barrier against moisture and UV damage without trapping heat or moisture beneath the surface, which is vital for longevity. If you want to streamline your maintenance routine, consider adopting these advanced tools and techniques. For more insights into choosing durable, low-maintenance decking materials, visit this comprehensive guide. Start with a moisture meter or invest in a deck cleaning system—simple steps that can significantly extend your outdoor space’s life—and witness the difference in your outdoor living experience.
Lessons That Changed How I Approach Outdoor Living
One of the toughest lessons I learned was the importance of thorough site assessment before digging. I once assumed that a uniform soil type applied across my yard, leading to uneven settlement of my deck. That mistake taught me to always perform detailed soil testing and frost level checks, ensuring my footing depths matched local conditions. Additionally, I realized that overlooking drainage during initial planning can cause long-term issues, like water pooling and frost heaves, even if the deck is perfectly built. Now I always incorporate effective drainage solutions from the start—trust me, this proactive approach saves countless headaches later.
Tools and Resources That Elevate My Craft
My favorite go-to is a high-precision laser level; it’s indispensable for ensuring your deck and stairs are perfectly aligned, especially on uneven terrain. A durable moisture meter helps me detect hidden issues beneath wooden or composite decks before they turn into costly repairs. For reference, I rely on the comprehensive guides provided by this resource to select the best materials suited for my climate and usage needs. Finally, investing in quality concrete mixers and vibrators streamlines footing pours, ensuring that every project is built on a solid foundation—literally. These tools collectively make my work more precise and durable, giving clients peace of mind.
Your Next Outdoor Masterpiece Starts Now
Building a deck or outdoor stairs that stand the test of time is a rewarding challenge—one that requires patience, knowledge, and the right mindset. If you’re ready to elevate your outdoor living space, remember that each step—whether deep footing planning, choosing the right materials, or fine-tuning details—counts toward creating a lasting haven. Don’t let fear or uncertainty hold you back; embrace the learning process, and soon you’ll enjoy a stunning, functional space that adds value and joy to your home. Your outdoor transformation awaits—start today and make your vision a reality!