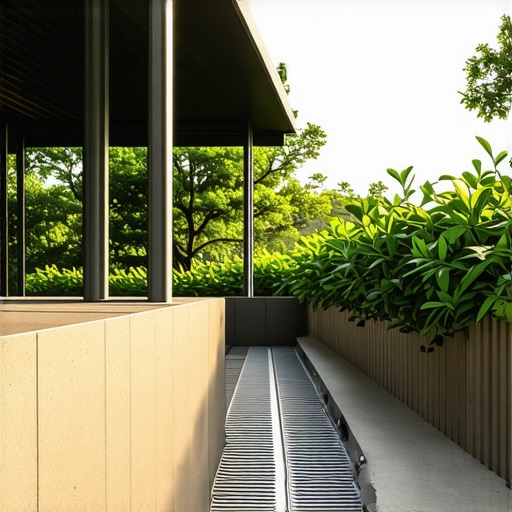
I remember the day I finally realized that my beloved deck was turning into a mini water park—right underneath my outdoor storage! After a heavy rain, I’d open up that space to grab some garden tools, only to be met with puddles, mud, and a damp, musty smell that refused to go away. It was frustrating and, frankly, embarrassing. That lightbulb moment struck me hard—there had to be a better way to protect my dry storage from relentless moisture.
The Game-Changer: A Simple Drainage Trick for Dry Under-Deck Storage
So, here’s the promise: I’ll share the drainage trick that transformed my outdoor storage area into a dry, accessible, and almost maintenance-free space. No more splashing through puddles or worrying about rot and mold eating away at my deck’s support posts. This fix is straightforward, inexpensive, and can save you headaches down the line. Trust me, this is one DIY tip you’ll wish you knew sooner.
Can Moisture Be Your Deck’s Worst Enemy—Or Just an Annoyance?
Early on, I made the mistake of assuming that a well-built deck would naturally drain water away. News flash: even sturdy composite decking can trap moisture if you don’t handle drainage properly. This oversight led to wood rot, warped boards, and compromised stability—a costly cycle I was desperate to break. According to experts, drainage failures are among the top reasons decks deteriorate prematurely (source). The good news? Small adjustments can make a huge difference, and that’s exactly what I’m here to guide you through.
Install a Gravel Bed for Effective Drainage
Start by excavating a shallow trench under your deck, about 4-6 inches deep, to lay a layer of crushed gravel or coarse stone. This acts as a natural sponge, absorbing and channeling away rainwater. When I tackled mine last spring, I cleared the area, dug the trench, and filled it with gravel, ensuring it sloped slightly away from the storage space. After a heavy rain, I noticed water rapidly draining away instead of pooling—a major win. Regularly top off the gravel to maintain proper flow and prevent soil compaction that can clog drainage.
Create a Perforated Drain Pipe for Fast Water Exit
Next, install a perforated pipe, like *weeping tile*, through the gravel bed. Place it at the lowest point of your trench, connecting it to a safe discharge area away from your home’s foundation. This pipe accelerates water movement, preventing puddles. I used flexible corrugated piping, snaking it through the gravel, then covered it with landscape fabric before backfilling. During heavy storms, I observed an almost complete absence of standing water in my storage area—saving my tools and preventing mold. Remember to periodically check the pipe for clogging and clear debris.
Seal and Maintain the Storage Area
Once drainage is set, ensure your storage area isn’t contributing to moisture buildup by sealing gaps and applying a protective barrier. Use weather-resistant caulk around any joints or openings, and consider installing a small waterproof threshold. During my project, I applied a sealant to the bottom of the storage shed, which prevented splash-back from rain runoff. Regular maintenance, like clearing leaves and debris from the gravel bed and inspecting the pipe, keeps the system functioning efficiently. Linking to innovative outdoor solutions, a good [deck builder](https://deckdesignbuild.com/deck-builder-insights-designing-your-dream-outdoor-space) can offer tailored advice for complex setups.
Enhance with a Drip Edge or Moisture Barrier
Adding a slight overhang or drip edge at the top of your storage enclosure directs rain away, reducing direct splash contact. Also, install a moisture barrier or vapor barrier underneath your shed if possible. During my renovation, I used a durable plastic membrane beneath the shed’s base, dramatically reducing ground moisture wicking up into my stored items. For more design ideas, visit [transform your outdoor living](https://deckdesignbuild.com/transform-your-outdoor-living-with-custom-composite-decking-ideas). Keep your setup simple yet effective—your stored tools will thank you, and your deck’s support posts will remain healthy longer.Many outdoor enthusiasts and homeowners assume they have the basics down when it comes to stairs, decking, and outdoor design. However, even experienced DIYers often fall prey to nuanced mistakes that can compromise safety, durability, and aesthetic appeal. Let’s examine some common myths and advanced pitfalls that are rarely addressed, yet make all the difference in professional-grade outdoor projects.
One widespread misconception revolves around the assumption that standard measurements ensure perfect stairs and deck alignment. While adhering to code is essential, the real challenge lies in nuanced details like precise stringer spacing and consistent riser heights. Overlooking these subtleties can lead to stairs that are uncomfortable to use or uneven over time. For instance, many mistakenly believe that 16-inch joist spacing suits every situation; yet, studies show that closer spacing can significantly enhance stability, especially when using heavy composite decking.
A common trap in outdoor living design involves underestimating the impact of material choice. Everyone raves about composite decking for its low maintenance, but few recognize that not all composites behave equally. Darker shades tend to absorb more heat, leading to discomfort barefoot, or faster fading and staining. An advanced mistake involves selecting a color without considering the sun exposure of your space. Experts suggest opting for lighter tones or textured surfaces, which weather more gracefully and address the “burning feet” issue, a matter often misunderstood by novices. For insights on selecting durable decking options, I recommend exploring this comprehensive guide.
Let’s talk about a sneaky error many overlook: neglecting proper drainage around stairs and deck supports. It’s not just about installing gravel beds or perforated pipes; the advanced nuance is in integrating these drainage solutions seamlessly with the overall design. Improper slope angles or failing to seal joints can trap water, accelerating rot and structural failure. Furthermore, homemade drainage setups often ignore the importance of ensuring water exits far enough away from the foundation, risking basement flooding or soil erosion. To avoid these pitfalls, professional insights emphasize detailed planning and continual maintenance.
What about the myths surrounding the construction of stairs in terms of safety? A prevalent belief is that simple stringer installation suffices. In reality, integrating a central middle stringer can drastically improve stability, especially for wider stairs. Without it, you risk creaking, bouncing, or even collapse over time. Many early-stage DIYers skip this step, inadvertently compromising safety. For an in-depth look at advanced stair construction techniques, refer to this expert article.
From material longevity to the perfect stair design, the devil truly is in the details. Recognizing and correcting these advanced mistakes can elevate your outdoor project from amateur to professional quality. Remember, seasoned deck builders focus on nuances like exact measurements, sun exposure, drainage intricacies, and material selection—and so should you. Are you falling into any of these traps? Share your experiences or questions in the comments, and let’s keep the outdoor living conversation growing.Regular maintenance is essential to ensure your outdoor decks and stairs remain safe, durable, and attractive over time. Investing in the right tools and adopting systematic techniques can make upkeep more manageable and effective. One must-have for any serious DIYer or professional is a high-quality cordless impact driver. I personally prefer the DeWalt DCF887 because its torque settings, compact size, and ease of use streamline tasks like tightening or replacing fasteners in composite decking and stair stringers. It’s unstoppable when securing hidden fasteners, which are crucial for a clean, snag-free surface, as detailed in this guide.
For precise measurement and layout, I rely on a laser distance meter such as the Bosch GLM 50 C. It makes it effortless to verify spacing, levelness, and slope, especially when installing drainage slopes or aligning stair stringers. Accurate measurements are vital, because small errors compound over the project, leading to unsafe or unsightly results.
When it’s cleaning time, I consider a powerful power washer a necessity but emphasize the importance of adjusting the pressure to avoid damaging composite materials. The Kärcher K5 Premium is my go-to because of its adjustable pressure settings and specialized nozzles, which effectively remove dirt without risking surface degradation. Regularly cleaning your deck with such equipment prevents mold buildup, keeps the surface looking fresh, and extends its lifespan.
How do I maintain decks and stairs over time? Apart from routine cleaning, I recommend applying protective treatments periodically. For composites, I use a specialized cleaner like Star Brite’s Teak & Deck Cleaner to remove stains and prevent discoloration, especially in sun-exposed areas. Additionally, inspecting fasteners and sealants bi-annually ensures that no moisture seeps in, which could cause rot or warping.
Looking ahead, the future of outdoor maintenance tools seems promising with the advent of smart technology. Integration of IoT sensors and app-connected devices might offer real-time status updates for your deck’s integrity—think corrosion detection or moisture levels—helping you schedule maintenance proactively. According to the latest trends, such innovations will make long-term management more seamless.
Ready to elevate your DIY game? Try upgrading your toolkit with a laser distance meter and impact driver to improve both accuracy and efficiency. These tools aren’t just upgrades—they’re investments that can save you time, money, and headaches down the line. For more expert insights, don’t hesitate to reach out through our contact page. Happy building and maintaining!
What I Learned About The Subtle Art of Drainage and Its Impact on Longevity
One pivotal lesson I wish I grasped earlier was the importance of seamless drainage integration. Small oversights, like neglecting the slope accuracy or ignoring the debris accumulation in drainage pipes, can accelerate wear and tear. My breakthrough came when I realized that effective drainage isn’t just about installing gravel or pipes—it’s about creating an invisible system that works harmoniously with the deck’s design. This insight transformed my approach, emphasizing ongoing maintenance and precision during installation, which can make your outdoor space more resilient over time.
My Top Tools and Guides to Elevate Your Outdoor Living Projects
After years of trial and error, I have curated tools that truly change the game. A laser distance meter, like theBosch GLM 50 C, ensures perfect measurements, saving time and preventing costly mistakes. Pair that with a quality impact driver such as theDeWalt DCF887, which simplifies fastening and ensures durability. For cleaning, theKärcher K5 Premium power washer allows me to keep decks looking new without damaging the surface. Trust me, investing in these tools, along with expert resources like the guide on selecting durable composite decking, can significantly elevate your DIY skillset and the outcome of your projects.
Your Move: Building Ease and Confidence into Outdoor Projects
Don’t let the complexities of stairs and deck construction intimidate you. With the right knowledge, tools, and mindset, you can craft an outdoor space that is both beautiful and safe. Remember, even small improvements—like ensuring proper stair stringer support or choosing lighter, heat-resistant decking—have long-lasting effects. Dive into resources on [innovative stair solutions](https://deckdesignbuild.com/innovative-outdoor-living-ideas-with-composite-decking-in-2025) and keep pushing your skills forward. Your outdoor oasis awaits, and with each project, you’re not only beautifying your home but also gaining confidence in your craftsmanship.
Have you ever overlooked a small detail that made a huge difference? Share your experience below!
,