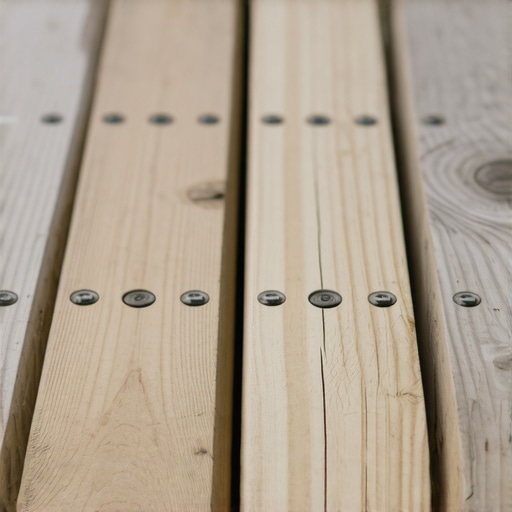
Imagine spending a warm weekend building your dream deck, step by step, excited to enjoy those outdoor gatherings. But then, within a year, you notice some boards start to cup—bowing inward or outward—ruining that perfect surface you worked so hard on. It’s frustrating, and if you’re like me, you might have felt that sinking feeling of disappointment, asking, “Did I do something wrong?” Here’s the truth: those little imperfections can often be traced back to overlooked details in fastener placement—especially the infamous 3-screw pattern.
Why Proper Fastening Matters More Than You Think
When I first started building decks, I focused on the big picture—material choice, design, and layout. Fasteners? Just a means to an end, I thought. That was a mistake. I learned the hard way that how you secure deck boards plays a crucial role in preventing cupping, warping, or even squeaks. The 3-screw pattern is more than just a fancy trick; it’s a proven way to keep your decking level, smooth, and looking pristine over the years. Experts agree that proper fastening techniques extend the lifespan of your deck. Proper screw placement can actually save you from costly repairs down the line.
Is this 3-screw pattern really worth the effort?
I admit, at first, I was skeptical. I thought, “How much difference can a pattern of screws make?” Well, I learned early on that even small details matter. A mistake I made initially was pre-drilling every screw the same depth, which seemed efficient but led to uneven pressure and eventually cupped boards. Trust me—learning from these missteps made me realize the importance of precision and consistency. Once I adopted the 3-screw pattern, I noticed my deck remained flat and attractive, even after harsh weather. If you want your outdoor space to stand the test of time, paying attention to these little techniques is essential.
Now, let’s explore exactly how this pattern works and how you can implement it in your project to avoid these common pitfalls.
Mark Your Fastening Points Precisely
I recall my first attempt at implementing the 3-screw pattern. I started by measuring the width of a standard deck board, then marked three equally spaced points near the edges, about 1 inch from each side, and a third screw in the center. Using a pencil, I drew light guidelines across the board to ensure alignment. This initial step is crucial because inconsistent markings lead to uneven pressure, causing cupping or lifting over time. Think of it like laying out a blueprint before constructing a building—accuracy at this stage prevents major issues later.
Pre-Drill Holes Carefully
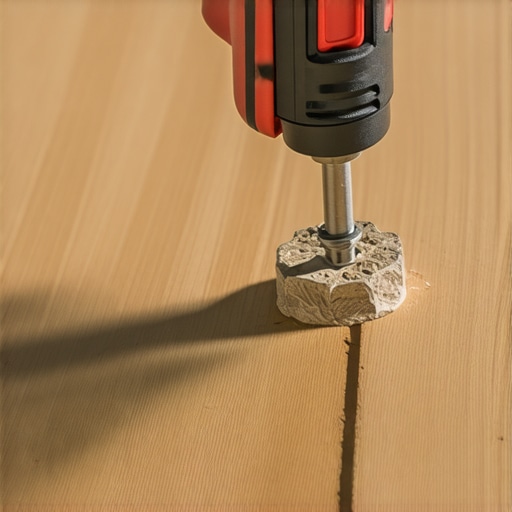
Next, I pre-drilled each marked spot with a drill bit slightly smaller than the screw diameter. Pre-drilling prevents the composite from splitting and reduces screw torque, which could distort the board. I used a cordless drill fitted with a depth stopper to ensure I wasn’t drilling too deep. This step is akin to creating guide holes for a bolt—accuracy here ensures each screw seats perfectly without damaging the material. Remember, uneven depth causes inconsistent holding power, so take your time. For deeper insights, check out our structural fix guides.
Drive Screws with Consistent Torque
After pre-drilling, I inserted the screws by hand using a screw gun set to a low torque setting. I pressed just enough to seat each screw flush with the surface—no more. I found that overtightening can squeeze out the composite or cause the screw to strip, weakening the hold. By keeping the screw head slightly below the surface, I avoided creating high spots that could trap water. This is similar to tightening a bolt just enough to hold two pieces firmly without warping them. Over time, this careful approach keeps the deck flat and prevents cupping, especially in moisture-prone areas.
Maintain Consistency Throughout the Deck
When building multiple boards, I made sure to use the same measurement and spacing for each. I created a simple jig—a scrap piece of wood with pre-drilled screw holes at fixed intervals—to quickly mark consistent points across all boards. This technique saved me hours and kept the pattern uniform. Think of it like using a stencil in painting—once set up, it ensures every iteration matches perfectly. If you’re working with composite decking, understanding how to select optimal materials enhances your results.
Final Checks and Adjustments
Once all screws were in place, I stepped back and examined the surface for any high or low spots. Using a level and straightedge, I identified minor inconsistencies. Slight adjustments—such as tightening screws or adding shims beneath sagging boards—restored perfect alignment. This attention to detail prevents depressions that trap water and cause warping over time. Remember, the goal is a smooth, durable surface that withstands the elements, matching the aesthetic you envisioned. For advanced techniques, explore modern deck maximizing ideas.
By adopting this methodical approach—precise marking, careful pre-drilling, consistent driving, and final adjustments—you’ll ensure your deck remains level, strong, and visually appealing for years to come. These core steps act as the backbone of a professional-looking outdoor space, whether you’re building a cozy backyard retreat or a large multi-level deck.
Many homeowners and even seasoned deck builders fall prey to common misconceptions about outdoor living spaces, particularly when it comes to composite decking and the intricate details of stair design. While selecting materials and basic construction techniques are often emphasized, the real expertise lies in understanding the subtle nuances that can make or break a project. Let’s challenge some widespread beliefs and reveal advanced pitfalls to avoid for truly durable and stunning outdoor environments.
Myth Busting: More Fasteners Always Mean Better Durability
It’s a common assumption that doubling or tripling the number of fasteners will enhance a deck’s lifespan. However, over-fastening can cause stress concentrations, leading to cracks or warping in composite boards. The key is precise placement and using the right type of fasteners designed for composite materials, such as stainless steel screws. Incorrect fastening not only undermines the integrity of the deck but also voids manufacturer warranties. For insights on material compatibility and best fastening practices, refer to our guide to composite decking.
What’s the danger of neglecting builder-specific nuances in stair stringers?
Many assume standard staircase framing is sufficient for all projects. Yet, subtle miscalculations in stringer slope, riser height, or support spacing can lead to bouncy, uneven stairs—especially problematic with composite decks that lack natural flex. Expert-grade stairs incorporate precise measurements and advanced framing techniques, such as adjustable stringer jacks, to ensure safety and aesthetics over decades. For more about designing safe and stylish stairs, see our comprehensive stair guide.
Sophisticated Trick: Mastering Material Trends and their Hidden Traps
While many focus on choosing trendy composite colors or textures, a less obvious but critical aspect is understanding the material’s long-term behavior under environmental stress. For example, darker-colored composites absorb more heat, leading to increased thermal expansion and potential warping or buckling. Moreover, some brands utilize mineral cores to enhance fire resistance but may compromise UV stability. A recent study published in the Journal of Outdoor Materials highlights that selecting trending products without understanding their performance nuances can result in costly replacements sooner than expected. Stay ahead by exploring 2025 composite trends and their hidden implications.
Finally, don’t underestimate the importance of proper planning and respect for advanced details—these are what separate a good outdoor space from a truly enduring one. Every cut, fastener, and design choice matters more than most realize. Think of it like building a custom home; it’s the meticulous attention to nuance that sustains the beauty and functionality over years of weather and wear.
Have you ever fallen into this trap? Let me know in the comments. If you’re ready to elevate your project through expert insights, check out our advanced decking tips or stair design strategies to ensure your outdoor living space stands the test of time.
Analyzing the Right Tools for Deck Maintenance
To keep your outdoor living space in pristine condition, investing in high-quality tools is non-negotiable. I personally swear by a cordless impact driver with adjustable torque settings; it allows me to tighten or loosen fasteners efficiently without stripping screws or damaging composite boards. A Laser distance measurer proves invaluable for accurately assessing spacing when replacing or adding decking sections, ensuring seamless integration. For cleaning, I opt for a power washer with variable pressure controls. This enables me to remove dirt and algae without risking gouges or gouges in the decking surface. Remember, the right tools can significantly extend the lifespan of your deck and reduce long-term maintenance costs.
How do I maintain my deck over time?
Long-term maintenance hinges on regular inspections and prompt repairs. I schedule biannual assessments—spring and fall—to catch any loose or damaged fasteners, warped boards, or signs of rot. Using a composite decking suitable for low-maintenance outdoors ensures less cleaning and staining, but it still benefits from routine checks. Applying a high-quality, UV-resistant sealant every couple of years helps preserve the vibrancy and structural integrity of your decking. Additionally, sealing gaps and drainage areas prevents water accumulation, which is critical because moisture is a primary enemy of outdoor structures.
Techniques to Simplify Long-Term Upkeep
One technique I find effective is implementing a cleaning schedule with enzyme-based deck cleaners. These environmentally friendly solutions break down organic materials and prevent mold growth, keeping your deck looking fresh with minimal effort. Pairing this with a soft-bristle scrub brush prevents scratches on composite surfaces—a common mistake among DIYers. For ongoing protection, I recommend installing adequate drainage systems beneath your deck to divert water away from joists and posts. This proactive approach minimizes wood rot and prolongs the life of your outdoor structure, especially in areas prone to heavy rainfall.
Tools That Help Scale Up Your Deck
If you’re looking to expand or modify your deck, consider tools like a miter saw with a sliding feature for precise cuts of new composite boards. A modular jig system can facilitate quick, accurate spacing for additional joists or stairs. For larger projects, hiring a professional-grade leveling system ensures your expansion maintains perfect alignment across the entire deck. Investing in these tools not only streamlines the process but ensures quality craftsmanship that stands the test of time.
The Future of Deck Maintenance
Looking ahead, advancements like smart moisture sensors embedded into decking materials could revolutionize maintenance routines. These sensors will alert homeowners to areas with excess moisture, enabling targeted interventions before problems escalate. Additionally, innovations in self-cleaning coatings promise to reduce the frequency of routine cleaning, making outdoor living even more convenient. Embracing these technologies will position you ahead of the curve, ensuring your outdoor haven remains safe, beautiful, and functional for decades.
Start incorporating a professional impact driver into your routine to streamline fastener management, or schedule biannual inspections with quality tools to catch issues early. Remember, proper maintenance empowers your deck to withstand the elements and continue providing enjoyment for years to come.
My journey into the world of outdoor living taught me that it’s often the subtle nuances—like precise screw placement or informed material choices—that distinguish a fleeting project from a lifelong showcase. Overlooking small details initially led me to costly repairs and frustration, but each mistake became a stepping stone towards mastery. Now, I realize that truly durable and stunning decks are built not just on quality materials, but on meticulous craftsmanship and a deep understanding of hidden pitfalls. **************************************
Lessons That Never Made It to the Forums
- Never underestimate the power of a second opinion: Collaborating with seasoned deck builders revealed that many common pitfalls, such as uneven spacing or improper fastener selection, can be prevented with an extra pair of eyes.
- Technology can be both a friend and a foe: While smart sensors and self-cleaning coatings are promising, relying solely on the latest gadgets without understanding their limitations can backfire. Personal experience showed that integrating traditional techniques with modern innovations yields the best results.
- Patience pays off in the planning stage: Rushing measurements or skipping final inspections can lead to uneven surfaces and water trapping. Taking the time to double-check every detail ensures longevity and aesthetic appeal.
- Consistent education is key: Regularly consulting expert resources and community forums expanded my knowledge, helping me avoid myths such as ‘more fasteners are better’ and correcting misconceptions about composite material behaviors.
- Respect the environment in your design: Factoring in local climate patterns, like UV exposure and humidity, informed my material choices and fastener types, leading to a deck that ages gracefully regardless of weather.
Tools and Resources That Transformed My Approach
- A reliable guide on composite decking materials: It helped me select materials that balance aesthetics with durability, crucial for long-term satisfaction.
- Expert tips for outdoor living design: This resource refined my approach to layout and accessory integration, making my deck a true extension of my home.
- An insightful look at hidden project costs: Keeping budget surprises at bay ensured I could focus on quality craftsmanship without compromise.
- Future-forward ideas for composite decking: Staying updated led me to incorporate trendsetting elements that still prioritize longevity.
Seize the Moment: Elevate Your Decking Game Today
Embarking on an outdoor project is more than just assembling materials—it’s about crafting a personal sanctuary that endures and delights for years. By paying attention to minor yet impactful details—like accurate screw placement, thoughtful material selection, and ongoing maintenance—you set the foundation for extraordinary outdoor living. Don’t let myths or shortcuts undermine your vision; instead, embrace learning and precision. Your perfect deck is within reach.
Remember, every nail, screw, and board contributes to the story you’ll tell for decades to come. Take the first step today, and transform your outdoor space into a masterpiece of craftsmanship and comfort.
What’s one detail you’ve learned the hard way about building decks or stairs? Share your experience below—I’d love to hear your story.