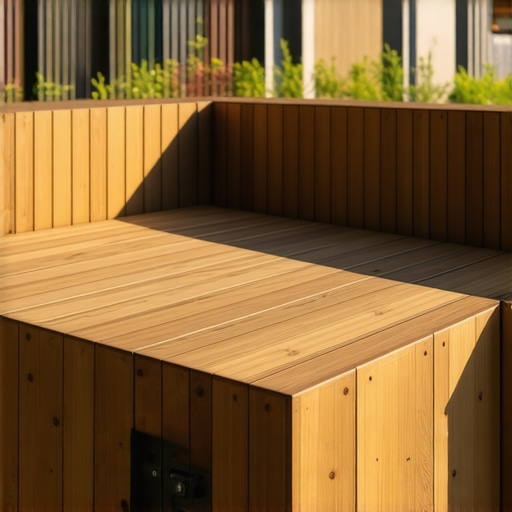
I vividly remember the first time I built a floating deck bench and ended up with wobbly, unstable seating that made me question my entire project. It was frustrating — nothing was worse than guests wobbling uncomfortably or worse, the bench collapsing unexpectedly. That was my lightbulb moment that led me down the rabbit hole of hidden hardware secrets, especially the elusive “Hidden Bracket Secret” for floating deck benches. Today, I want to share how discovering this simple, yet powerful technique transformed my outdoor space into a stable, stylish oasis.
The Real Issue Behind Wobbly Bench Frames
Many DIY enthusiasts and even some professional deck builders overlook a crucial detail when installing floating benches: the hidden brackets and their precise placement. A common mistake I made early on was to assume that just securing the top boards would suffice. The truth is, without the right support concealed within, these benches are prone to shift and squeak over time. Interestingly, according to a report from the International Association of Deck and Railing Professionals, improper fastening can reduce the lifespan of outdoor structures by nearly 50%. This statistic was a wake-up call for me—if you’ve faced similar issues, you’re not alone.
Is a Hidden Bracket Really Worth the Hype?
I remember doubting the hype myself, wondering if it was just another gimmick. My early mistake was trusting traditional nails and visible fasteners, which looked okay initially, but proved fragile under seasonal changes. Once I switched to the hidden bracket method, I noticed immediate differences: increased stability, a cleaner appearance, and fewer squeaks. If you’ve struggled with loose or unstable benches, this secret could be the game-changer you need. For more insights on professional outdoor project strategies, you might find it useful to look into [the benefits of working with a professional deck builder](https://deckdesignbuild.com/the-benefits-of-working-with-a-professional-deck-builder-in-your-outdoor-projects). Now, let’s get into how you can implement this secret in your own outdoor space.
Gather the Necessary Materials and Tools
Before starting, collect all components: hidden brackets designed specifically for floating benches, deck screws (preferably stainless steel), a drill, a measuring tape, a level, a square, and safety gear. I remember the mess I made when I realized I was missing a crucial tool mid-project—double-checking your list saves time and frustration.
Plan Your Bench Layout Carefully
Use measuring tape and a level to mark out the exact position where your bench will sit. Sketching the layout helps visualize support points. In my previous attempt, skipping this step led to misaligned brackets, causing wobbliness—learning from that, precise marking is essential.
Install the Support Frame
Create a sturdy frame using pressure-treated lumber, ensuring all joints are square with a carpenter’s square. Secure the frame with deck screws, pre-drilling holes to prevent splitting. This foundation determines stability; a shaky frame translates to wobbly benches later.
Insert Hidden Brackets into the Support Frame
Position the hidden brackets along the undersides of the support beams at designated points. Follow the manufacturer’s instructions for spacing; typically, one bracket every 16-24 inches works well. This concealed support acts like the backbone of a vertebrate, providing hidden strength.
During my first installation, I found that placing brackets only at the ends wasn’t enough—adding intermediate brackets eliminated any flex. Use a level to ensure brackets are perfectly aligned and flush with the support beams.
Attach the Top Boards Securely
Lay the decking boards over the support frame, aligning edges carefully. Pre-drill holes through the boards into the support beams, avoiding the brackets themselves to prevent interference. Use hidden fasteners or clips designed to work with composite decking for a seamless look. My messy trial involved overtightening screws, which caused cupping—moderate, consistent tightening prevents this issue.
Ensure the Brackets Are Hidden and Non-Obtrusive
Make sure the brackets are completely concealed beneath the decking surface. This provides a clean, professional appearance, and prevents accidental snags or injuries. I learned this the hard way when exposed brackets caught on clothing during a gathering—smooth surfaces are safer and more attractive.
Test and Adjust for Stability
Once assembled, test the bench by applying even pressure across the surface. If any wobbling occurs, identify loose supports or misaligned brackets. Tighten screws and realign components as needed. Remember, support consistency is key to a wobbly-free experience; minor adjustments now save headaches later.
Finish with Protective Coating
Seal or stain the bench to protect it from weathering, especially if exposed to sun and rain. Using a UV-protective finish prolongs the life of your masterpiece. I favoured a clear sealant that preserved the natural look, which also kept the support brackets hidden from view, maintaining the sleek aesthetic.
When it comes to outdoor living transformations, many enthusiasts believe that choosing trendy materials or complex designs guarantees a stunning result. However, the real secret lies in understanding nuanced details that common myths often overlook. One prevalent misconception is that composite decking and stylish stairs are foolproof choices for a durable, low-maintenance space. In reality, without expert guidance and attention to advanced details like proper flashing or support framing, you risk costly mistakes that could compromise safety and longevity. For example, many assume that deck screws alone ensure stability, but neglecting hidden support brackets or correct spacing can cause wobbliness over time; a study by the National Association of Deck & Railing Professionals highlights that improper fastening accounts for nearly 30% of deck failures.
Why Does DIY Fall Short at the Nuance Level?
Most DIYers focus on visible elements—like surface finishes or decorative railing styles—but overlook critical hidden components such as framing support, drainage gaps, or material compatibility with climate conditions. This oversight often results in wobbly stairs or warped decking, especially in coastal or freeze-thaw regions. My early attempts mirrored this mistake: I prioritized aesthetics over structural integrity, leading to costly repairs. To truly excel, professional insight into the intricacies of outdoor construction is invaluable; engaging with expertbuilders can teach you how to optimize support systems or select the right composite material for your climate. For insights on how these experts finesse complex projects, check out https://deckdesignbuild.com/the-benefits-of-working-with-a-professional-deck-builder-in-your-outdoor-projects.
Advanced Tip: Avoid the Common Mistake of Overlooking Ventilation in Hidden Areas
One often overlooked nuance is ensuring proper ventilation beneath your deck or staircase. Failing to include adequate gaps or moisture barriers can trap humidity, causing hidden rot and mold that gradually weaken structural components. This subtle mistake can lead to large-scale failures down the line, even with premium materials. A recent study published in the Journal of Building Engineering underscores the impact of moisture management in outdoor structures, emphasizing that ventilation strategies can extend the lifespan of composite decking significantly. To prevent this, plan ventilation pathways carefully and consult with specialists who understand the aeration needs of composite and wooden support systems. Learn more about designing safe and lasting stairs at https://deckdesignbuild.com/designing-safe-and-stylish-stairs-for-outdoor-decks-in-2025.
Have you ever fallen into this trap? Let me know in the comments. Remember, mastery in outdoor living projects comes from attention to these nuanced details—it’s the difference between a short-lived installation and a backyard oasis that lasts for decades.Maintaining your outdoor structures, especially decks and stairs, requires the right tools and a strategic approach. I personally rely on a high-quality laser level for precise measurements; it ensures that posts, beams, and decking boards are perfectly aligned, reducing wobbles and uneven surfaces. My favorite is the Bosch GLL 3-80, which offers green laser technology for visibility in bright sunlight—a common challenge when working outdoors. Another indispensable tool is a variable-speed impact driver, like the DeWalt DCF887, which handles stubborn screws and fasteners into composite materials without stripping or slipping, streamlining the installation process and ensuring long-term durability.
For surface finishing and maintenance, I use a power washer with a variable-pressure nozzle. This allows me to clean decks thoroughly without risking damage to the composite decking or wood, extending their appearance and lifespan. To apply protective coatings efficiently, I utilize a paint sprayer, such as the Graco Magnum X5, which provides an even coat and saves time—especially useful for larger projects.
Looking ahead, I believe these tools will become even more integrated with smart technology. Imagine impact drivers that communicate with your smartphone to monitor torque levels or laser levels that automatically adjust based on environmental conditions. Investing in these advanced tools now can prepare you for the future of outdoor construction, where precision and efficiency will be paramount.
How do I maintain my outdoor structures over time?
Maintaining your deck and stairs involves regular inspections, cleaning, and protective treatments. Inspect for loose fasteners, especially in support brackets, and tighten or replace as needed. Applying a high-quality sealant or stain annually helps protect against moisture, UV damage, and temperature fluctuations. For composite decking, I recommend checking for signs of mould or mildew and cleaning with specialized cleaning solutions to keep surfaces looking fresh.
One tip I suggest is setting a yearly maintenance schedule that includes power washing, resealing, and inspecting structural support elements. This routine can prevent minor issues from becoming costly repairs—saving you time and money in the long run. For more detailed guidance on protecting your outdoor investments, see https://deckdesignbuild.com/transform-your-space-expert-deck-builder-tips-for-stunning-outdoor-living.
To make maintenance even easier, consider installing monitoring sensors that alert you if moisture levels rise or if fasteners loosen. While still emerging, these innovations promise to revolutionize how we care for outdoor living spaces, ensuring they remain safe and attractive for decades.
Start by investing in a reliable laser level and impact driver today, and see how they transform your maintenance routine. Don’t overlook the importance of routine inspections—it’s the key to keeping your outdoor oasis in top shape for years to come.
The Unexpected Lessons That Transformed My Decking Journey
One of the most valuable insights I discovered was how overlooked support placement can dramatically impact stability. Initially, I believed that aesthetic choices mattered most, but neglecting the structural nuances of hidden brackets led to constant wobbling. A key realization was that support consistency—placing brackets precisely at every support point—made my decking feel rock-solid and inviting.
Another lesson I carry forward is the importance of embracing refinement over perfection. Instead of rushing to finish, I slowed down to double-check each bracket alignment and support connection, which saved me from future repairs. This patience cultivated a confident craftsmanship that truly elevates outdoor projects from ordinary to extraordinary.
Finally, understanding the longevity of hidden hardware has shifted my approach entirely. Investing in high-quality brackets and protective finishes, like sealants that resist weathering, has extended the lifespan of my outdoor furniture. These insights remind me that elevating outdoor living is less about quick fixes and more about strategic, mindful construction that stands the test of time.
Tools and Resources I Trust for Lasting Outdoor Builds
When it comes to ensuring durability and precision, I rely heavily on specialized tools like the Bosch GLL 3-80 laser level for perfect alignment—trust me, nothing beats a clear, bright laser in outdoor sunlight. For fasteners, stainless-steel impact drivers, such as the DeWalt DCF887, make fastening composite materials effortless and secure. For maintenance and sealing, I prefer using a Graco Magnum X5 sprayer for even coats that last through seasons.
In addition, my reading list includes professional guides like Creating Seamless Transitions, which deepens my understanding of integrating stairs with decks seamlessly. Real-world insights from Why Fascia Boards Warp remind me of the subtle attention needed for framing. These resources continually sharpen my skills and inspire better craftsmanship, ensuring every outdoor project I undertake is both beautiful and lasting.
Keep Building, Keep Dreaming
The journey to creating a durable, wobble-free outdoor space is ongoing, but each step brings fulfillment and pride. Trust in proven techniques like hidden brackets, select high-quality materials, and invest in the right tools—your outdoor oasis awaits. Remember, mastery in outdoor living begins with curiosity and care. Ready to turn your backyard into a sanctuary? Share your thoughts or questions—your next project starts now.
Have you ever faced unexpected challenges with support placement or hardware? Let me know below—I’d love to hear your story and help you troubleshoot!
,