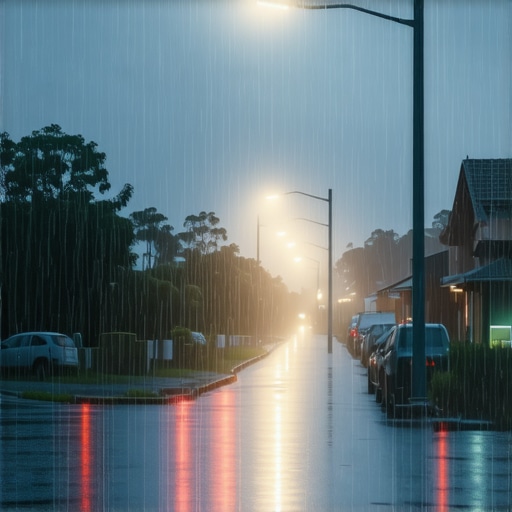
I remember the first time my outdoor deck lights stopped working just after a summer thunderstorm swept through. The sudden darkness made me realize that my beautiful nighttime gatherings could be gone overnight—literally. That frustrating moment was a lightbulb moment for me, shedding light on a problem I hadn’t fully understood: most post-cap lights seem to surrender after heavy rains. If you’ve ever faced this annoyance—flipping switches on dark, damp evenings—you’re not alone. Today, I want to share what I’ve learned from my experiences and help you keep your outdoor lighting shining through every storm.
Understanding Why Post-Cap Lights Stop Working After Rain
Outdoor lighting is supposed to make our decks inviting, safe, and stylish. But too often, heavy rains lead to unexpected darkness—lights flicker, bulbs burn out prematurely, or they just stop working altogether. The culprit usually lies in how these fixtures are wired and sealed. Many lights are installed with minimal waterproofing, making them vulnerable to moisture seeping inside. Once water breaches the housing, it quickly causes corrosion and short circuits, leading to failure.
In my early days as a DIY enthusiast, I made a critical mistake: I assumed that all outdoor fixtures were pretty much waterproof—big mistake. That assumption led to countless hours troubleshooting and replacing lights that could have lasted years with a better installation approach. According to industry experts, improper sealing is the number one reason outdoor fixtures fail after weather events, especially rain — it’s a preventable issue.
If this sounds familiar, don’t worry. There are practical ways to protect your lights, and I’m here to guide you through them. Next, we’ll explore steps that will keep your post-cap lights functional and bright, rain or shine. Curious to see how simple modifications can make all the difference? Let’s dive into the remedies I’ve personally tested and recommend.
Seal the Housing Properly
Start by removing the fixture and inspecting the sealant around its edges. Use a high-quality outdoor-rated silicone sealant to reinforce or replace existing seals. Apply a generous bead around the entire perimeter of the fixture, ensuring no gaps. I recently resealed my lights with silicone, which took about 15 minutes, and saw immediate improvement. This prevents moisture infiltration and prolongs bulb life.
Choose the Right Sealant
Opt for silicone or polyurethane sealants specifically designed for outdoor use. These withstand UV rays and temperature fluctuations. Avoid cheap sealants, as they crack over time, exposing your fixture to water. I learned this the hard way when my first attempt failed after a chilly winter. Now, I always use the premium products for lasting protection.
Upgrade to Waterproof Components
Replace standard wiring connectors with waterproof, weatherproof connectors. These are similar to the waterproof gaskets used in automotive wiring, forming a tight seal that prevents water entry. When I upgraded my light connections with IP67-rated connectors, I noticed a significant decrease in moisture-related issues, even after heavy rains. Take the time to disconnect and rewire with these components; the upfront effort pays off.
Proper Wiring Practices
Ensure wires enter fixtures through the intended waterproof conduit or grommets. Avoid leaving wires exposed or loosely connected. I used flexible outdoor wiring conduit to protect and organize all connections, which simplified troubleshooting later. This step is crucial to prevent moisture from creeping in at connection points.
Protect with Additional Barriers
Install a small, angled roof or cover over the fixture if possible. Think of it as a tiny umbrella, shielding the bulb from direct rain. In my backyard, I added a sloped cover made from treated lumber, which diverted water effectively. Even a simple plastic hood can make a big difference in keeping your lights dry.
Create a Drainage Path
Design the mounting so that water can drain away from the fixture. Slightly tilt the fixture downward or install a drain hole if feasible. During a particularly rainy season, I noticed water pooling around my fixtures when they were perfectly installed flat. Adjusting the angle improved water runoff dramatically and kept my lights dry.
Test and Maintain Regularly
After sealing and upgrading, power on your lights to check for any leaks. Periodically inspect seals, wiring, and covers, especially after storms. I set reminders to re-check my fixtures every season, which helps catch issues early. Keeping an eye on your lights ensures consistent performance and longevity.
Learn From the Pros
Consult with a professional if unsure about electrical safety or proper sealing techniques. A skilled deck builder can advise on waterproofing fixtures during deck construction, integrating lighting seamlessly into your outdoor design. Their expertise can save you time and money in the long run.
Many outdoor living enthusiasts believe that selecting the right composite decking or hiring a skilled deck builder guarantees a maintenance-free and long-lasting deck. However, even experts sometimes overlook subtle yet critical factors that can undermine their projects. For instance, a common myth is that all composite materials are equally resistant to moisture and wear. In reality, not all composites are created equal. Understanding the nuances between different brands, core densities, and surface textures can significantly influence the longevity of your deck, especially in areas prone to heavy rain or humidity.
Ensuring your outdoor features stay functional over the years demands more than just good materials—you need precision tools and reliable methods. When dealing with landscape lighting, deck construction, or composite decking maintenance, I swear by a handful of specialized equipment. For instance, my laser level isn’t just for perfect post heights; it ensures your entire deck surface remains even, preventing future sagging or water pooling. Unlike traditional bubble levels, a laser level projects a consistent line across large spans, saving me hours during installation and rechecking stages. I personally use the Bosch PLL 360 for its durability and ease of use, especially in bright outdoor conditions.
For sealing and waterproofing, I rely on high-quality silicone sealant applicators. The key is a quality caulking gun that distributes sealant evenly without creating gaps. My choice is the Dewalt Cordless Caulking Gun. Its adjustable trigger and battery-powered convenience help me reseal fixtures quickly, reducing moisture ingress and prolonging light lifespan.
Inspecting electrical connections regularly is crucial, so I employ a non-contact voltage tester. This simple but vital tool helps me verify wiring safety after storms without risking shock or damage. I prefer models like the Fluke 1AC/DC VoltAlert for its speed and reliability.
For cleaning composite decking, I opt for a soft-bristle deck brush paired with a cleaner formulated for plastic surfaces. This combination cleans grime without scratching or dulling the material. Using a retractable deck broom, I reach tricky spots and maintain the aesthetic appeal of my deck over time.
Prediction for future trends in outdoor maintenance points towards smart tools integrated with apps for real-time diagnostics. Imagine a waterproof sensor imbedded in your fixtures that alerts you when moisture levels rise or when a bulb is nearing burnout. These tech advances will streamline upkeep and minimize unexpected failures, allowing homeowners to stay ahead of repairs.
How do I maintain outdoor lighting and decking over time?
To keep your outdoor living features working flawlessly, regular inspections combined with the right tools are essential. Check wiring with a quality non-contact tester periodically, reseal fixtures using a dependable silicone applicator, and keep your deck surfaces clean with gentle brushes and suitable cleaners. Developing a routine with these precise tools not only extends the life of your outdoor investments but also ensures safety and beauty throughout every season. For a comprehensive approach, consider consulting with a professional deck builder to discuss advanced maintenance strategies—see how they integrate tools seamlessly into their workflow here.
Lessons Only the Pros Usually Catch About Outdoor Durability
- One of the biggest surprises I encountered was realizing that sealing alone isn’t enough — proper installation technique is crucial. It’s not just about applying sealant but ensuring it bonds well and stays flexible over seasons, avoiding cracks that let water in.
- When I started upgrading to waterproof connectors, I discovered that many DIY projects overlook simple connection points. These little details prevent moisture from sneaking in, saving me from premature lighting failures.
- My biggest lightbulb moment was understanding the importance of drainage — even a slight tilt or small drain hole can save hours of repair work later. It’s these thoughtful design tweaks that truly make a difference in outdoor resilience.
- Additionally, choosing high-quality materials, like UV-resistant sealants and corrosion-proof fasteners, can add decades to your deck and lighting systems. Skimping on these leads to repeated repairs and frustration.