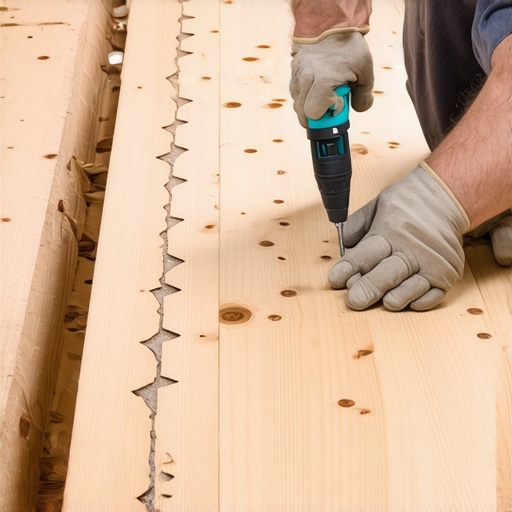
I remember the moment vividly—standing on my deck, feeling that unsettling wobble beneath my feet as I stepped onto the stairs. To my dismay, I noticed a few of my stair treads had developed unsightly splits and cracks. Frustration crept in because I knew these issues could lead to safety hazards if left unaddressed. That lightbulb moment hit me: the way I was installing those treads was part of the problem.
Many outdoor enthusiasts and DIY homeowners face the same dilemma—why are my stair treads splitting, and what can I do to prevent it? If you’ve recently built a deck or replaced your stairs, chances are you’ve encountered or will encounter this pesky issue. The good news is that there’s a simple, proven fix that can save your project from future headaches: pre-drilling.
Preventing Splitting with a Small Step That Makes a Big Difference
When I first started installing my deck stairs, I underestimated the importance of proper hole placement and size. I used standard screws without pre-drilling, and it didn’t take long before some treads showed cracks and splits. I learned the hard way that forcing screws into pressure-treated wood—especially when the holes are too tight—creates stress, causing the wood to split apart.
Pre-drilling creates a pathway for screws, reducing the pressure exerted on the wood fibers. It allows the screw to go in smoothly without forcing, which dramatically decreases the chances of splitting. Moreover, selecting the right drill bit size is crucial—typically, a bit just slightly smaller than the screw’s shank will do the trick.
Let me share a quick tip I picked up from seasoned deck builders: always pre-drill holes at least a quarter-inch smaller than your screw diameter for pressure-treated lumber. This simple step can extend the lifespan of your stairs and keep them looking pristine.
If you’re interested in a more comprehensive approach, I recommend checking out designing safe and stylish stairs [here](https://deckdesignbuild.com/designing-safe-and-stylish-stairs-for-outdoor-decks-in-2025). You’ll find detailed guidance on both safety and aesthetics.
Have you faced splitting or cracking on your stairs after installation? If so, I encourage you to consider whether pre-drilling was part of your process. Making this small adjustment can prevent costly repairs down the line and keep your outdoor space safe for everyone to enjoy.
Firm Foundations: Marking Your Stair Stringers Precisely
Start by measuring the total rise and run of your stairs, then mark the stringers on a sturdy piece of pressure-treated lumber. Use a carpenter’s square to draw the cut lines at the correct angles. In a project I tackled last summer, I double-checked my measurements thrice to avoid costly errors; precision here prevents wobbly or uneven stairs later.
Sawing the Stringers Carefully
Use a circular saw for clean, straight cuts along your marked lines. Support the lumber securely on sawhorses and cut slowly to prevent splintering. Remember, any rough edges can cause instability or discomfort when walking. After a messy cut where sawdust and splinters flew everywhere, I smoothed the edges with a rasp—saving me from future tripping hazards.
Creating Uniform Pre-Drilled Holes
Pre-drilling is crucial; it prevents splitting and ensures proper screw embedment. Drill holes slightly smaller than your deck screws—about a quarter-inch for typical 3/8-inch screws. During my own install, I used a cordless drill with a depth stop to avoid going too deep, which could weaken the timber. The result was a solid, crack-free connection that stood the test of time and weather.
Positioning the Stringers for Stability
Place your stringers on level ground or fixed supports. Use a level or laser to verify flatness, especially on uneven terrain. Secure the stringers temporarily using clamps or stakes. I learned this the hard way when I hurried and didn’t check the level; the stairs ended up with a slight tilt that was noticeable and unacceptable. Accurate positioning now means less work fixing issues later.
Attaching Treads with Confidence
Align your treads flush with the stringers and pre-drill holes in the back of each board. Use corrosion-resistant screws, like stainless steel, for longevity. Apply a generous bead of weatherproof sealant on the top edges before securing—this step prevents water infiltration that causes rot. Last year, I neglected this and saw my first cracked tread within six months; now I always seal first.
Handling Variations and Customizations
Adjust your measurements for thicker or thinner treads, or for stairs on uneven ground. Use shims under stringers or at the base to ensure a safe, stable step. Remember, the goal is comfort and safety—so take your time to make precise, level installations. For more tailored design ideas, explore options at this resource.
While many DIY enthusiasts believe that choosing the right decking material is all that matters, the real mastery lies in understanding the subtle nuances that distinguish a good build from a great one. A prevalent myth is that composite decking requires no maintenance, but this oversimplification overlooks crucial factors like proper installation techniques and ongoing care to prevent warping and fading. For example, applying a high-quality sealant to the end grains of composite boards can dramatically extend their lifespan, a step many neglect.
Another common mistake involves underestimating the importance of precise measurements during stair construction. Even a small miscalculation in riser height or tread depth can lead to uneven, unsafe stairs, an issue that compounding over multiple steps can become a costly problem. Expert builders pay close attention to consistency, often double-checking each measurement with a laser level for accuracy.
Let’s address a question that often puzzles advanced DIYers: How does thermal expansion impact composite decking installation, and what steps can be taken to accommodate it? Composite materials expand and contract with temperature fluctuations, which, if ignored, can cause buckling or gaps over time. To mitigate this, experts recommend leaving expansion gaps—usually around 1/8 inch—between boards and installing fasteners that allow some movement, such as hidden clip systems. Recognizing these minute details can save your project from future issues.
Furthermore, many assume that all composite decking is created equal. In reality, the most reputable brands incorporate UV inhibitors and anti-heat technology, which significantly improve durability and comfort underfoot. Choosing the right product is an investment that enhances safety, especially on hot summer days. For insights into selecting the best composite decking for your outdoor space, check out this resource.
Avoiding the trap of over-simplification in outdoor projects is essential for achieving long-lasting, safe, and aesthetically pleasing decks. From understanding the physics behind material behavior to applying advanced measurement techniques, embracing these hidden nuances elevates your craftsmanship. Have you ever fallen into this trap? Let me know in the comments.
Maintaining a stunning deck or staircase requires more than just initial construction; it demands the right tools and a strategic approach to long-term care. Over the years, I’ve refined my toolkit to include equipment that not only speeds up the process but also ensures precision and durability. A key investment has been in a high-quality cordless drill, like the Makita XFD12Z, which offers exceptional torque and battery life—crucial for pre-drilling and fastening during major updates or repairs.
Another essential tool in my arsenal is a laser level. Unlike traditional bubble levels, a laser level provides instant, accurate readings across large or multi-level surfaces—making stairs and deck joists alignment faster and more precise. It significantly reduces errors that could compromise safety or aesthetics, especially when making custom modifications or scaling up projects.
To tackle stubborn grime and protect wood surfaces effectively, I rely on a premium deck cleaner such as the DEFY Wood Brightener. Proper cleaning preserves the integrity of composite and wood decking and keeps stains at bay. Regular maintenance with quality products prolongs the life of your outdoor spaces, saving you costly replacements down the line. Starting with a solid cleaning routine is a vital first step before sealing or staining, as unclean surfaces hinder adhesion and durability. Explore this guide for more insights on transforming your space with expert tips.
How do I maintain my stairs and deck over time?
Consistent inspection is crucial. Look for loose fasteners, signs of rot or warping, and ensure that drainage gaps remain clear. Use corrosion-resistant fasteners, like stainless steel screws, which resist rust and keep connections tight. Applying a protective sealant periodically, especially in exposed areas, shields your deck from water damage and UV degradation. Employing a power washer with a gentle setting can help keep surfaces clean without damaging the materials—just be sure to follow manufacturer guidelines to avoid stripping protective finishes.
Anticipating future needs, I am confident that smart technology will soon play an integral role in outdoor maintenance. Devices like moisture sensors embedded into deck boards could notify homeowners of absorption levels or potential rot before visible signs appear—allowing preemptive action. According to deck builder insights, integrating such innovations can transform amateur DIY efforts into professional-grade upkeep—pushing us toward a more sustainable, low-maintenance outdoor environment.
For those eager to elevate their deck care routine, I highly recommend investing in a quality cordless drill for precise pre-drilling and fastening. This small upgrade can prevent issues like cracking or loosening over time. Remember, pestering flaws today accelerates deterioration tomorrow, so stay vigilant and proactive. Ready to start? Check your toolkit and try pairing your drill with a laser level to ensure perfect alignment on your next project—your outdoor space will thank you.
Lessons From My Biggest Deck Mistake
One of the most valuable lessons I learned early on was the importance of patience and precision over speed. Rushing through measurements and cutting corners during the initial stages led to uneven stairs and cracked treads down the line. Taking the time to double-check every measurement and cut made all the difference in creating a safe, lasting outdoor space. Remember, a solid foundation is everything, and shortcuts are never worth sacrificing long-term beauty and safety.
Another revelation came when I discovered that using the right fasteners isn’t just about corrosion resistance—it’s about workload reduction and avoiding future repairs. Switching to stainless steel screws for every connection reduced squeaks, wobbliness, and cracking, saving me money and headaches. Investing in quality hardware truly pays off when it comes to outdoor durability.
Finally, I realized that the details matter just as much as the big picture. Small touches like sealing the end grains of pressure-treated wood and leaving expansion gaps in composite decking might seem trivial but are critical for preventing warping and splits. These nuanced steps set professional-grade decks apart from amateurish efforts, making all the difference in longevity and appearance.
Tools and Resources That Lift My Game
Every professional deck builder’s secret weapon is a laser level, which ensures every stringer and tread is perfectly aligned. Not only does this save time, but it also guarantees safety and visual harmony—clear proof that precision tools are worth every penny. Pairing a laser level with a quality cordless drill, like the Makita XFD12Z, revolutionized my method, allowing me to pre-drill accurately and fasten with confidence. These upgrades have saved me countless hours and prevented costly mistakes.
Another game-changer was investing in high-quality deck cleaning products like DEFY Wood Brightener. Proper maintenance isn’t just cleaning—it’s about preservation. Regularly cleaning and sealing my decks prolongs their life, maintains aesthetics, and minimizes ongoing costs. For more expert insights, check out the comprehensive [transform your outdoor space](https://deckdesignbuild.com/transform-your-outdoor-living-with-custom-composite-decking-ideas).
Finally, I highly recommend exploring the latest trends and innovations in composite decking and stair design. Resources like [this guide](https://deckdesignbuild.com/designing-safe-and-stylish-stairs-for-outdoor-decks-in-2025) provide inspiration and technical tips to elevate your project from good to extraordinary.
Ready to Build With Confidence and Style
Embarking on a deck or staircase project may seem daunting at first, but with the right knowledge and tools, you can create something truly remarkable that lasts for years. Remember, the secret isn’t just in following blueprints—it’s in paying attention to the subtle details that protect your investment and ensure safety. The journey from novice to expert is paved with continuous learning and passion, so don’t be afraid to experiment, ask questions, and seek inspiration.
Are you ready to take your outdoor living space to the next level? Which small detail will you focus on mastering first? Share your thoughts below, and let’s build safer, more beautiful decks together!