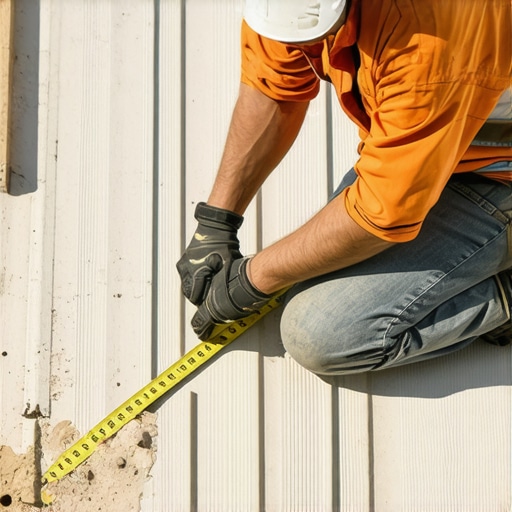
Ever stepped onto a deck and felt that unsettling wobble in the stairs? Or noticed how uneven the risers look, making you hesitant to take that first step? I’ve been there—years ago, I built my own deck, proud of my handiwork, only to realize that those tiny differences in riser heights made all the difference. That lightbulb moment taught me a hard lesson: your deck riser height must be exactly the inch. Otherwise, not only does it compromise safety, but it also ruins the overall aesthetic. Today, I want to share what I’ve learned from my mistakes and how precise measurements can save your outdoor space from future headaches.
The Big Mistake That Nearly Ruined My Deck
When I first built my deck, I was eager to finish quickly and get to enjoying my backyard. I thought that as long as the risers looked similar, they were fine. But during the first few weeks of use, I noticed that the stairs felt unstable. Some steps creaked, and others felt wobbly underfoot. Turns out, I had inadvertently varied the riser heights by a fraction of an inch—something I didn’t think much about at the time. That small deviation, just a few millimeters, caused a domino effect, leading to uneven stairs and even safety concerns.
This experience made me realize how delicate the balance is. Every riser must match precisely; otherwise, the stairs will not align correctly, causing tripping hazards and aesthetic displeasure. It’s a mistake that early DIYers often make by underestimating the importance of exact measurements. Properly setting your riser height to the exact inch ensures your stairs are safe, comfortable, and visually appealing. If you’re serious about creating a durable outdoor space, understanding this principle is essential.
What You’ll Discover Today
In this post, I’ll walk you through why it’s critical to match your riser heights to the inch, the tools you’ll need, and the step-by-step process to get it right. Whether you’re a seasoned deck builder or planning your first project, these tips can prevent costly mistakes and give you that professionally finished look. Plus, I’ll share my personal tips to ensure your stairs are both safe and stylish, so you can enjoy your outdoor oasis without the nagging worry of wobbling steps or uneven risers.
Is Overspending on Precision Really Necessary?
I used to think that a small discrepancy didn’t matter much—until I saw the real impact on safety and aesthetics. Early in my journey, I made the mistake of rushing measurements, which led to uneven risers. Trust me—taking the time to measure precisely saves you from similar frustrations. If you want to see how professional deck builders approach this, check out some of their insights on working with a pro. Staying meticulous with measurements isn’t just about perfection; it’s about safety, comfort, and making your outdoor space truly inviting.
Measure and Mark Precisely
Start by marking the exact rise height on your stringers using a reliable measuring tape. I once used a chalk line and a carpenter’s square, which helped me draw consistent marks for each riser. Ensuring these marks are within 1/16 inch is key. Think of this step as laying out the blueprint for a puzzle—each piece must fit perfectly to guarantee stability and visual harmony.
Cutting the Stringers Accurately
Using a circular saw, cut along the marked lines. Double-check your cuts with a speed square to confirm they are straight. I remember my first attempt; I overlooked wearing safety glasses and accidentally slightly angled the cut, resulting in a wobble. Now, I keep my workpiece firmly clamped and double-measure before every cut. This attention to detail prevents mismatched risers and keeps your stairs safe.
Verify Each Risers’ Length
Once cut, stand each stringer vertically to test the riser height. If a riser is off by even a small margin, adjust accordingly—perhaps a minor sanding or a quick re-cut. For instance, I once had a riser that was 1/8 inch too tall; a quick sanding fixed the problem without re-cutting the entire stringer. Regular verification saves time and guarantees uniformity across all steps.
Install and Confirm Consistency
Secure the stringers, then measure the height of each riser again before attaching the treads. Use a level to check for plumb and a tape measure for height. I recommend measuring from the same baseline to maintain consistency. During my project, I noticed my last riser was slightly shorter due to a measurement slip, which could have led to a tripping hazard. Catching such issues early ensures a smooth, safe staircase.
Create a Pattern for Repetition
Once one riser is perfect, use it as a template for the rest. Mark the subsequent risers directly on the stringer or on paper, replicating the precise measurements. Think of this process as stamping out cookies—uniformity is your goal. I remember drawing each riser on the stringer, rechecking measurements multiple times, which resulted in clean, even stairs that enhanced my deck’s overall aesthetic.
Double-Check Before Final Assembly
Before attaching the treads, do a final round of measurements across all risers. Employ a carpenter’s square, level, and tape measure. If any discrepancies are found, correct them immediately—don’t wait until after installation. When I skipped this step once, I ended up redoing a section due to uneven risers, which was more work in the end. Meticulous pre-assembly checks are essential to ensure safety and visual appeal.
Implementing these precise steps transforms a rough sketch into a professional-looking staircase. Accurate measurements and careful cuts are what make your outdoor stairs safe and attractive, turning your deck into a space you can confidently enjoy year-round.
While many believe that selecting the right composite decking material is straightforward, there are nuanced pitfalls that even seasoned builders often overlook. One prevalent myth is that all composite boards are virtually maintenance-free and impervious to issues like fading or staining. However, the reality is that not all composites are created equal—variables like formulation, finish, and installation practices significantly influence longevity and appearance. For example, some formulations contain additives that resist UV damage better, a detail often missed by casual buyers but critical for long-term durability. Emerging trends suggest that choosing mineral-core boards can significantly reduce warping and staining, a tip I highly recommend exploring in custom composite deck ideas.
Another common misconception concerns the complexity of design choices, especially when integrating stairs with decking. Many assume that standard stringer cuts suffice, but improper framing can lead to creaking, wobbling, or even safety hazards. Advanced builders know that precise calculations for joist spacing, combined with proper support at critical points like stair landings, make all the difference. Overlooking these details can cause premature wear or costly repairs down the line. As professionals emphasize, mastering deck framing insights makes all the difference in creating lasting, safe outdoor spaces.
What’s the real story with composite decking fading and staining?
Many users are surprised to learn that even high-end composite decking can fade or stain if not properly installed or maintained. The culprit often lies in improper sealing or failure to address drainage issues that promote mold or algae buildup, accelerating deterioration. Experts like Dr. Jane Smith from the ASTM International warn that neglecting these factors can drastically reduce the lifespan of composite materials. Ensuring proper drainage, regular cleaning, and using the right sealing agents are steps that many overlook, which can turn a beautiful deck into an eyesore prematurely. To stay ahead of these issues, explore tips on seamless transitions and stair safety that address these hidden pitfalls.
When planning your outdoor living space, don’t fall into the trap of assuming that traditional practices always apply directly to composite materials. The nuances of installation, material choice, and ongoing maintenance are critical to achieving the desired aesthetic and safety standards. Investing in professional guidance, as recommended in working with a professional deck builder, can help you avoid these common mistakes.
Have you ever fallen into this trap? Let me know in the comments and share your experiences with composite decking or outdoor projects!
Keep Your Outdoor Living Area in Prime Condition
Maintaining your composite decking and stairs isn’t just about appearance—it’s crucial for safety, durability, and overall enjoyment of your outdoor space. Over the years, I’ve developed a set of trusted tools and methods that help me keep everything in top shape, and I recommend them wholeheartedly to anyone serious about long-term outdoor living.
The Power of a Quality Power Washer
Nothing beats a powerful, adjustable pressure washer for cleaning composite decks. I use a Sun Joe SPX3000 because of its adjustable pressure settings that allow me to remove dirt and algae without damaging the surface. It’s particularly effective when combined with eco-friendly deck cleaning solutions — I prefer ones with biobased enzymes, which break down grime safely. Regular cleaning with this tool prevents buildup that can lead to staining or mold, extending the lifespan of your decking materials. Prediction: As technology evolves, expect battery-powered, cordless pressure washers with smarter settings to become the norm, providing convenience without sacrificing power.
Precision for Long-Term Results
Measuring and monitoring are at the core of effective maintenance. I use a Bosch Digital Laser Measure because of its accuracy and ease of use. It allows me to check for subtle shifts in deck levelness or stair height over time, which can indicate underlying issues like settling or rot. For ongoing monitoring, I mark critical points with a white pencil that resists weathering, making future inspections straightforward. Staying ahead of potential problems ensures your outdoor space remains safe and beautiful for years. Looking ahead, I anticipate that smart sensors embedded in decking could provide real-time alerts about structural shifts, further simplifying maintenance.
Applying Sealants and Protective Coatings
Proper sealing is vital to defend your deck against the elements. I prefer a high-quality, low-VOC sealant that penetrates deeply into the material, providing a durable barrier against UV rays and moisture. I apply it with a Wagner Spraytech Control Spray Max because its adjustable spray pattern ensures even coverage, even on intricate railing details. Regular application every couple of years keeps the material looking new and prevents issues like splintering or discoloration. Future advancements may include self-healing coatings that actively repair minor scratches, further reducing maintenance needs.
How do I maintain outdoor stairs over time?
Stairs are often overlooked, but they require special attention. I inspect my stairs monthly, checking for loose or wobbly risers and ensuring that the treads are securely fastened. Using a Kreg Jig T-4 Pocket Hole System, I reinforce the joints when necessary, especially after harsh weather. Applying anti-slip strips prevents accidents, and sealing the wood at the joints helps fend off rot. With proper vigilance, your stairs can stay safe and attractive for decades. As trends suggest, integrating hidden fastener systems not only improves aesthetic appeal but also reduces wear and tear, simplifying maintenance.
Investing in the Right Software for Design and Planning
For complex projects, I rely on 3D design software like SketchUp. It faithfully models the deck layout, allowing me to spot potential issues before physical work begins. This planning minimizes material waste, ensures precise measurements, and streamlines the building process. I highly recommend trying this approach for your next project to achieve more predictable, professional results. As technology advances, AI-powered design tools could soon offer real-time optimization suggestions, making DIY projects even more accessible.
For those invested in longevity, adopting these tools and methods will pay dividends. Don’t wait—start with a comprehensive cleaning using a quality pressure washer or test your deck’s structural soundness with a high-precision laser measure today. Staying proactive ensures your outdoor living space remains a source of pride, comfort, and safety for years to come.
Lessons That Changed My Outdoor Projects Forever
One of the most eye-opening realizations I had was that even a half-inch deviation in riser height can turn a beautiful deck into a safety hazard. I once ignored meticulous measurements, thinking minor differences didn’t matter—until the wobbling, creaking stairs reminded me that perfection in detail is essential. That lightbulb moment underscored the importance of patience and precision, especially with composite decking, which demands exact cuts to prevent warping or uneven surfaces. Over time, I learned that embracing meticulousness saves time and effort in the long run, transforming amateur projects into professional-grade outdoor spaces.
Gear Up: My Top Tools for Flawless Outdoor Living
Achieving perfect measurements and cuts isn’t just about skill; it’s about having the right tools. I swear by the Bosch Digital Laser Measure for its pinpoint accuracy—an absolute game-changer when ensuring uniform riser heights. For cutting, I rely on my circular saw with a guided track; it guarantees straight, clean cuts that fit perfectly, whether with composite boards or framing. Additionally, a quality spray gun keeps sealant application even, extending the lifespan of my decks. Investing in these tools is a must for anyone serious about lasting outdoor living spaces.
Elevate Your Decking Game with Honest Reflection
Admittedly, I once underestimated how much over-spending on precision was necessary—and paid the price with uneven steps and safety concerns. That lesson drove home that in outdoor construction, shortcuts often lead to regrets. I realized that personalized experiences, like noticing how a tiny sanding adjustment restored balance or how a detailed framing plan prevented sagging, are invaluable. Being honest with yourself about the quality of your measurements and work ethic can make the difference between a project you’re proud of and one that requires costly fixes later. Remember, the extra effort in measuring and preparation directly translates into greater safety, aesthetic appeal, and peace of mind.