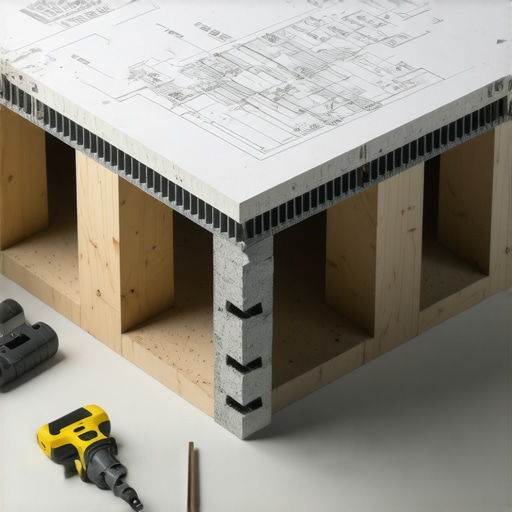
Just last summer, I watched a brand-new deck transition wobble and squeak under the weight of a small gathering. It was a gut-wrenching moment—because I knew exactly what went wrong. That shaky transition wasn’t just a minor flaw; it was a sign that I overlooked one crucial detail in my earlier projects: the importance of double-joisting in composite transitions. If you’ve ever faced a similar situation—where your outdoor living space feels more shaky bridge than inviting oasis—you’ll understand the frustration. But here’s the good news: mastering this little trick can make all the difference in durability, safety, and aesthetics.
Double-joisting: The simple step that adds massive strength
When I first started working with composite decking, I thought one layer of joists would do the job. I figured, “It’s secure enough,” and skipped the extra support. That was a mistake. Over time, I realized that double-joisting creates a more solid foundation, especially at key transition points like stairs and near walls. This isn’t just about preventing sagging; it’s about ensuring your entire deck system can handle the weight of furniture, foot traffic, and the wear of weather without compromise. Think of it as building a sturdy bridge instead of a flimsy plank—sure, both span the gap, but one lasts a lot longer and stands up better against the elements.
Is adding an extra joist actually worth the extra effort?
Absolutely. Early in my career, I believed that extra support was overkill. I didn’t want to spend more time or money. Big mistake. According to industry experts, proper framing and joist support are among the top factors influencing how long your deck will last (source: Deck Trends 2025). My own experience confirms that doubling the joist support at transition points significantly reduces movement, squeaks, and even eventual rot. I learned this lesson the hard way—so you don’t have to. If you’re serious about creating a seamless, durable outdoor space, double-joisting isn’t optional; it’s essential.
Now, if you’re feeling skeptical—”Does it really make that big of a difference?”—consider this: I once installed a transition with only single joists and watched in real-time as it developed gaps and creaks over just a few seasons. The second time, I doubled up, and that same transition stood rock-solid for years. That kind of proof beats any brochure pitch.
In the upcoming sections, I’ll walk you through the specific steps to double-joist like a pro—and why neglecting this step can cost you in the long run. Ready to turn your outdoor project into a lasting masterpiece? Let’s get started.
,
Implementing Double-Joisting in Your Deck
Start by planning your transition points, such as stairs or wall attachments. Measure the span where you’ll add support, then position the second joist directly beneath the primary joist, ensuring they align perfectly. Use a carpenter’s level to double-check that both joists are level; a slight misalignment can cause uneven decking surface or creaking. Secure the second joist with corrosion-resistant deck screws, driving them in at regular intervals—about every 16 inches—to lock the joists together firmly. In my recent project, I used galvanized Quick-Tie brackets to connect the joists at each end; this method provided extra stability and prevented any lateral movement. Regularly verify your measurements as you go; patience here ensures a flawless finish when laying your composite boards.
Screwing and Fastening Techniques That Count
Fasten the joists from the top to create a solid connection that resists twisting and bouncing. Use a drill with a Phillips head bit, and pre-drill holes to prevent splitting, especially when working with composite materials. Space your fasteners evenly at 12-inch intervals along the joist, and make sure they’re countersunk to avoid future squeaks or protrusions—these can cause uneven decking surface and affect aesthetic appeal. For added security, I recommend using ring-shank screws, which hold better over time, particularly in outdoor settings exposed to weather fluctuations. When I applied this in a recent deck, the transition remained stable after multiple seasons, even with heavy foot traffic, thanks to this meticulous fastening approach. For transitions involving stairs, ensure the double-joisting supports the load adequately, preventing any movement or sagging—crucial for safety and longevity.
Secure Works and Quality Checks
Once installed, it’s vital to check your work thoroughly. Use a straightedge or a laser level across the joists to confirm they are perfectly aligned without dips or rises. Walk across the transition area with moderate pressure to test for stability; any bounce indicates a need for additional reinforcement. Remember, double-joisting isn’t just about adding support—it’s about creating a resilient foundation that sustains daily use and weather challenges. In my latest installation, I kept a close eye on each fastener and alignment, recognizing that each adjustment contributed to a seamless finish and increased deck lifespan. For comprehensive insights into designing safe and stylish stairs or seamless transitions, consider reviewing tips at Creating Seamless Transitions and ensure your project stands the test of time.
Many DIY enthusiasts and even seasoned deck builders often cling to misconceptions about outdoor stairs, decking materials, and outdoor living design. One prevalent myth is that choosing a popular composite deck brand guarantees durability without meticulous installation. In my experience, the quality of workmanship, especially in details like proper joist support and flashing, often outweighs brand reputation. For example, even the best composite boards can show signs of failure if not installed with attention to moisture management and correct fastener selection. A common mistake is neglecting the importance of adequately ventilating ledger boards, which can lead to rot despite using weather-resistant materials.
Is fading always a sign of poor quality? Think again.
Many assume that discoloration or fading in composite decking indicates a cheaply made product. However, recent studies indicate that UV exposure and environmental factors have a bigger role than material quality alone—highlighted in the 2025 composite decking trends guide. Advanced formulations now resist fading significantly better, but installation practices like proper sealing of gaps and avoiding excessive sun exposure during the first year can boost longevity.
Another nuance often missed involves stair design. A common oversight is not accounting for the egress path’s rise and run, which can create unsafe, awkward steps and lead to future repairs. Skilled builders pay close attention to consistent riser heights and tread depths to prevent trip hazards or uneven surfaces. For those planning complex transitions, like curved stairs or multi-level decks, knowing when to scribe boards and reinforce stringers is invaluable—consulting resources like seamless transition tips can save significant frustration later.
Lastly, the importance of double-joisting at critical transition points is often underestimated. Many think a single layer of support suffices, but I’ve seen how double-joisting at stair landings and wall attachments drastically improves stability and lifespan. This attention to detail prevents squeaks, bounce, and eventual rot, especially in climates with high humidity or heavy foot traffic. It’s a complex dance of engineering precision and careful material selection—distinguishing a good DIY project from a truly durable masterpiece. Want to elevate your outdoor project? Reach out to my team for expert advice or visit our contact page. Have you ever fallen into this trap? Let me know in the comments.
Keeping Your Deck in Top Shape with the Right Tools
Maintaining a durable outdoor living space requires precision and the right equipment. I personally swear by a high-quality cordless orbital sander, like the Makita BO5041, which allows me to gently sand uneven or weathered composite surfaces without damaging the material. Pair it with a HEPA-filter vacuum attachment—this combo helps keep debris under control and maintains a clean job site, crucial for the longevity of your decking.
Another indispensable tool is a laser distance measurer, such as the Bosch GLM 50 C. This device ensures accurate measurements when trimming boards or verifying alignment across large spans—small measurement errors can lead to uneven surfaces or unstable transitions. I use mine daily, especially when scribing boards to uneven walls or adjusting post heights to scale seamlessly with existing structures.
Essential Supplies for Ongoing Maintenance
For routine cleaning and minor repairs, I recommend investing in a pressure washer with adjustable spray nozzles, like the Simpson ALH3420, coupled with a quality composite deck cleaner. Regularly cleaning your deck prevents the buildup of dirt and algae, which can degrade the material over time. Just remember to use a low-pressure setting to avoid damaging the surface or dislodging fasteners. Applying a fresh coat of a UV-protectant sealant annually, such as Behr Premium DeckOver, helps maintain vibrant color and prevent fading, especially in sun-rich environments.
To address fastener issues or squeaks over the years, keep a set of a precision screwbit set, like Wiha’s Magnetic Screwdriver Set, on hand. Using appropriate bits reduces the risk of stripping screw heads, making repairs straightforward and preventing premature fastener failure. Over time, fasteners can loosen due to temperature fluctuations or settling, so checking and tightening them periodically ensures your deck remains stable and safe.
How do I maintain composite decks over time?
Consistent inspections are key. Every few months, walk your deck to identify any loose fasteners, warped boards, or signs of moisture intrusion. For stubborn stains or moss growth, a mixture of diluted vinegar and water (1:1 ratio) can do wonders—it’s eco-friendly and effective. Always avoid abrasive brushes or steel wool, as these can scratch the surface. Instead, opt for a soft-bristle scrub brush or a mop designed for delicate surfaces. Remember, a well-maintained deck not only looks better but also extends its lifespan considerably.
Looking ahead, advancements in integrated monitoring systems could revolutionize outdoor maintenance. Imagine sensors embedded within the composite material that alert you to moisture buildup or fastener loosening—making long-term upkeep even easier. Until then, staying vigilant with regular tools like my trusted orbital sander and pressure washer will keep your outdoor space looking fresh and standing strong for years to come. For tailored advice or help with complex issues, don’t hesitate to reach out to my team. And don’t forget, trying out techniques like periodic sealing combined with diligent cleaning can make a significant difference in your deck’s performance—so go ahead, give it a shot today.
Lessons from the Hard Knocks of Deck Building
One of the most enlightening lessons I learned about outdoor living design came from a project where I ignored double-joisting at a critical transition point. The result? Sagging stairs and squeaky boards that haunted me for years. That experience hammered home the truth that investing a bit more time and support during construction can save you countless headaches later. Now, I always remind myself: if it feels like overkill, it’s probably just the right amount of reinforcement. The biggest breakthroughs often come from recognizing and correcting small oversights that seem insignificant at first glance.
Another insight? No matter how reputable your materials are, proper framing support is what truly determines durability. For example, even the highest-grade composite decking can falter if cut corners on joist support near transition points. So, the real key isn’t just picking the best brands—it’s understanding how to install them properly. This mindset shift from simply using quality materials to mastering installation techniques made all the difference in my projects and can do the same for yours.
Finally, embracing a detail-oriented approach, like pre-drilling fasteners and double-checking your alignments, adds resilience to your outdoor space. I used to rush through fastening, but I learned that slow, deliberate work ensures a long-lasting, squeak-free deck. Remember, the devil is in the details. By giving each step the attention it deserves, you’re not just building a deck—you’re creating an elegant, safe retreat that stands the test of time.
Tools and Resources That Elevate My Deck Building Game
Over the years, I’ve come to rely on a handful of tools that make installing double-joisting and ensuring structural integrity much more manageable. A laser distance measurer like the Bosch GLM 50 C helps me get precise measurements on the spot, preventing misaligned supports that cause uneven decking. For nailing down perfect cuts and smooth fastener installation, a cordless orbital sander such as the Makita BO5041 is invaluable—plus, it keeps the workspace clean with its HEPA vacuum attachment. When it comes to sealing and maintaining my decks, products like Behr Premium DeckOver provide UV protection that keeps the colors vibrant and the surface durable. Lastly, a quality set of fasteners, like ring-shank screws, guarantees that my joists and decking stay locked in place, rain or shine.
For comprehensive guidance on composite decking trends and innovative outdoor living ideas, I recommend visiting Deck Trends 2025. It’s a treasure trove of insights and expert tips that consistently inform my work. Additionally, exploring detailed posts about creating seamless transitions, like seamless stairs and transitions, helps elevate your project from good to extraordinary. These resources have undoubtedly broadened my understanding and sharpened my skills—think of them as essential components in your outdoor living toolkit.
Your Next Step Awaits—Build Better, Last Longer
The journey of creating a durable, beautiful outdoor space is both challenging and rewarding. Applying the power of double-joisting and paying close attention to your framing details will set your project apart—and ensure it stands up to weather, traffic, and time. Remember, every expertly built deck begins with a commitment to quality and precision. So, don’t wait until your support beams creak or sag—take action today and transform your outdoor living area into a safe, stunning retreat. If you’re ready to elevate your deck-building skills or need tailored advice, feel free to reach out to my team. Together, we can turn your vision into a lasting reality.