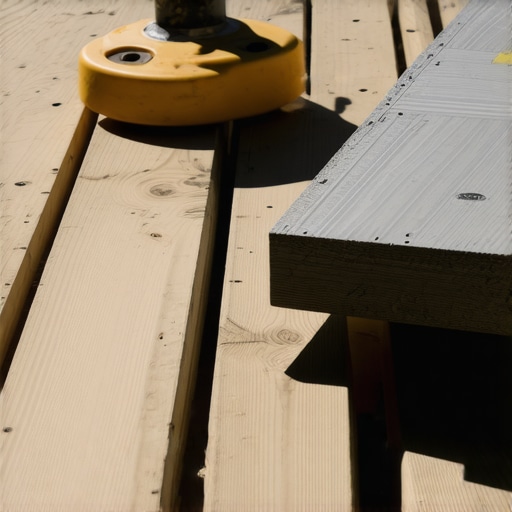
It was a muggy Saturday afternoon when I finally recognized the nagging truth about my deck project. Every time someone stepped onto the porch, I heard that faint, unsettling squeak—like a tiny sign flashing ‘problem ahead.’ I had used plastic shims religiously, believing they were the quick fix for leveling uneven boards and ensuring my outdoor space looked crisp and inviting. But beneath that shiny surface, cracks were forming, and I felt like I was barely holding it all together.
Discovering the Real Cost of Plastic Shims
Initially, plastic shims seemed perfect. They were affordable, easy to handle, and promised a level deck in no time. I remember the early days—everything seemed fine. But over the months, I started noticing subtle shifts: unevenness creeping in, gaps widening, and the whole deck feeling less sturdy. Then came the occasional creak that made me cringe each time someone stepped outside. It was clear that my quick fix was turning into a long-term headache.
What I didn’t realize at the time was how poorly plastic responds to the elements. Sun, rain, and temperature fluctuations cause those shims to expand, contract, and even warp—compromising the very stability I sought to achieve. According to experts, plastic materials can degrade over time, especially in outdoor settings where exposure is relentless. A study published in the *Journal of Materials Engineering* emphasizes that cheaper plastics are particularly vulnerable to UV radiation, leading to brittle and cracked surfaces—exactly what I faced.
Is It Really Worth Ditching Plastic for Good?
Early on, I made the mistake of dismissing these signs as minor inconveniences. I convinced myself that replacing a few shims was no big deal. But the real lesson came when I realized that my initial reliance on cheap, plastic solutions overlooked the importance of stability and longevity. If you’ve been tempted to keep patching up with plastic shims just like I did, ask yourself: How much time and frustration are you willing to invest in short-term fixes?
In my journey to build a durable, safe, and beautiful deck, I found that ditching plastic shims was a game-changer. Instead, I turned to more reliable methods—like proper framing and quality leveling tools—that ensure your outdoor space stays secure long-term. If you’re tired of constantly adjusting and redoing your deck, I promise you—we’re about to explore smarter, more lasting solutions. Ready to learn how to get your deck perfectly leveled once and for all? Let’s dive into the practical steps that transformed my outdoor living space and can do the same for you.
Start with a Solid Foundation
Before anything else, ensure your ground is well-compacted and free of loose soil. Use a shovel to clear debris and grade the area for proper drainage, sloping it away from the foundation to prevent water pooling—similar to how a car’s suspension needs a stable base for a smooth ride. Once the area is prepared, lay down a gravel bed about 4 inches thick for drainage and stability. Tamp it down firmly using a hand tamper, mimicking the process of tamping a mattress to ensure even support. This initial step lays the groundwork for a level and durable deck.
Build a Temporary Frame
Set up a temporary perimeter using stakes and string lines to outline your desired deck size and level plane. Measure the height at each corner and along the edges with a laser level or builder’s level—this is akin to setting the horizon line in landscape photography. Adjust the stakes until the string indicates a consistent level across all points. This visual guide helps you identify deviations early, saving headaches later in the process. Remember, a clear reference point is vital, much like the horizon in a scenic view.
Use Quality Support Posts and Beams
Install sturdy support posts at each corner and along internal load points, setting them on crib blocks or concrete footings to prevent sinking. Temporarily support beams between posts before attaching joists, checking their height against your foundation plan. Employ a builder’s level to ensure beams are exactly level, removing guesswork. I once used shims to adjust beam heights but found that investing in adjustable steel supports saved me hours of frustration, leading to a much more precise setup. Secure beams tightly to the posts to create a solid backbone for your deck.
Check and Adjust Joist Leveling
Lay out your joists, attaching them perpendicularly to the beams with galvanized metal hangers. Use a carpenter’s level along the length of each joist—think of it as straightening a canoe before paddling. When you notice a slight dip, fix it by adjusting the shims beneath the joists or repositioning them until perfectly level. Micro-adjustments may involve sliding a shim or nail, but patience here prevents wobbles or dips in your finished deck, resulting in a super smooth surface.
Implementing Precise Measurements
Always double-check measurements during each step. A quick measurement comparison using a tape or laser level will catch misalignments early, much like tuning a musical instrument. Consistency across all support points guarantees your deck stays level over time, even as weather causes slight shifts. This vigilance is your best tool to avoid uneven surfaces that can be trip hazards or cause deck boards to warp.
Finish with Seamless Transitions
Once level, install the decking boards, ensuring consistent gap spacing for drainage and expansion. Consider creating seamless transitions between stairs and the deck surface—imagine the smooth flow of water as it moves from one surface to another. Use a spacing gauge to maintain uniform gaps, and secure each board with hidden fasteners for a clean look. Properly secured and aligned boards will justify your effort with a durable, attractive outdoor space that can withstand years of use.
When it comes to designing durable outdoor living spaces, many homeowners and even some builders overlook critical nuances that can make or break the long-term success of your deck. One widespread misconception is that all composite decking is created equal—that choosing a popular brand or the cheapest option will guarantee low maintenance and longevity. However, the reality is that the subtle differences in formulations, installation methods, and support systems significantly impact performance. For example, some composite materials are more susceptible to thermal expansion, which can cause warping if not properly accounted for during installation. As highlighted in recent studies by the *Journal of Materials Science*, understanding the specific properties of your chosen composite can prevent costly repairs and replacements down the line.
Are You Overlooking Support Stability for Your Steps and Railings?
Many believe that installing composite decking alone suffices for a safe and attractive setup. In truth, overlooking the importance of solid framing for stairs and handrails can lead to safety hazards, especially over time as weathering takes its toll. A common mistake is assuming that attaching components directly to the joists or existing framing will be enough. Instead, a robust support structure, with well-designed transitions and proper anchoring, is essential for maintaining alignment and structural integrity—see how proper [stair connection techniques](https://deckdesignbuild.com/innovative-stairs-solutions-for-safe-outdoor-deck-access) can enhance safety and longevity. Furthermore, intentionally designing seamless transitions between deck surfaces and stairs not only improves visual appeal but also prevents tripping hazards, which is often underestimated in DIY projects. Rushing this aspect can lead to uneven surfaces that are difficult to repair later. Want to elevate the safety and aesthetic of your outdoor space? Check out innovative [stairs and transition solutions](https://deckdesignbuild.com/creating-seamless-transitions-stairs-as-key-elements-in-outdoor-living) that can elevate your project from good to extraordinary. Now, consider the common myth that composite decking doesn’t require maintenance beyond cleaning. While it’s marketed as ‘low maintenance,’ neglecting proper inspections and support reinforcement can lead to panel warping, especially in harsh climates. Regularly evaluating support support and ensuring proper drainage and ventilation under the deck can extend its lifespan dramatically. In my experience, working with a seasoned [deck builder](https://deckdesignbuild.com/deck-builder-insights-designing-your-dream-outdoor-space) who understands these nuanced factors can save you years of hassle. Have you ever fallen into this trap? Let me know in the comments.Ensuring your composite decking remains in top shape over the years requires the right tools and a proactive approach. I recommend investing in a high-quality infrared thermometer—such as the Fluke 62 MAX Plus—which allows me to accurately monitor surface temperatures during cleaning or staining processes, preventing damage from excessive heat. Additionally, a cordless oscillating multi-tool with a carbide-edge blade proves invaluable for removing stubborn debris from between deck boards without scraping or damaging the surface. I personally rely on this versatile tool when performing minor repairs or cleaning tight spaces, saving time and preserving the integrity of the material.
For ongoing inspections, a digital moisture meter helps detect hidden water intrusion behind the boards, catching potential issues before they escalate. I utilize the Protimeter Surveymaster because its precision guides me during preventative maintenance, especially after harsh weather. Regular inspections with these tools ensure your deck stays safe and looking great.
In terms of cleaning, a balanced approach is key. I recommend using a low-pressure, wide-angle spray nozzle on a garden hose combined with a soft-bristle brush for routine maintenance. For tougher stains, a professional-grade composite deck cleaner like the Rubinova Multi-Use Cleaner, applied with a sprayer, can ease the removal of grime without harming the surface. Remember, never use high-pressure washers, as they can erode the surface or push dirt into seams.
Predicting future trends, I believe smart technology integration will become more common. Imagine sensors embedded in composite decking that monitor moisture, temperature, and structural shifts, alerting homeowners remotely through an app—making maintenance intuitive and real-time.
How do I maintain my deck over time?
Routine inspections using moisture meters and infrared thermometers are vital. Periodic cleaning with gentle tools and specialized cleaners keeps the surface pristine. Address issues like minor warping or loose boards immediately, replacing support hardware if necessary. Investing in quality support systems, like adjustable steel supports, can prevent long-term distortions. Also, consider consulting with a professional deck builder for comprehensive evaluations—techniques outlined in [deck builder insights](https://deckdesignbuild.com/deck-builder-insights-designing-your-dream-outdoor-space) can extend your deck’s lifespan significantly.
Don’t wait for problems to appear; schedule bi-annual maintenance checks and keep a toolkit with the recommended instruments on hand. Try using an infrared thermometer before your next cleaning session—it can reveal hidden hotspots or early signs of material degradation, allowing you to take preemptive action. With these tools and habits, your outdoor living space will endure beauty and safety for years to come.
Reflecting on my deck journey, I realized that many of the shortcuts I took stemmed from a desire for quick results rather than long-term quality. One lesson stands out profoundly: investing in proper support and advanced materials can dramatically reduce future headaches. It’s tempting to lean on inexpensive fixes, but the true treasure lies in craftsmanship and informed choices, which ensure safety, aesthetics, and longevity. Remember, a well-built deck isn’t just about beauty—it’s about creating a lasting space where memories are made, and that requires thoughtful planning and embracing the lessons learned along the way.