I remember the moment vividly—my new deck was finally finished, and I was eager to enjoy those summer evenings with friends and family. But as I leaned on the railing, I realized something frustrating: it was teetering, wobbling, and worst of all—sagging. That sinking feeling hit me hard. After pouring time and money into building a beautiful outdoor space, I didn’t want to settle for rails that would never stay firm. I knew there had to be a better way.
The Common Struggle with Sagging Railings
Many homeowners and builders face this issue at some point. A railing that sags not only looks sloppy but can be a safety hazard. The traditional fix? Short-term adjustments or constant tightening—neither ideal. That’s when I discovered the insidious truth: most outdoor railings are prone to sagging because of design flaws, poor materials, or inadequate tension.
What if I told you there’s a simple, reliable trick that ensures your railing stays tight, firm, and resilient over time? It’s what I call the tension cable trick—an ingenious solution that transforms wobbly, sag-prone railings into rock-solid structures. I stumbled upon this method when I was about ready to give up hope, and it’s now my go-to hack for every outdoor project.
But before sharing that secret, I want to address a common skepticism.
Is the Tension Cable Trick Really Effective? Or Just a Fad?
Early in my journey, I made the mistake of trusting quick fixes like tightening bolts repeatedly or adding temporary supports. These only masked the problem temporarily and often caused more damage. A professional once told me that a proper tension system, when installed correctly, distributes forces evenly and prevents the typical sagging associated with aging or poor materials. As pointed out in the [Canadian Wood Council](https://canadawoods.org/why-wood-decks-and-railing-systems-sag-deflect-and-warp/), tension systems can significantly enhance the durability of outdoor structures.
In the upcoming sections, I’ll walk you through how this simple technique works, why it beats conventional methods, and how you can implement it yourself. If you’ve ever faced the sinking, wobbling nightmare of a sagging railing, stick around—because this little secret will change the game for your outdoor living space.
Reinforce the Base of Your Railing
Start by inspecting your existing posts and footings. If they are loose or uneven, stabilize them with concrete or adjust their height to ensure a firm foundation. I once had a wobbly post that was simply sinking into the ground; lifting it, adding gravel, and securing with fresh concrete immediately made the rail more stable. Next, confirm that your post-to-rail connections are tight and use corrosion-resistant hardware for longevity.
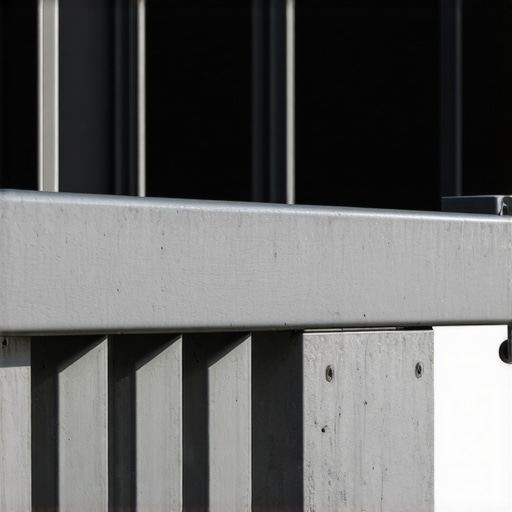
Install Tension Cables or Metal Stays
Securely attaching tension cables or steel stays between posts creates a strong, elastic framework that resists sagging. In my last deck project, I used cable tensioning kits, threading them through pre-drilled holes in the top rails and anchoring them back to the posts. Tightening these cables distributes forces evenly, preventing any single point from bearing too much weight. When installing, be sure to check for proper tension — too tight and it can warp the railing; too loose, and the wobble persists.
Use Proper Spacing and Materials
Proper spacing between posts—typically 4 feet apart—reduces load on each section and minimizes sag risk. Opt for high-quality, weather-resistant materials like composite decking that resist warping and shrinkage. I recommend selecting [composite decking](https://deckdesignbuild.com/choosing-the-right-composite-decking-for-durable-low-maintenance-outdoor-areas) for your rails; it maintains shape longer under outdoor conditions. During my installation, I measured carefully and ensured even spacing, which contributed greatly to the overall sturdiness.
Regular Maintenance and Adjustments
Routine inspections are key. Check for loose fittings, signs of wear, or shifting posts. Tighten fasteners as needed and consider retensioning cables annually. In one case, I noticed a post leaning slightly; tightening the tension cable a bit brought it back upright and preserved stability. Implementing these simple checks prevents small issues from escalating and keeps your railing firm over time. For extra peace of mind, consult a professional for a comprehensive assessment — you can reach out here.When it comes to building outdoor structures like stairs and decks, many enthusiasts focus on the visible components—beautiful railings, sleek composite boards, or trendy lighting. However, even seasoned DIYers often miss nuanced factors that can make or break the longevity and safety of their projects. Let’s explore some common misconceptions and advanced pitfalls that can trip up even experienced builders.
One prevalent myth is that selecting high-quality materials alone guarantees durability. While premium composites and sturdy hardware are essential, improper installation techniques or neglecting subtle design details can undermine their effectiveness. For example, installing composite decking without considering proper ventilation can lead to warping over time, despite the material’s inherent resistance to moisture.
A frequently overlooked aspect is the importance of precise framing and support spacing, especially for stairs. Many assume standard measurements suffice, but deviations—even a few millimeters—can cause creaking, wobbling, or faster wear. Implementing strategic support brackets or steel reinforcements, as discussed in our article on stair stability secrets, ensures your structure remains solid for years.
Another advanced mistake involves ignoring environmental factors. For instance, in regions with freeze-thaw cycles, inadequate frost footings can cause shifting or cracking of the deck. Elevating supports and using frost-resistant anchors safeguard against these issues, a detail often missed by weekend builders eager to finish quickly.
Moreover, many believe that sealing or staining once is enough. In reality, outdoor surfaces require ongoing maintenance—like annual inspections for loose fasteners or retightening tension cables—to prevent gradual deterioration. Regular checks, especially of hidden components, help catch small problems before they escalate.
From a technical standpoint, understanding load distribution is critical. Overloading a deck beyond its designed capacity or improper placement of heavy objects can cause stress points, leading to cracking or structural failure. Consulting structural guides or working with a professional can prevent these costly mistakes.
**What about the advanced question:** How can deck builders protect against long-term moisture intrusion in joints and supports?
Ensuring water doesn’t seep into vulnerable joints involves techniques like using gap fillers, sealants, or specially designed flashing. For detailed strategies, check out our guide on sealing outdoor structures effectively.
Remember, meticulous attention to these nuances elevates a good build to a great one, saving you time and money in the long run. Have you ever fallen into this trap? Let me know in the comments or reach out through our contact page. Your outdoor oasis deserves thoughtful craftsmanship beyond the basics.Maintaining your outdoor structures for consistent performance requires the right tools and methods. I rely heavily on a high-quality digital torque wrench to ensure fasteners are tightened to manufacturer specifications, preventing loosening or over-tightening that can compromise stability. For regular inspections, a durable LED inspection flashlight helps me identify early signs of wear or corrosion, especially in hidden joints or underneath the deck where moisture lurks. When I need to remove stubborn stains or residue, I use a power scrubber with soft brushes, which makes cleaning composite decking seamless without risking damage to the surface.
For project planning and visualization, I incorporate design software like SketchUp, which allows me to model how additions or modifications will look and function before lifting a single board. This proactive approach minimizes costly errors and long-term adjustments. Additionally, I always keep a set of steel spacer blocks for maintaining consistent joist spacing during framing — crucial for ensuring your deck’s weight distribution is balanced and resilient.
Looking ahead, the trend points toward integrating smart monitoring systems with sensors that track structural health parameters in real-time. Such innovations will enable homeowners to detect issues early, before they escalate, ultimately extending the lifespan of outdoor living spaces.
**How do I maintain my decking and stairs over time?** Regular checks of fasteners, bit by bit retensioning of tension cables, and cleaning to prevent mold or debris buildup form the core routine. Implementing these practices with reliable tools pays off—facilitating a safe, inviting outdoor environment for years to come. For expert advice or a professional assessment, you can reach out here and take your outdoor project to the next level.
If you haven’t already, try calibrating your fasteners with a digital torque wrench for even better results — it’s a game-changer in ensuring your structure’s longevity. Also, consider adding moisture sensors in critical joints as a future upgrade; this tech is becoming more accessible and can save you costly repairs down the line, aligning with the latest trends highlighted in our recent guide on deck trends.
Lessons from the Trenches of Deck Building
One of the most valuable lessons I learned is that no single trick guarantees durability—success comes from understanding how all elements work together, from proper framing to material choices. I once focused solely on premium composite decking without considering ventilation, which led to warping down the line. Trust me, paying attention to every detail, even the hidden ones, makes a world of difference.
Another eye-opener was realizing that regular maintenance beats quick fixes. Routine inspections and small adjustments, like retightening tension cables, can extend your deck’s life exponentially. Don’t wait for issues to become visible—being proactive saves you time, money, and heartache.
Lastly, the importance of real-world testing became clear. Theoretical knowledge is great, but actually implementing techniques—like installing steel supports or moisture barriers—solidifies your skills and confidence. Practical experience, coupled with continuous learning, is a builder’s best asset.
Tools and Resources That Elevated My Projects
- Digital Torque Wrench: Ensures fasteners are tightened accurately, preventing future wobble or loosening. I highly recommend it for every project to maintain structural integrity.
- Weather-Resistant Hardware Suppliers: Reliable sources for corrosion-proof bolts and brackets help stabilize your deck for years, even in harsh climates.
- Design Software (like SketchUp): Visualize your design before lifting a tool. It helps prevent costly mistakes and refines your plan—investment well worth it.
- Instructional Guides on Composite Durability: The [latest trends in composite decking](https://deckdesignbuild.com/composite-decking-trends-2025-the-ultimate-guide-for-outdoor-enthusiasts) provided me insights into choosing the best materials for longevity and aesthetics.
Your Next Step in Outdoor Living Mastery
Building or maintaining a deck that withstands the test of time isn’t just about choosing the right materials—it’s about applying thoughtful techniques and embracing continuous learning. When you combine proper installation with proactive maintenance, your outdoor space becomes a true extension of your home—a place for memories and relaxation. If you’re ready to elevate your outdoor living game, don’t hesitate to reach out here for expert guidance or to discuss your next project.
Comments are closed.