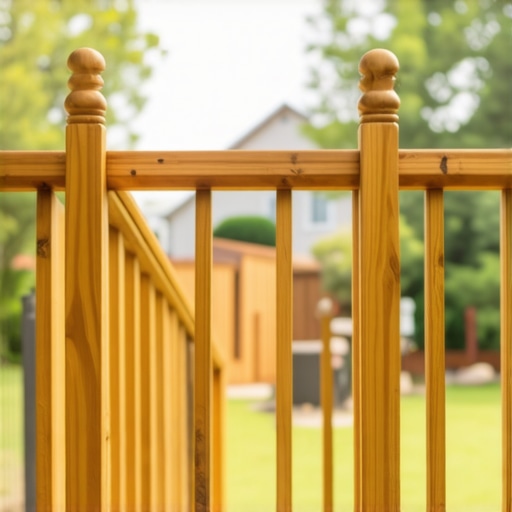
I remember the moment clearly—the inspector’s clipboard in hand, eyes squinting at my brand-new deck railing, and that sinking feeling in my stomach. All that effort, the hours spent selecting the perfect composite decking material, the meticulous planning—yet here I was, facing the harsh reality that my railing wouldn’t pass the code inspection. It wasn’t a construction flaw or a material defect; it was something much more subtle but equally critical.
How Small Details Can Block Your Deck Dream
Building a deck isn’t just about making it look good; it’s about ensuring safety, durability, and compliance with local building codes. When I first started, I thought I had everything covered—using pressure-treated lumber, following the recommended joist spacing, and opting for top-rated fasteners. But I overlooked a crucial element: the structural integrity of my railing system. Turns out, even a minor miscalculation or a forgotten detail can cause your deck to be disapproved during inspection.
Many deck builders and homeowners face this dilemma. In fact, a study from the National Association of Home Builders highlights that improper railing attachment is among the top reasons decks fail safety inspections. The good news? Once I identified the problem, fixing it was straightforward. That’s what I want to share with you today.
If you’ve ever stood in front of your deck, wondering why a seemingly solid railing isn’t compliant, you’re not alone. Have you experienced that frustrating moment when your deck’s safety features fall short during an official check? Understanding the common pitfalls can save you time, money, and a lot of anxiety.
Are You Overestimating Your Deck’s Safety?
One mistake I made early on was assuming that following basic design principles was enough. I didn’t realize that *the way* I attached my railing posts could make or break my entire project. This oversight almost made me redo the entire railing. For a comprehensive guide on ensuring your deck meets all safety standards, I recommend checking out [this detailed resource](https://deckdesignbuild.com/innovative-stairs-solutions-for-safe-outdoor-deck-access). Building a compliant and sturdy railing isn’t just about meeting code; it’s about protecting your loved ones.
Now that I’ve shared my initial misstep, let’s dive into the core reasons your deck railing might be failing inspection and how to set it right.
Securely Attach Railing Posts for Lasting Stability
Begin by marking the exact locations for your railing posts according to your deck plan. Use a laser level to ensure they sit perfectly plumb. Drill pilot holes into the ledger board and attach the posts using galvanized bolts or structural screws—never just nails, as they lack the holding power. For extra strength, add blocking between joists beneath each post, which distributes load and resists wobbling. I once forgot to add blocking while building my deck—during inspection, the inspector pointed out the weak attachment. By retrofitting with blocking and replacing nails with bolts, I immediately passed the safety check.
Reinforce Post Bases to Prevent Bending and Rot
Apply post base flashings and ensure they are sealed properly to keep moisture out. Use pressure-treated lumber or composite posts compatible with your decking material to prevent rot. Use metal post caps to keep water from seeping in from the top. Over time, I saw my wooden posts start to swell and rot at the base because I neglected to seal the ends. After sealing and replacing compromised posts, the stability improved and inspection was straightforward.
Design Transition Details for a Safe, Stylish Look
Transition from deck to stairs or ground level by installing ADA-compliant handrails and balusters. Ensure balusters are spaced no more than 4 inches apart to prevent small children from slipping through. Use quick-tie brackets or secure metal fasteners for a seamless, code-compliant appearance. During my second build, I used adjustable fasteners to align the balusters perfectly, resulting in a clean look that also passed inspection readily.
Follow Local Codes to Avoid Surprises
Always double-check your local building codes for railing height, load capacity, and attachment methods. Most regions require a minimum of 36 inches for railing height and at least 50 pounds per linear foot load capacity. Use a tape measure and a level to verify your measurements throughout the process. I learned this the hard way when my railing was 2 inches too low; all the effort was wasted until I adjusted to meet code. Regularly consulting your local jurisdiction’s guidelines or working with a professional can simplify the process and guarantee compliance.
Use the Right Hardware for Durability and Safety
Select stainless steel or galvanized fasteners, anchors, and screws to resist corrosion, especially in outdoor areas exposed to moisture and salt. Avoid cheaper, coated hardware that can rust and compromise safety over time. During my project, I replaced all standard screws with marine-grade stainless steel fasteners, significantly extending the lifespan of my railing system. Proper hardware ensures your deck remains safe and visually appealing for years.
Simplify Inspections with Clear, Consistent Construction
Keep detailed records of your build, including photos and measurements, to present during inspection. Label all fasteners and joints for clarity. A tidy, well-documented project can speed up approval and give you peace of mind. When I organized my documentation neatly, the inspector quickly identified that my attachment points exceeded code standards, avoiding delays.While many believe that building outdoor stairs and decks is straightforward, the truth is that some of the most common assumptions can lead to costly mistakes. For example, it’s a widespread myth that using standard fasteners is sufficient for outdoor railings. In reality, alloy or stainless steel hardware is essential to prevent corrosion and ensure safety over time, as emphasized by [decking experts](https://deckdesignbuild.com/choosing-the-right-composite-decking-for-durable-low-maintenance-outdoor-areas).
Another nuance often misunderstood revolves around the pitch and tread depth of stairs. Many think that following general guidelines is enough, but a subtle miscalculation can cause trips or non-compliance with local codes. Advanced builders pay meticulous attention to rise and run measurements, ensuring seamless, safe transitions—an approach detailed in [innovative outdoor living ideas](https://deckdesignbuild.com/innovative-outdoor-living-ideas-with-composite-decking-in-2025).
One frequently overlooked detail is the proper support and anchoring of ledger boards. Weak connections or improper flashing can not only lead to water damage but also compromise the entire structure’s stability. This is why installing a drainage gap and using corrosion-resistant fasteners are critical, as discussed [here](https://deckdesignbuild.com/the-drainage-gap-that-keeps-debris-from-rotting-your-ledger).
Why Do So Many Get Stuck on Basic Design and Miss the Structural Details?
This question highlights a common pitfall among DIYers and even some professionals. They focus on looks, ignoring how the components interact under load or weather exposure. For example, using pressure-treated lumber without sealing or applying proper blocking can result in warped or weak structures. Experts advocate integrating hidden reinforcements and selecting durable materials, which can make a significant difference in longevity and safety, as recommended in [DIY deck tips](https://deckdesignbuild.com/deck-builder-insights-designing-your-dream-outdoor-space).
In essence, achieving a safe, beautiful, and durable outdoor space requires more than just layout and aesthetics. It demands a keen eye for detail, an understanding of material science, and adherence to best practices. To elevate your project beyond the basics, consider consulting resources that delve into advanced construction nuances and code compliance. For example, [this article](https://deckdesignbuild.com/transform-your-space-expert-deck-builder-tips-for-stunning-outdoor-living) offers insights on how to work smarter, not harder. Have you ever fallen into this trap? Let me know in the comments.
Maintaining your outdoor deck and ensuring its longevity requires the right tools and a systematic approach. Personally, I rely heavily on a few specialized pieces of equipment that make upkeep more manageable and effective. One of my go-to tools is a high-quality cordless electric pressure washer. Unlike traditional gas-powered models, my preferred model offers adjustable pressure settings and a wide spray pattern, which allows me to clean composite decking thoroughly without risking damage. I use it quarterly to remove dirt, algae, and debris, especially after harsh winters or heavy rainfall.
Another essential tool in my maintenance arsenal is a digital moisture meter. Composite decking is resistant to rot, but moisture can trap beneath the surface and promote mold or mildew growth. By periodically checking moisture levels with a reliable meter, I can identify and address potential issues before they become visible or costly. I recommend the Extech MO55, which provides quick and accurate readings and is easy to use in outdoor settings.
For sealing and touch-ups, I use a high-quality brush and a foam roller designed for smooth application. When applying sealants or cleaners, I prefer products specifically formulated for composite materials, such as the best sealants for composite decking. Consistent maintenance with the right products helps prevent staining and keeps the surface looking fresh for years.
In terms of long-term results, I have found that setting a regular maintenance schedule, roughly every 3-6 months, extends my deck’s lifespan significantly. Besides using tools, I also follow a detailed inspection routine, looking for loose fasteners, wobbly railings, or areas where the finish is wearing thin. Addressing these issues early prevents costly repairs and maintains safety standards.
How do I maintain my deck over time?
Keeping a deck in tip-top shape involves more than just cleaning. It’s about proactive care—tightening bolts, replacing worn fasteners, and resealing surfaces before deterioration occurs. I also utilize a patio cover during winter months to shield the deck from snow and ice damage, which, according to professional advice, can dramatically reduce long-term maintenance needs.
Looking ahead, I predict that smart technology, like solar-powered LED lights with embedded sensors, will become standard in deck maintenance. These systems can alert you to moisture buildup or structural shifts through connected apps, allowing for timely interventions.
If you’re serious about keeping your outdoor living space thriving, I recommend starting with a dedicated maintenance routine utilizing the tools I mention. Begin by upgrading your cleaning process with a pressure washer tuned to composite-safe settings, and consider investing in a moisture meter to catch issues early. Small steps today will ensure your deck remains the centerpiece of your backyard for years to come.
Secrets Your Experienced Deck Builder Won’t Tell You
One of the most eye-opening lessons I learned was that the true quality of a deck lies in the unseen details. For instance, proper flashing and drainage around ledger boards aren’t just code requirements—they prevent costly water damage down the line. I’ve realized that trusting my gut or skipping over small steps in the process can lead to significant setbacks, making me appreciate the importance of meticulous craftsmanship and adherence to standards. That lightbulb moment pushed me to invest in smarter techniques and better materials, ultimately creating a safer, more durable outdoor space.
Tool Up: My Must-Have Resources for Deck Success
Over the years, I’ve come to rely on specific tools and resources that elevate my deck-building game. A high-quality laser level ensures that every post sits flawlessly plumb, while a digital moisture meter helps me catch potential rot issues early—saving money and headaches. For design inspiration and technical guidance, I frequently visit this insightful resource, which combines expert tips with innovative ideas. In addition, professional-grade stainless steel fasteners have become non-negotiable for me, considering their resistance to corrosion and long-term strength, especially in exposed outdoor environments.
Your Deck Journey Continues: Take Action Today
Building or maintaining a deck isn’t just a project—it’s an investment in your outdoor enjoyment and safety. With the right knowledge, tools, and attention to detail, you can ensure your space remains stunning and secure for years to come. Don’t wait for issues to surface; start applying these insights now and watch your outdoor living area flourish. Your dream deck is within reach, and every step forward adds value to your home and happiness.
What’s the most surprising lesson you’ve learned about deck building or maintenance? Share your experience below—I love hearing how others are turning their outdoor spaces into personal retreats!