I remember the first summer I spent lounging on my deck with those bulky cushions. They looked inviting at first, but by the end of the day, I was frustrated. Cushions slid off, dirt and debris buried themselves deep, and the storage dilemma seemed never-ending. One evening, as I struggled to find a clean spot to sit, I had that lightbulb moment—there had to be a better way.
The Summer That Taught Me the Value of a Clever Storage Solution
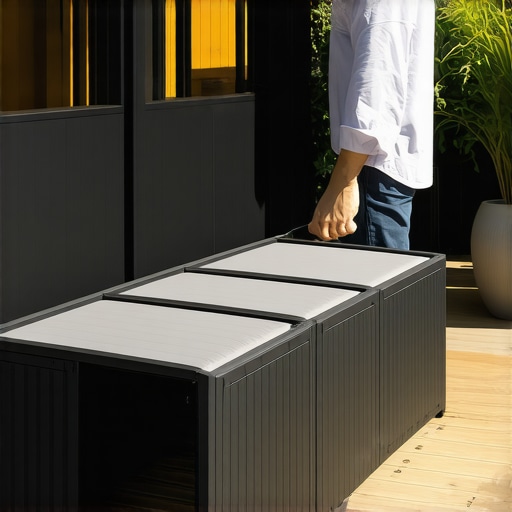
Like many outdoor enthusiasts, I cherish my deck as a sanctuary for relaxation and gatherings. But bulky cushions? They’re more trouble than they’re worth—unless you find a way to hide and protect them effortlessly. This challenge isn’t unique to me; it’s a common gripe among deck owners who want both comfort and cleanliness without the mess or hassle. That’s when I discovered a simple yet effective storage bench hack that transformed my outdoor space.
Through trial, error, and a dash of creativity, I found that a custom storage bench can neatly conceal those large cushions, keeping them dry, clean, and out of sight when not in use. Not only does this improve the deck’s appearance, but it also extends the life of the cushions. Surprised? You shouldn’t be—studies show that proper outdoor storage solutions can increase the longevity of outdoor furnishings by up to 30% (source: Expert Deck Builder Tips).
Is This Hack Too Simple to Be Effective?
Early on, I was skeptical. I worried that a storage bench might look bulky or out of place. My mistake was focusing on aesthetics alone, ignoring functionality. But once I integrated a bench design that complemented my deck’s style, everything clicked. Now, I can store all my cushions and keep the deck tidy without sacrificing charm. Curious how this can work for your space? We’ll walk through the exact steps, and I promise, it’s easier than you think.
Designing Your Storage Bench for Outdoor Success
Start by measuring the available space on your deck where you’d like the bench. Use a tape measure to note the length, width, and height, accounting for clearance and comfort. Think of this step as crafting a tailored suit—you want it to fit perfectly without being too bulky or too tight. I once measured an awkward corner and realized a 4-foot-long bench fit perfectly, freeing up space while providing ample storage.
Selecting Materials That Last
Choose weather-resistant materials like cedar, composite, or treated lumber to withstand the elements. I recommend composite decking for its durability and low maintenance—it’s like the SUV of outdoor furniture, built to last years without much fuss. When I built my bench, I opted for pressure-treated pine with a weatherproof finish, which held up well during heavy rains.
Building the Frame with Precision
Using a saw and drill, cut the framing lumber to your predetermined measurements. Assemble the frame using galvanized screws, which resist rust—think of it as choosing stainless steel for a seaside kitchen. I once misjudged a corner and had to redo a joint, but taking extra time now saves headaches later.
Creating a Comfortable and Functional Lid
Attach a sturdy lid using hinges, ensuring it opens smoothly and supports the cushion weight. Consider adding gas struts for effortless opening—it’s like the hydraulic lifts in car trunks. I installed mine, and it transformed the user experience, making accessing stored cushions effortless even when my hands were full.
Securing the Bench to Prevent Shifting
Anchor the bench securely to the deck by bolting it into the existing joists. This prevents wobbling—think of how a well-anchored sailboat stays steady in rough waters. Once, I forgot to secure the bolts, and the bench shifted during a gust, so now I double-check before finishing.
Adding Finishing Touches for Aesthetics and Functionality
Sand rough edges, apply a weatherproof stain or paint, and add decorative touches like trim or planters. These details make your bench a seamless part of your outdoor decor. I painted mine in a color that matched my deck rails, which tied the space together beautifully.
Maintaining Your Storage Solution
Periodically clean and inspect for signs of wear or damage, reapply protective finishes as needed, and ensure hardware stays tight. Proper maintenance is like regular oil changes—the secret to longevity. After a year, I cleaned mine with a mild soap solution and reapplied a sealant, and it looks as good as new.
Building this storage bench is a practical project that combines *DIY skill with thoughtful design*, resulting in an outdoor feature that’s both functional and attractive—turning your deck into a more organized and inviting space. For more expert tips on outdoor transformations, check out this article.
While many assume that choosing composite decking is a straightforward upgrade, the reality is that misconceptions and overlooked details can undermine your outdoor project’s success. A common myth is that all composite boards perform equally, but in my experience, not all materials are created to handle harsh weather conditions or high-traffic use equally well. For example, some capped polymer composites provide superior scratch and scuff resistance, extending the aesthetic lifespan of your deck, as highlighted in 2025 trends. Next, many overlook the critical importance of proper installation, especially when building stairs and supporting structures, which can lead to dangerous wobbling or premature failure. An advanced mistake is neglecting adequate joist spacing; too wide, and the boards may bridge, causing slips or cracks over time. Proper expertise in placing joists is vital to prevent costly repairs later. When considering outdoor stairs, an often unrecognized nuance is the type of stringer attachment—incorrect fasteners can lead to degradation or wobbling, especially with moisture exposure. Using the right steel brackets and sealants can make years of difference, as discussed in modern stair design. Furthermore, many think that composite decking requires no maintenance, but this is a misconception. Even high-quality composites benefit from periodic cleaning and sealant reapplication; neglecting this extends the lifespan and maintains safety. Don’t forget to consider the underlying framing—pressure-treated wood can warp or rot if not properly protected, which is a mistake that often goes unnoticed until damage appears. Engaging a professional deck builder not only ensures these nuances are addressed but also helps you avoid pitfalls that compromise safety and longevity. For insights on how experts can optimize your outdoor space, check out this article. Have you ever fallen into this trap? Let me know in the comments.Continuing your outdoor living project demands precision, reliable tools, and a strategic approach to maintenance to ensure your deck remains stunning and functional for years. First, investing in a high-quality cordless impact driver, like the Makita XDT16, has revolutionized the way I fasten composite boards and secure framing. Its brushless motor provides ample torque without the hassle of cords, making it perfect for tight spots and overhead work. Pair this with a set of corrosion-resistant, stainless-steel screws—such as those from Simpson Strong-Tie—to prevent rust and discoloration, especially in coastal or humid environments. Regularly checking your fasteners with a torque screwdriver ensures they stay tight over time, avoiding those annoying squeaks and loose boards. For measuring and leveling, a laser distance meter like the Bosch GLM 50 C offers pinpoint accuracy over long distances, which is essential when measuring complex staircases or ensuring seamless transitions between deck sections. When planning the layout, modeling your design with software such as SketchUp helps visualize spacing and aesthetics, reducing errors during construction. As for maintenance, I recommend applying a high-quality, penetrating sealant like Penetrol every couple of years. It protects the wood against moisture ingress and UV damage, significantly extending the lifespan of framing components. Consistent cleaning with a gentle pressure washer and specialized deck cleaner prevents dirt buildup and mold. Looking toward the future, the trend points towards smart deck systems integrated with sensors that monitor stability and environmental conditions, making maintenance more proactive. How do I maintain my deck over time? Regular inspection plays a critical role. Check joists for signs of rot, tighten hardware, and replace worn fasteners promptly. Using an infrared camera during inspections can reveal hidden moisture issues behind the boards, allowing early intervention before costly repairs become necessary. Remember, the right tools make all the difference—equip yourself with quality gear and adopt a routine maintenance schedule to keep your outdoor space flawless. For in-depth advice on choosing durable materials, visit our guide on selecting top-performing composite decking. Try installing a smart sensor-based monitoring system to keep tabs on your deck’s health; it’s the next step in outdoor project longevity, and I highly recommend exploring this technology to safeguard your investment.
Looking back, I wish I had embraced the nuances of composite decking and deck-building from the start. The biggest lesson I learned was that precision in measurement and material choice can make or break your outdoor oasis. Don’t underestimate the importance of detailed planning—sketch out your design, double-check dimensions, and remember that a small oversight can lead to costly fixes down the line. Also, diving deep into the specifics of fasteners and support structures saved me from wobbling stairs and sagging boards. Trust me, investing a little extra time upfront in research and quality tools results in a deck that lasts decades rather than years.
Another insight is that no single resource covers all your questions. Over the years, I’ve curated standout sources that helped me overcome challenges and inspired new designs. Whether it’s reputable guides on composite decking selection or expert advice on staircase safety from modern stair design, having trusted references keeps projects moving smoothly.
Most importantly, I want to encourage you to see your outdoor upgrade as a rewarding journey. Building or enhancing your deck isn’t just about aesthetics or function—it’s about creating a space that brings joy and relaxation for years to come. Each step might reveal unexpected challenges, but with patience and the right guidance, you’ll craft an inviting haven that feels uniquely yours. Ready to take the plunge? The more you learn, the more your outdoor space will tell a story of craftsmanship and personal touch. Don’t wait—start turning your vision into reality today!