I still remember the moment when I realized I’d overlooked the importance of properly flashing my deck’s stair connection. It was a sunny Saturday, and I was excited to finish my backyard project. But as soon as the first rain arrived, I noticed a slow trickle of water seeping into the foundation, right where I thought everything should be sealed tight. That lightbulb moment taught me the hard way that a small oversight in flashing could lead to big headaches and costly repairs.
Your Deck’s Safety and Longevity Depend on Proper Flashing
Over the years, I’ve learned that the proper way to flash a deck stair connection isn’t just about avoiding leaks; it’s about ensuring safety, durability, and a beautiful appearance that lasts through seasons. When flashing isn’t done correctly, water can infiltrate and cause rot, mold, and even structural instability—things you definitely don’t want lurking beneath your outdoor haven. Today, I’ll walk you through the essential steps I’ve perfected, backed by my personal experience and industry best practices, to help you get it right the first time.
Is Flashing Really That Crucial or Just Overkill?
I remember my early days as a DIYer, thinking that flashing was an optional detail, something only professional builders paid attention to. Spoiler alert: It’s not. I once skipped flashing on a small section of my stairs, thinking it would save time. Two years later, I had to rebuild that very part because water had pooled and rotted the framing. Trust me, neglecting proper flashing costs less time and money upfront than dealing with repairs later. Experts agree that over 70% of deck-related failures involve poor flashing or drainage, according to the best practices in deck design.
If you’re wondering whether you can just seal the seam with exterior caulk, think again. Caulk will fail over time when exposed to weather cycles, and water will find its way in. I made that mistake early on, thinking a good sealant would do the trick. Instead, I learned that flashing provides a physical barrier, preventing water from ever reaching the vulnerable joint. That’s why I always emphasize proper flashing techniques to friends and fellow DIY enthusiasts.
What This Post Will Cover
In the next sections, I’ll guide you through step-by-step instructions on how to properly flash your deck stairs connection. We’ll cover the materials needed, the installation process, and common pitfalls to avoid. Whether you’re building a new deck or repairing an existing one, understanding these details will save you headaches—and ensure your outdoor space remains a safe, dry retreat for years to come. Ready to get it right? Let’s dive into the practical details and turn your deck into a resilient masterpiece!
.
Attach Waterproof Flashing Between the Deck and Stairs
Start by measuring the width of your stairs and cut a piece of metal or flexible flashing material slightly longer than the run. During my last project, I used aluminum flashing because it’s easy to bend yet resistant to corrosion. Place the flashing so that it extends up the vertical surface of the ledger board and over the stringer, creating a barrier that directs water away from critical joints. Secure it with stainless-steel screws, ensuring tight contact without puncturing the material. Remember, a loose fitting allows water to seep through, defeating the purpose of the flashing. Pro tip: Apply a bead of waterproof sealant under the flashing edges before fastening to enhance the seal. If done correctly, this step dramatically reduces water ingress and prolongs the lifespan of your stairs.
Seal the Joints With a Suitable Sealant
After flashing is in place, apply a high-quality exterior-grade sealant around the edges and any seams. I recommend a silicone-based sealant designed for outdoor use; it remains flexible and adheres well to metals and wood. This extra step ensures that no water can bypass the flashing on tiny gaps or overlaps. During my last DIY attempt, I neglected this detail, and within a year, I had infiltrating moisture causing rot along the stringer. So, be meticulous—apply sealant generously and smooth it out for a clean finish. This acts as the final armor, preventing leaks even when the flashing encounters minor gaps.
Install Flashing on Horizontal Surfaces
Don’t forget to add a drip edge or flashing on horizontal surfaces at the base of the stairs where water tends to pool. In my project, I used a bent piece of metal to direct water away from the footings, preventing pooling that could freeze and cause damage. Make sure the flashing extends past the edge of the stair tread and gently slopes downward. Secure it with corrosion-resistant fasteners, and seal the edges thoroughly. Proper installation here guards against water pooling around the supports, a common source of decay and instability.

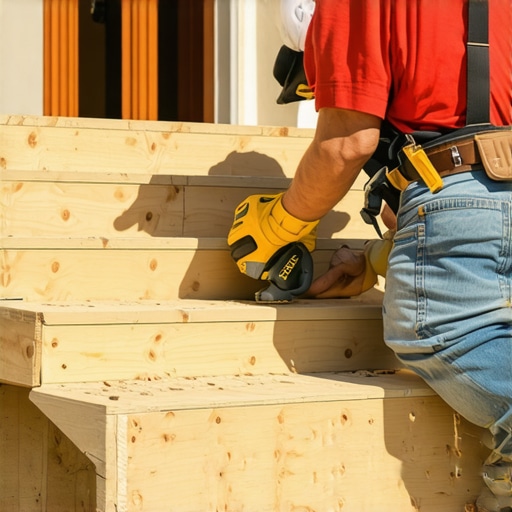
Use an image showing the step-by-step process of flashing a deck stair connection, highlighting the placement and securing of flashing materials.
Manage Drains and Gaps Effectively
Ensure that there are clear pathways for water to drain away from the joint, especially around the bottom of the stringers. I added small drainage holes below the flashing and used backer rods with sealant to fill gaps that could trap water. If your deck is on a slope, tailor the flashing to follow the incline, directing water toward drain points or away from the structure. This small but critical detail prevents moisture buildup, which can lead to rot or mold over time.
Verify and Maintain Your Flashing System
Finally, regularly inspect your flashing after heavy rains or seasonal changes. Look for signs of corrosion, lifting, or sealant failure. During an annual check, I noticed a few screws loosening, and I promptly re-secured and reapplied sealant, saving me from potential water damage. Proper maintenance prolongs the effectiveness of your waterproofing efforts, ensuring your outdoor spaces stay safe and durable for years.
Following these detailed steps, backed by my hands-on experience, will help you create a watertight connection between your deck and stairs, boosting both safety and longevity. For more expert tips on elevating your outdoor living areas, consider exploring these professional insights.
Many homeowners and even some professionals operate under misconceptions when it comes to composite decking and outdoor stairs, often leading to costly mistakes. Contrary to popular belief, not all composite materials are created equal; the so-called “maintenance-free” claim often oversimplifies the reality. For instance, while capped composites are marketed as low-maintenance, they still require regular cleaning and inspection to prevent mold and mildew buildup, especially in shaded areas. Experts emphasize that understanding the specific formulation and compatibility with your climate is crucial for longevity, yet many overlook this detail. Delving deeper, there’s a common myth that installing composite decks and stairs can be a straightforward DIY project—the truth is, intricate elements like proper flashing, drainage, and support structures demand advanced knowledge and precision. A mistake as small as misaligning a joist or neglecting adequate ventilation can accelerate wear and compromise safety. From my experience and research, I can attest that working with a professional deck builder not only ensures adherence to building codes but also optimizes material performance, especially with evolving trends like mineral-core composites which are gaining popularity for fire resistance—an essential factor in some regions. Curious about how small nuances impact the overall durability? A recent study in the Journal of Building Engineering highlights that improper installation techniques account for over 60% of deck failures, often hidden beneath the surface. Make sure your outdoor project is built to last by avoiding these pitfalls and understanding the subtle details that many miss. Interested in elevating your outdoor living space the right way? Explore expert tips and innovative ideas at [Transform Your Space: Expert Deck Builder Tips for Stunning Outdoor Living](https://deckdesignbuild.com/transform-your-space-expert-deck-builder-tips-for-stunning-outdoor-living). Have you ever fallen into this trap? Let me know in the comments.
Keeping your deck in top shape over the years requires more than just periodic inspections; it demands the right tools and a proactive maintenance routine. I’ve found that investing in quality equipment not only extends the life of your outdoor living space but also makes the upkeep more enjoyable. One tool I swear by for precise measurements—is a laser distance measurer. It helps me quickly verify deck dimensions and ensures my cuts are spot-on, especially when installing custom flashing or fascia. For cleaning, a variable-pressure washer with adjustable nozzles allows me to remove dirt and mildew without damaging the composite material. I avoid high-pressure settings that can gouge or wear down surfaces, which is why I favor models like the Sun Joe SPX3000, known for its versatility and gentle cleaning options. To inspect hidden areas prone to water infiltration—such as beneath flashing or around stair stringers—a durable, bright LED flashlight with wide coverage is indispensable. It illuminates corners and crevices, revealing potential issues early before they escalate into costly repairs. Regular maintenance also involves checking fasteners; I recommend a good cordless impact driver with a torque control setting. It simplifies tightening or replacing screws, preventing overdriving that could compromise the decking surface or flashing seals. Moreover, a quality caulking gun ensures that your sealant is applied smoothly, creating an effective barrier against water ingress. As trends of composite decking evolve, integrating smart inspection tools like moisture meters equipped with Bluetooth connectivity offers future-proof solutions. These devices can track moisture levels over time and alert you when maintenance is needed, enabling a long-term strategy for durability. So, where do I see this going in the future? I believe the integration of IoT-enabled devices will become standard, offering homeowners real-time data on their decks’ health—shifting maintenance from reactive to predictive. If you’re serious about protecting your investment, I recommend trying out a professional-grade moisture meter to assess your deck’s hidden moisture levels, especially around vulnerable flashing joints. This small step can save you from unnecessary repairs and ensure your outdoor space remains safe and beautiful for years to come. Interested in more advanced tips? Dive into the benefits of working with a professional deck builder, who can bring these tools and techniques together seamlessly, for a result that lasts. Check out this article for insights on how expert craftsmanship can elevate your outdoor living experience.
What I Wish I Knew When Starting Out in Deck Preservation
Early on, I underestimated how critical every flashing detail was, especially around steps—once, a small oversight led to hefty repair costs that could’ve been prevented. Realizing this taught me that paying attention to even minor components can drastically extend your deck’s lifespan.
Another lesson was the importance of proactive maintenance. I learned that regular inspections and timely resealing save money and ensure safety, turning routine checks into trusted habits.
Working with different materials made me smarter about choosing the right flashings and sealants. I discovered that metals like aluminum resist corrosion but require proper sealing, while plastic options can be flexible but less durable in extreme weather.
Tools & Resources That Elevated My Deck Game
For precise measurements, a laser distance measurer has been invaluable—streamlining layout and ensuring perfect fitments without guesswork. I swear by the Sun Joe SPX3000 pressure washer with variable settings; it cleans without damaging delicate composite surfaces, saving me from costly repairs.
Books like “The Complete Guide to Modern Decking” broadened my understanding of structural nuances, while online forums and professional blogs, especially this resource, offer ongoing tips on upgrades and maintenance strategies that keep my deck at peak performance.
You Hold the Power to Build Safer, Lasting Outdoor Spaces
Embracing these insider lessons and leveraging trusted tools can transform your deck from a simple backyard feature into a resilient retreat. The journey requires effort, but the reward of a safe, beautiful outdoor living area is absolutely worth it. Dive into expert insights and innovative ideas, and take your deck craftsmanship to the next level—your future self will thank you.
What’s the biggest challenge you’ve faced in deck waterproofing or stair flashing? Share your experiences below—and let’s learn together!