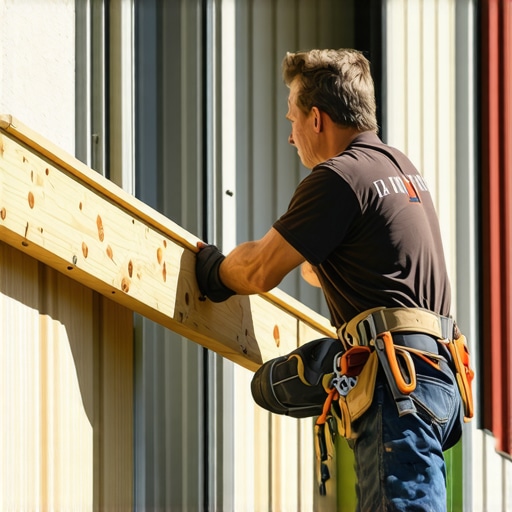
I still remember the frustrating moment when my first outdoor project took a nosedive—slipping into a puddle of sweat and doubt. The culprit? A ledger board that looked fine at a glance but started rotting away within a year. Turns out, that common mistake many DIYers make can turn a beautiful deck into a nightmare of rot and structural issues.
Why Your Ledger Board Could Be a Hidden Threat to Your Outdoor Oasis
If you’ve ever undertaken a deck project, you know the excitement of transforming your backyard into a personal retreat. But that excitement can quickly fade if the fundamental step isn’t done right. The ledger board is the backbone of your deck, anchoring it securely to your house. A misstep here isn’t just a small oversight—it’s a potential disaster waiting to happen.
Early on in my building days, I believed that sealing the ledger with some waterproof paint would do the trick. I thought, “It’s just a simple attachment—what could go wrong?” Spoiler: plenty. I overlooked the importance of proper flashing and insulation, which are critical to prevent water infiltration. The result? Rot and mold crept in, compromising the structure’s integrity.
According to a study by the American Wood Protection Association, improper ledger flashing and sealing account for over 70% of deck failures due to rot and decay. That statistic hit home when I realized how a small, overlooked detail could cause huge problems.
Today, I promise to share the insider tips and practical steps to avoid that common mistake—so your outdoor space stands the test of time. From correct flashing techniques to choosing the right materials, we’ll cover it all.
Will Proper Installation Really Make a Difference?
Honestly, I was skeptical at first. I wondered if all the fuss about flashing and insulation was just hype. But after experiencing costly repairs and potential safety hazards, I became convinced: your ledger board’s correct installation is non-negotiable.
If you’ve run into issues like peeling paint, warped siding, or even worse—the sight of rotting wood—you’re not alone. Many DIYers face these problems because they miss that one crucial step early on.
So, if you’re about to install your ledger board—or you already have but aren’t sure it’s done right—stick with me. We’ll explore the exact procedures to get it right, ensuring your deck is not just beautiful but safe and durable for years to come.
Ready to dive into the specifics? Let’s start with the essentials of flashing and how to protect your home from water damage, right from the get-go.
Prepare Your House and Materials
Before starting, clear the area around your house’s perimeter and gather all needed materials, including flashing, fasteners, and insulation. Think of this step as laying a solid foundation for building a house—mistakes here can cause issues later.
Assess the Wall and Frame
Inspect your house’s wall for existing damage or rot. Use a screwdriver to check for soft spots. If damage is found, repair before proceeding. This initial assessment is like diagnosing health issues before treatment.
Mark the Correct Position
Determine the height where the ledger will sit, ensuring it’s level and flush with the rim joist. Use a laser level or a long straightedge. Precise marking here is like drawing the blueprint for a perfect house.
Install the Flashing Properly
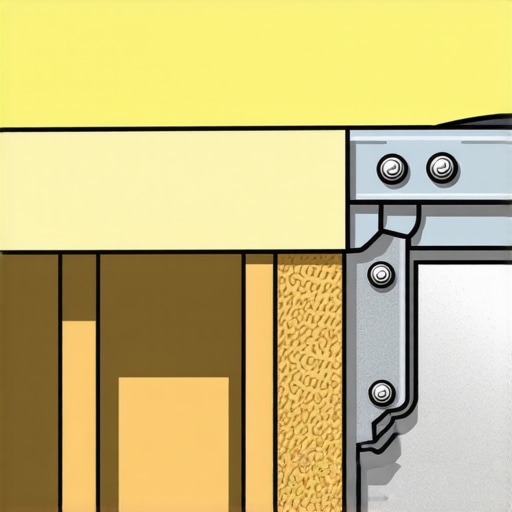
Apply a continuous metal flashing at the wall-ledge interface. Start from the bottom and overlap upper layers by at least 2 inches to prevent water intrusion. Think of flashing as a raincoat for your house—its job is to shed water away.
Secure the flashing with corrosion-resistant nails or screws, and seal edges with waterproof sealant. This process is critical—missing or improper flashing is the leading cause of rot.
Use the Right Flashing Material
Opt for aluminum or copper flashing, especially in coastal areas where salt accelerates corrosion. Avoid plastic or vinyl here because they lack durability under weather exposure.
Attach the Ledger Board
Position the ledger over the flashing, then pre-drill holes through the ledger and into the house framing. Use lag bolts spaced 16 inches apart, with washers to distribute pressure evenly. Tighten bolts securely without over-tightening, which can crush wood fibers.
It’s like securing a boat to the dock—firm but not crushing the connection, allowing some flexibility to prevent damage during movement.
Insulate and Seal
Insert foam backer rod and sealant behind the ledger to prevent water movement behind it. Adding insulation also helps avoid condensation issues. Consider wrapping waterproof insulation around the rim joist for added protection.
This step is like adding a rain barrier—your goal is to prevent any moisture from seeping into the framing, which can cause rot and mold over time.
Final Checks and Details
Verify that the ledger is plumb and securely attached. Check the overlap of flashing for continuous water shedding. Clean the area and remove debris to ensure all components work together seamlessly.
Remember, each of these steps builds on the last—a mistake in flashing installation or fastening can compromise your entire deck. For more insights on installing durable outdoor structures, visit creating seamless transitions and stairs.
 While many consider selecting composite decking as a straightforward upgrade to their outdoor space, few realize the nuanced complexities that can make or break the longevity and aesthetics of their project. Contrary to popular belief, not all composite decks are created equal; subtle installation details and material choices can significantly impact performance. One common misconception is that newer, ‘low-maintenance’ composites eliminate the need for meticulous framing or flashing—this is a dangerous oversimplification. In fact, improper framing or water management can lead to hidden decay beneath seemingly durable surfaces, undermining your investment over time.
Are All Composite Decks Equally Resistant to Warping and Fading?
Many assume that premium labels guarantee uniform performance—yet, studies show that environmental factors and installation practices influence durability just as much as the material grade. The American Society of Civil Engineers highlights that correct spacing, proper ventilation, and sealing practices are critical to prevent issues like warping, especially in high-humidity climates. An overlooked nuance is the importance of understanding how the composite’s core composition reacts under different conditions; some brands employ mineral cores that offer better heat resistance, reducing board expansion and contraction. Failing to consider these factors can lead to expanded gaps, uneven surfaces, or faded appearance earlier than expected. For those interested in staying ahead of trends, exploring innovative ideas like integrating composite decks seamlessly with outdoor stairs and transitions can elevate your space—check out the latest in composite outdoor living ideas for 2025. Beyond material selection, attention to detail in framing and flashing is paramount; many deck failures originate here. Proper ledger board flashing, for instance, might seem like a minor detail but is crucial to prevent water infiltration and wood rot underneath composite surfaces. Remember, a professional-grade deck incorporates understanding of these layered nuances—if you’re planning a project or considering upgrades, learn more about expert insights from seasoned deck builders. Don’t forget: even the best composite materials can’t compensate for poor installation practices. Ensuring correct joist spacing and fastening methods not only prolongs deck life but also maintains safety standards. For example, recent research emphasizes that tighter joist spacing becomes essential with certain composite brands to prevent sagging or cracking. To enhance your project’s durability, consider consulting comprehensive guides like choosing the right composite for low-maintenance outdoor areas. In summary, mastering the intricacies of material selection, installation practices, and ongoing care transforms a simple deck into a lasting outdoor haven. This layered understanding separates amateur projects from professional-grade craftsmanship. Have you ever fallen into this trap? Let me know in the comments.Maintaining your outdoor deck and composite materials requires precision tools and proactive care to ensure longevity and safety. One of my preferred tools is the cordless impact driver, which allows me to quickly fasten joists and deck boards with minimal effort. I rely on models with brushless motors, like the Milwaukee M18 Fuel, because they offer durability and consistent torque for heavy-duty fastening without battery drain issues. For inspecting water infiltration or hidden rot, I use a moisture meter such as the Tramex MRH, which provides instant readings on moisture levels within framing members, enabling me to address potential issues before they escalate. Regular cleaning is vital, and I recommend a high-pressure washer with adjustable settings to remove dirt, algae, and pollen, especially in shaded or humid areas prone to mold growth. Always use a fan tip or a low-pressure setting to prevent damaging the composite surface.
To prevent warping or degradation, I check the joist spacing periodically. As noted in the comprehensive guide on joist spacing for composite decking, proper spacing is crucial, especially for newer mineral-core boards that offer better heat resistance. Incorporating a hidden fastener system like the Concealoc clips ensures a seamless appearance while reducing surface cracks caused by thermal expansion.
Prediction-wise, as smart technology advances, I foresee the integration of IoT sensors that monitor moisture and temperature levels in real-time, alerting homeowners to potential issues before visible signs appear. This proactive approach can save significant repair costs and extend deck life.
### How do I keep my composite decking and outdoor structures in top shape over time?
Routine inspections combined with strategic tools are your best bet. For example, scheduling bi-annual moisture assessments helps identify early signs of rot or mold. Using a moisture meter during these inspections ensures you’re not just guessing—it’s about data-driven maintenance. Furthermore, adopting an orbital sander with fine-grit sandpaper helps smooth any surface scratches or minor warps that develop, restoring the deck’s aesthetic appeal.
Consistent cleaning with eco-friendly, non-abrasive solutions prevents buildup while protecting your materials. Applying a quality sealant compatible with composite and wood elements annually reinforces water resistance, especially around joints and staircases. For ongoing safety, I always verify that fasteners, handrails, and stairs comply with local building codes, such as those recommended in stairs safety standards.
Embrace these tools and practices, and you’ll find preserving your outdoor living space to be a manageable, even enjoyable task. Start by trying out a moisture meter during your next inspection to gain better insight into your deck’s health—early detection can make all the difference in extending its lifespan.
The Hardest Lesson I Learned About composite decking,outdoor living,deck builder,stairs
One of my most profound realizations is that even the slightest oversight in flashing or fastening can lead to years of frustration. Early on, I underestimated how critical detailed attention is, thinking that a quick seal or loose screw wouldn’t matter much. But experience proved otherwise—small errors compound, causing rot or safety hazards that are costly to fix and diminish your outdoor space’s beauty. Embracing patience and precision has transformed my projects into lasting, joyful spaces.
My Essential Toolkit for outdoor living excellence
Over the years, I’ve curated a set of trusted tools that make a real difference. The Milwaukee M18 Fuel impact driver provides consistent power for fastening, ensuring your deck’s frame stays solid. A moisture meter like the Tramex MRH helps catch hidden rot early, saving you headaches. An adjustable pressure washer keeps your composite surface pristine without damage. These tools aren’t just equipment—they’re my partners in crafting durable, beautiful outdoor spaces. Incorporating high-quality flashing materials, premium fasteners, and safety equipment ensures your deck stands the test of time and weather, reflecting the standards shared in choosing the right composite for low-maintenance outdoor areas.
Keep Your Deck Alive: Your Path Forward Starts Today
Transforming your outdoor area into a safe, inviting retreat is within reach when you pay attention to these layered details. Every careful measurement, correctly installed flashing, and trusted tool makes your deck more resilient and enjoyable. There’s a satisfaction that comes with knowing you’ve built something lasting—something that can be enjoyed year after year. So, take that first step today: assess your current deck, educate yourself on best practices, or consult a professional for insights. Your outdoor sanctuary awaits—ready to be created and cherished. What’s the next small step you’re willing to take to improve your outdoor space? Share below and start the conversation.