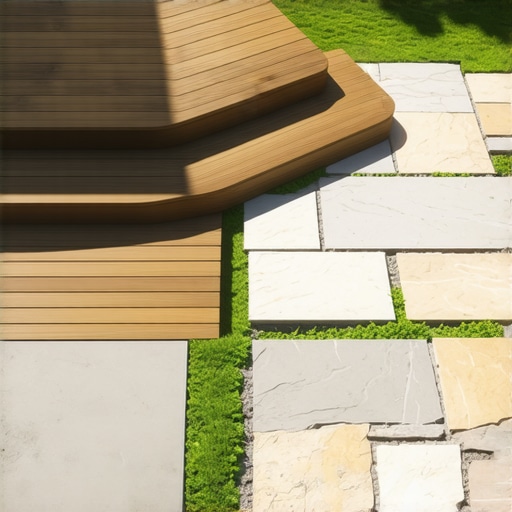
I still remember the moment I stepped onto my deck after a long weekend of DIY projects. The squeak of worn-out stairs echoed beneath my feet, and I realized—this transition between my inviting deck and the beautiful stone patio below was a glaring gap. It was frustrating, almost embarrassing, especially as friends gathered around, eager to enjoy the outdoor space I had envisioned. That lightbulb moment propelled me into researching the best ways to create a smooth, durable bridge from my deck stairs to the stone patio, and I want to share that journey with you.
Why a Poor Transition Can Ruin Your Outdoor Oasis
A stunning outdoor space isn’t just about beautiful materials; it’s about how seamlessly everything comes together. An awkward or unsafe transition from deck stairs to a patio can detract from your yard’s overall appeal, potentially causing tripping hazards or structural issues over time. Early on, I underestimated the importance of a well-crafted connection. I thought simply placing a few stepping stones or a makeshift step would suffice—but sure enough, it led to uneven ground and a few dangerous trips.
According to recent outdoor design studies, properly integrated transitions can enhance both safety and visual appeal, making your backyard feel like a cohesive extension of your living space. This realization was eye-opening and motivated me to invest time in understanding how to do it right.
Are you struggling with uneven or unstable connections between your deck and patio? If so, you’re not alone—many homeowners face this challenge, often with disappointing results until they discover proven techniques.
But before we dive into the solutions, a quick confession: one of my biggest mistakes early on was choosing materials that didn’t match or complement the existing structures. This mismatch not only looked off but also caused further wear and tear. Trust me—consulting a professional [deck builder insights](https://deckdesignbuild.com/deck-builder-insights-designing-your-dream-outdoor-space) can save you from costly errors.
Now, let’s explore how to bridge the gap between your deck stairs and a stunning stone patio, ensuring it’s both safe and visually appealing. We’ll cover everything from foundational considerations to materials and design ideas, guiding you step-by-step to transform your outdoor space into the oasis you’ve envisioned.
Build a Solid Foundation for Your Transition
Start by assessing the ground where your deck stairs meet the patio. Remove any loose soil or debris, and level the area with gravel or compacted sand to create a stable base. Think of this process like laying a strong foundation for a house—without it, everything else becomes shaky and unsafe.
Design a Transition Framework
Decide on the type of transition you want—whether a custom step, a curved path, or a low-slope ramp. For stairs, I recommend using pressure-treated framing for durability. During my project, I measured carefully and used a laser level to ensure precise alignment, preventing uneven steps later on.
Select Durable and Matching Materials
Choose materials that complement your existing deck and patio—composite decking for low maintenance and consistent appearance, or natural stone for rustic charm. I used composite stringers and risers for my stairs, matching the deck’s material, which made the entire setup cohesive and weather-resistant. For more ideas on stylish options, check out custom composite decking ideas.
Construct the Frame with Precision
Create a sturdy frame using pressure-treated lumber, ensuring the structure can support foot traffic and weather conditions. Use galvanized steel brackets to secure corners, as they resist corrosion. When I built mine, I laid out the stringers first, double-checked spacing with a tape measure, and secured everything tightly. This approach minimizes wobbling or shifting over time.
Install the Steps and Risers
Attach the risers first, followed by the treads, making sure each one is level. Use a carpenter’s level and test for stability repeatedly. I learned from trial and error that adjusting each step incrementally prevents the entire staircase from becoming uneven. For added safety, incorporate slip-resistant tread material, especially if your area experiences rain or humidity.
Integrate with the Existing Patio Seamlessly
Finish by laying a transition material—such as a narrow flagstone strip or a concrete curb—between the stairs and your patio. Use flexible joint filler or concrete to fill gaps and prevent shifting. I applied a thin layer of mortar between the stone and the base, which not only secured the transition but also created a clean visual line. For more detailed techniques, visit creating seamless transitions from stairs.
Final Touches for Safety and Style
Seal all wooden surfaces with a weatherproof stain to extend lifespan and enhance appearance. Add lighting along the steps—solar or low-voltage—to improve safety at night. When I installed low-voltage lights, I buried the wiring within the step risers to keep everything neat and protected, making my backyard truly inviting after sunset.
Many homeowners assume that choosing composite decking automatically guarantees a low-maintenance, long-lasting outdoor space, but the reality is more nuanced. A frequent misconception is that all composite materials are created equal; however, variations in resin content, core quality, and manufacturing processes can significantly impact durability and appearance over time. For example, mineral-core composite boards tend to resist moisture and temperature fluctuations better than traditional capped composites, yet many overlook this distinction, leading to premature wear and discoloration. When it comes to building stairs, an advanced mistake is underestimating the importance of proper framing and support, especially in high-traffic areas or coastal environments. Using subpar fasteners or neglecting proper ventilation can cause fastener corrosion and wood rot, undermining safety and aesthetics. Additionally, many DIYers believe that installing stairs is straightforward—measure, cut, assemble. But professional insight reveals that precise stringer layout, consistent riser heights, and slip-resistant treads are critical for both safety and visual harmony. Skipping expert guidance or relying solely on online tutorials can result in uneven steps or weak structural points. Experts recommend consulting comprehensive resources like deck builder insights to avoid these pitfalls. Common myths also include the idea that composite decking is impervious to staining; in truth, certain spills require prompt cleaning, and selecting appropriate sealers can extend lifespan. Furthermore, many mistake aesthetic decisions for functional ones—choosing colors or patterns solely based on looks without considering heat absorption or slip potential can lead to uncomfortable or hazardous surfaces, especially in sun-drenched regions. Advanced builders understand that integrating thoughtful design details—like strategic lighting along stairs or cushioned slip-resistant treads—not only elevates style but enhances safety. Recognizing these nuances separates a casual DIY attempt from a professional result that lasts decades. Remember, investing in proper materials, support systems, and expert guidance saves money and time in the long run. Have you ever fallen into this trap? Let me know in the comments and share your experiences or questions about mastering composite decking and outdoor stairs.Maintaining your outdoor living space, especially when it involves composite decking and stairs, requires specific tools and routine methods to ensure durability and aesthetic appeal.
Invest in Quality Power Tools for Precise Installation
When building or repairing decks, I rely heavily on a high-quality cordless impact driver. Its torque and speed help drive fasteners quickly and securely, reducing installation time and minimizing wood or composite damage. Pair it with a 12V or 20V drill/driver with variable speed settings for pre-drilling and assembly tasks. These tools give me control and efficiency, especially when working on complex stair stringers or intricate transitions.
Use a Laser Level for Perfect Alignment
Achieving even stairs and seamless transitions is impossible without precise leveling, which is why I recommend investing in a digital laser level. Unlike traditional bubble levels, laser levels project straight lines across surfaces, ensuring that every step and riser aligns perfectly. This tool has become indispensable for maintaining consistency across multiple stair flights and deck borders, ultimately extending the lifespan of your structure by preventing uneven weight distribution and stress points.
Apply Quality Sealants and Fasteners for Longevity
Long-term results depend on the materials you choose for sealing and fastening. I always opt for stainless steel fasteners—such as screws and bolts—because they resist corrosion, especially in coastal environments. For sealing joints and gaps, I use high-quality, weatherproof sealants that adhere well to composite surfaces. These small but crucial details prevent moisture ingress, wood rot, and board shifting, which degrade the structure prematurely. Experts, like those at deck designers, swear by stainless steel fasteners for coastal installations.
Sanding and Cleaning Equipment Make Routine Maintenance Easier
Periodic cleaning with a power washer on a gentle setting removes dirt and mold, but I avoid overdoing it to prevent surface damage. For touch-ups and smoothing out minor scratches or rough edges on composite boards, I use a orbital sander with fine-grit sandpaper. Regularly cleaning your deck with a deck-specific cleaner keeps it looking new and prevents buildup that can trap moisture and cause discoloration. Using a soft-bristled brush combined with eco-friendly cleaning solutions also works well for stubborn stains, like red wine, without damaging the surface.
Stay Ahead with Trendy, Low-Maintenance Materials
Ultimately, the trend in outdoor living points toward composites with mineral cores and intelligent surface technologies that resist scratches, stains, and fading. As these materials evolve, so do the tools required to maintain them. Incorporating modern equipment and techniques now will pay off in decades of beautiful, worry-free outdoor spaces. One upcoming trend involves UV-resistant finishes and embedded anti-slip textures—both of which demand specialized cleaning tools and care routines. Staying updated through reputable sources like decking trends can help you select the right tools and materials for future-proof outdoor living.
How do I keep my composite decking and stairs in top shape over time?
Regular inspections are key—check for loose fasteners, damaged boards, or signs of wear. Incorporate annual deep cleaning sessions with appropriate products, and replace any fasteners that show signs of rust or corrosion. Applying protective sealers designed for composite surfaces can extend material life, especially in harsh climates. Proper support and framing, as emphasized in professional guidance, prevent structural issues that compromise safety and appearance. Embracing these tools and maintenance routines will make your outdoor space both beautiful and durable for years to come. I encourage you to try using a laser level during your next project—precision here ensures lasting value and safety for your deck and stairs.
Lessons Only Experience Can Teach About Composite Decking and Stair Safety
One of the most profound realizations I had was that even the best-designed deck can be compromised by a poorly executed transition to the adjoining patio. I learned that attention to detail in support structures, material selection, and finishing touches isn’t just about aesthetics—it’s about safety, durability, and peace of mind. Ensuring every step is balanced and every joint is solid has made me appreciate the craftsmanship behind professional outdoor builds, inspiring me to continually refine my techniques and avoid costly mistakes down the line.
Another lightbulb moment was recognizing the importance of climate-specific choices. What works perfectly in a dry, temperate zone might not hold up in a humid coastal environment. Over time, I realized that consulting dedicated guides, like deck builder insights, can save me from overlooking crucial material compatibilities, ultimately extending the lifespan of my outdoor structures.
Finally, I discovered that integrating safety features early—such as slip-resistant treads, proper lighting, and sturdy handrails—elevates a simple backyard project into a genuine outdoor oasis. These details not only prevent accidents but also create an inviting atmosphere for family and friends to enjoy year-round, reinforcing the value of investing time into the little things that make a big difference.
Tools and Resources That Keep My Outdoor Projects on Point
- Stainless Steel Fasteners: As I’ve learned, quality fasteners are the backbone of durable outdoor structures, especially near the coast where corrosion is relentless. I trust stainless steel fasteners to ensure longevity and safety over the years.
- Digital Laser Level: Achieving perfect alignment is effortless with a laser level, and it’s transformed how I approach stairs and transitions. Accurate measurements prevent future wobbling or shifting, saving headaches later. You can see why pros swear by it, and I highly recommend checking out their insights for flawless results.
- Weatherproof Sealants: Applying the right sealants seals the deal—literally. They protect against moisture ingress and preserve the appearance of composite and stone materials. Having the right tools and products at hand makes maintenance faster and more effective.
Additionally, keeping a power washer on hand for routine cleaning, combined with gentle brushing and eco-friendly products, keeps my outdoor space pristine without damaging surfaces. For the latest innovations in decking materials or lighting, sites like decking trends help me stay ahead of the curve, ensuring my outdoor oasis looks fresh and modern.
Challenge Yourself: Bring Your Vision to Life
Deciding to upgrade your outdoor transition isn’t just about fixing a problem—it’s about creating a space that truly reflects your lifestyle and aesthetic preferences. Whether it’s adding a gentle ramp, a curved stone border, or integrated lighting, each choice elevates your outdoor living experience. Remember, the journey from planning to execution is rewarding, especially when you see your finished project becoming a favorite gathering spot. So, why wait? Start drafting those ideas, equip yourself with the right tools and knowledge, and turn your backyard into an outdoor sanctuary worth showing off. How are you planning to enhance your outdoor transition? Share your ideas or challenges below—I’d love to hear your story.