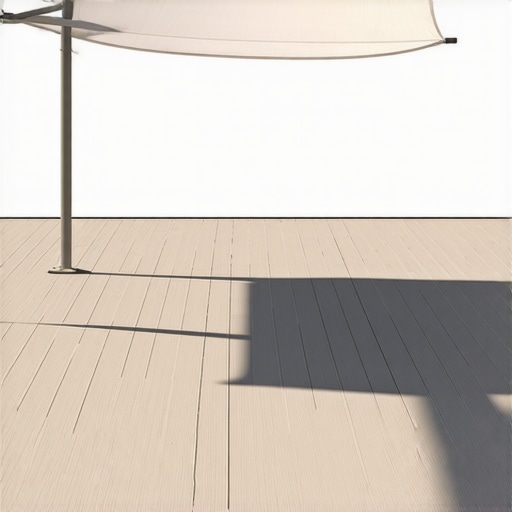
I remember the moment clearly—standing on my sun-drenched deck, squinting against the relentless afternoon glare, realizing that my latest outdoor project had become more of a headache than a sanctuary. The sun shade I installed looked great in theory, but in practice, it was a challenge to mount securely, and it never quite stayed in place as I imagined. Sound familiar? If you’ve ever wrestled with installing a sun shade and felt like you were fighting a losing battle against wind and sagging fabric, you’re not alone. That lightbulb moment—when I finally understood the importance of proper mounting techniques—changed everything for me, and I want to share that with you.
Why Proper Sun Shade Mounting Can Make or Break Your Outdoor Comfort
Mounting a sun shade might seem like a straightforward task—just attach it to nearby posts or rails, right? But in reality, a poorly executed installation can lead to sagging fabric, wind damage, or even safety hazards. Proper mounting ensures your shade stays taut, withstands the elements, and keeps your deck a comfortable retreat. I learned this the hard way early on, when I used inexpensive brackets that rusted in just a few seasons, causing my shade to flutter wildly and lose its shape. That mistake cost me time, money, and the pleasure of relaxing outdoors. I’ve since discovered that choosing the right hardware and mounting techniques isn’t just about aesthetics—it’s about durability and peace of mind. Did you know that proper installation can extend the lifespan of your sun shade by up to 50%? According to outdoor living expert, transforming your outdoor space with quality materials makes all the difference.
What Do You Fear Most About Mounting a Sun Shade?
Is your biggest worry that the shade will flop in the wind? Or perhaps you’re concerned that the hardware might fail after a year of use? Early on, I made the mistake of underestimating the importance of sturdy anchors, which led to frequent readjustments. Trust me, investing in robust mounting solutions is worth every penny. Now, let’s dive into how you can do it right the first time—so your outdoor retreat remains shaded, secure, and inviting for years to come.
Set Up Secure Anchor Points
Start by identifying sturdy spots for your mounts—ideally, solid wooden posts or metal beams. Use a level to ensure they are perfectly vertical, preventing sagging fabric later. I once tried mounting a shade to a crooked fence post; the shade hung unevenly, causing discomfort and increased wear. Correcting that involved repositioning and replacing weak anchors, which was a hassle. For long-lasting results, invest in high-quality hardware like stainless steel brackets and eye bolts. These resist rust and maintain tension, keeping your shade taut regardless of wind. When screwing into posts, pre-drill holes to prevent splitting and ensure precise placement. For a professional touch, check out some deck design tips where sturdy mounting plays a key role.
Use Heavy-Duty Hardware for Stability
Choosing the right hardware is crucial. Opt for industrial-grade turnbuckles to fine-tune tension and keep your shade taught over time. I remember installing mine and initially using cheap hooks—they rusted within a season, causing the fabric to sag and flap loudly in the wind. Upgrading to stainless steel turnbuckles and heavy-duty eye bolts resolved that issue instantly. Think of your mounting hardware as the backbone of your shade; strong materials prevent failures and extend lifespan. When attaching cables or fabric, maintain consistent tension to avoid wrinkles or looseness. This precise tensioning resembles adjusting a tightrope—balance is key. Learn about composite decking choices for durable outdoor setups that can handle the stress of wind and weather.
Secure Fabric with Tension-Wise Techniques
Now, focus on the fabric itself. Use turnbuckles and cable systems to create a taut surface that stays in place. I once mounted a shade with just clip hooks, and every gust loosened it—making it look sloppy and reducing its lifespan. Instead, I learned to attach the fabric with grommets and run cables through them, tightening with a turnbuckle. This method resembles tuning a guitar—every cord must be precisely tensioned for the perfect sound; here, for a perfect shade. Keep the fabric slightly tighter than you think necessary, as materials stretch over time. For inspiration on integrating these practical plans into your backyard, see creative outdoor design ideas that focus on functional elegance. Proper tension ensures your shade remains an outdoor oasis, resistant to wind and tears, lasting well into many seasons.
When Wisdom Turns to Myths in Outdoor Design
One of the most pervasive misconceptions is that choosing the most affordable composite decking is always the best decision. In reality, many homeowners are lured by initial savings but don’t consider the long-term implications such as color fading, warping, or the hidden costs of repair and replacement. As expert decking specialists advise, opting for quality materials designed for durability can actually save you money over time, providing a better return on investment and a more stunning, resilient outdoor space.
Another common error involves underestimating the importance of professional consultation, especially when it comes to complex features like stairs or multi-level decks. Many DIY enthusiasts attempt to build or modify stairs without understanding the nuanced code requirements for safety and stability. For instance, proper stair stringer placement isn’t just about aesthetics but is critical for safety and code compliance. Ignoring this nuance can lead to accidents or costly rework, which is why consulting with an experienced deck builder can be invaluable.
Advanced Hobbyists: How to Avoid Disasters with Your Deck’s Foundations
If you’re considering a large or intricate outdoor space, the hidden nuance lies in the foundation setup. Many assume that simply leveling soil is enough, but expert professional deck builders know that proper footing depth, drainage considerations, and anti-rot measures are vital to prevent future settling, warping, or even collapse. Skipping these steps can make even the most beautiful deck unsafe or unsightly after a few seasons.
In fact, recent studies highlight that improper foundation work is the leading cause of deck failure. For example, deck stair rot often starts at the foundation and is exacerbated by poor drainage and inadequate support. Be proactive by engaging experts who focus on durable, code-compliant foundation strategies, thereby extending your deck’s lifespan significantly.
Think about your deck’s longevity: are you overlooking foundational integrity? Remember, well-engineered footings and proper framing are the backbone of a safe, beautiful outdoor space. Want to see how a professional approach can transform your backyard? Reach out today for personalized advice and peace of mind. Have you ever fallen into this trap? Let me know in the comments.
Keep It Working: Essential Tools and Tips for Lasting Outdoor Living Spaces
Maintaining a beautiful and durable outdoor deck or staircase requires the right tools and a consistent approach. Personally, I rely on specialized equipment that not only speeds up the upkeep but also ensures safety and longevity. A high-quality cordless drill, for instance, is indispensable. I prefer models with a brushless motor, such as the DeWalt DCD998, because they offer more power and longer battery life, which is crucial when tightening or replacing fasteners in composite decking and structural components. For sealing and protective treatments, I use a 6-inch paint roller combined with a sprayer like the Graco Magnum X5 to efficiently apply sealants over large surfaces, preventing water infiltration and mold growth over time.
In terms of cleaning, I swear by a pressure washer with adjustable PSI settings—typically around 1500-2000 PSI—to remove dirt and algae without damaging composite surfaces. I always use a wide-angle spray tip; this distributes pressure evenly, reducing the risk of gouging or warping. For detail work around stairs or railings, a handheld wire brush helps eliminate stubborn grime and loose paint, especially in crevices and joints. Proper maintenance isn’t just about tools; software such as deck planning applications can help schedule regular inspections and visualize long-term repairs or upgrades, ensuring your outdoor spaces stay stunning year after year.
Looking ahead, I predict that innovative tools—like robotic vacuums designed to handle outdoor debris or smart sensors that monitor wood moisture levels—will become standard for professional-grade upkeep. These advancements will allow homeowners and deck builders alike to catch issues early, saving time and money. For example, smart moisture meters can alert you before rot begins, enabling preventative action. Incorporating these technologies now can significantly extend the lifespan of your structures and reduce major repairs down the line.
How do I maintain my outdoor structures over time?
One effective method is establishing a regular maintenance schedule—at least biannually—to inspect fasteners, sealants, and wood condition. Use a magnetic screw retriever to quickly locate loose or missing screws, which are often the first sign of wear. Applying protective coatings with a sprayer and ensuring proper drainage around your deck prevents water from pooling, which is especially critical for stairs and joints. Remember, a little preventative care now can save you costly repairs later, and investing in the right tools makes all the difference. For the most durable results, consider consulting with a professional deck builder for personalized advice on long-term maintenance strategies.
The Hardest Lesson I Learned About outdoor living,composite decking,stairs,deck builder
- Never underestimate the power of durable hardware. Investing in high-quality mounting brackets and fasteners early on saved me countless headaches and replacements down the line.
- Precision matters—aligning anchor points perfectly ensures the fabric stays taut and resists wind better, prolonging the lifespan of your shade.
- Weak foundational support can overshadow even the most carefully designed setup; solid footing and proper drainage are essential for safety and durability.
- Patience in tensioning and adjusting your hardware prevents issues like sagging or flapping fabric, turning a simple installation into a long-term success.
- Remodeling my approach based on lessons learned from earlier mistakes transformed my outdoor space into a haven that endures seasonal challenges and keeps looking great.
My Essential Toolkit for outdoor living,composite decking,stairs,deck builder
- Stainless Steel Turnbuckles — Trusted for their rust resistance and fine tension control, these are indispensable for maintaining taut shade surfaces.
- High-Quality Anchors and Eye Bolts — Securing your shade to sturdy, rust-resistant hardware extends its lifespan and safety.
- Digital Level and Laser Target — Ensuring perfect verticality and alignment keeps your setup looking professional and functions flawlessly.
- Pressure Washer with Adjustable PSI — Handy for routine cleaning, maintaining your shade’s fabric and hardware free of dirt and mold.
- Deck Planning Software — Visualize your project, manage tensioning, and schedule maintenance, turning a DIY project into an enjoyable process.
Your Next Step: Embrace the Future of Outdoor Comfort
Taking your outdoor living space to the next level means applying insights from real experience, like choosing the right mounting techniques and tools. Remember, each detail—from proper foundation to precise tensioning—contributes to a space that’s not just beautiful but built to last. This journey is about creating an oasis where memories are made, and worries about wind or wear are minimized. If you’re ready to elevate your outdoor setup, don’t hesitate to reach out for personalized guidance. Your perfect outdoor shade awaits—are you prepared to make it happen? What challenges have you faced in installing outdoor shades or structures? Share your story below and let’s learn together.