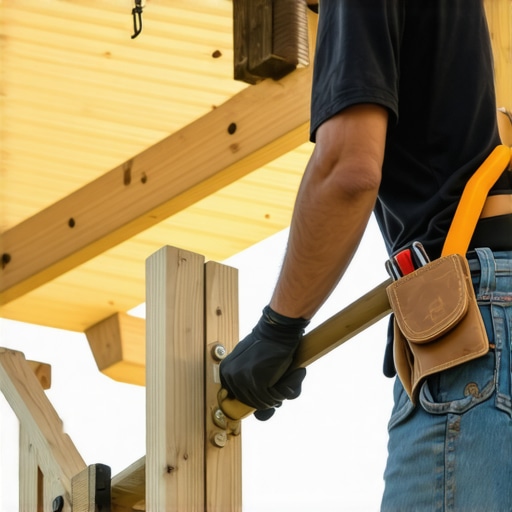
I remember the moment clearly—a scorching summer afternoon, sweat dripping down my forehead as I tried to figure out how to attach a pergola directly to my composite deck. Frustration mounted because every attempt seemed shaky, unstable, and barely held against the wind. It was a lightbulb moment for me: I was approaching the problem all wrong. The typical solutions just weren’t enough for the sturdy hold I wanted—and needed—to enjoy my outdoor space without worry.
The Challenge of Anchoring a Pergola to a Deck
Anchoring a pergola securely to your deck isn’t just about aesthetics or convenience; it’s about safety and durability. If not done properly, a pergola can become a hazard during storms or high winds, or worse, damage your deck structure over time. The real challenge lies in creating a connection that withstands the elements without compromising your deck’s integrity. Since my initial efforts failed—using just regular brackets and ignoring the importance of proper fasteners—I knew I needed a better approach. And let me tell you, the difference was night and day once I discovered the right method.
Today, I want to share my experience and guide you through the best way to anchor your pergola directly to your deck frame, ensuring both safety and style. This isn’t a quick fix or a one-size-fits-all solution—it’s rooted in understanding the specific requirements of your deck material, structure, and outdoor environment. Making a proper connection will save you time, money, and prevent headaches down the line. Plus, you’ll be able to truly relax and enjoy your outdoor living space.
Is this method truly worth the effort?
Trust me, early mistakes—like ignoring the importance of proper mounting hardware—cost me dearly in the long run. I learned this the hard way, and I want to help you avoid the same pitfalls. For example, using standard lag bolts without considering the material and load can lead to loosening or even structural failure. Incorporating the right fasteners, like stainless-steel lag screws and brackets designed for wood and composite, makes all the difference. For a deeper dive into deck construction fundamentals, check out how a skilled deck builder approaches these challenges.
So, if you’re tired of your pergola feeling wobbly or fear it might detach someday, fret not. Next, we’ll explore the best anchoring techniques that combine safety, strength, and ease of installation—crafted from my personal successes and lessons learned. Ready to give your outdoor space the sturdy support it deserves? Let’s get started!
.
Selecting the Right Hardware for Stable Anchoring
Start by choosing stainless-steel lag screws, as they resist corrosion and provide superior grip against composite and wood deck frames. I learned this firsthand when I replaced basic steel bolts with stainless fasteners on a summer project. The result was a pergola that didn’t wobble or shift after a storm, unlike my initial failed attempts with galvanized bolts. Think of it as upgrading from a paperclip to a carabiner—you’re embracing strength and reliability from the start.
Using Reinforced Brackets to Distribute Load
Next, attach heavy-duty brackets specifically designed for outdoor use—these distribute weight evenly across your deck’s framework. I installed these brackets on a breezy weekend, clamping them securely around the existing joists. The key is to align the brackets properly with the joist system, ensuring they act like anchors holding a ship in place, not loose sails flapping in the wind. This approach prevents undue stress on any single point, extending your deck’s lifespan.
Placement and Fastening Nuances
Position the brackets at points where the pergola beams will rest, avoiding misalignment that could lead to wobble. Drill pilot holes first to prevent splitting the composite material—think of pilot holes as guiding grooves for your screws, ensuring precision and reducing damage. Use a torque wrench to tighten fasteners uniformly, avoiding overtightening that might crack the composite surface.
Securing Post Attachments with Proper Support
Mount the pergola posts onto metal post bases embedded into the deck with expansion anchors. I once miscalculated the spacing, resulting in a wobbly post that I had to reinforce later. To prevent this, measure twice and ensure the bases are flush with the deck surface, providing a solid foundation. The post bases act like tree trunks—supporting weight and resisting lateral forces—do not skimp on quality here.
Ensuring Proper Drainage and Avoiding Water Damage
Seal around fasteners with outdoor-rated caulk to prevent water infiltration, which can corrode fasteners and rot your deck framing. I applied sealant during a rainless window, knowing that moisture intrusion is silent but deadly. Consider adding flashing tape over joints for an extra protective layer, especially if your deck is prone to pooling water. Proper sealing and flashing keep your structure dry and durable for years to come.
Final Checks and Load Testing
Once everything is mounted, gently shake the pergola to test stability. If it feels loose, tighten the bolts or reposition brackets as needed. Think of this step like a shirt fitting—adjust for comfort and security. This proactive testing saved me from potential disasters during windstorms and gave me peace of mind, turning my backyard into a true oasis. For more tips on creating seamless outdoor transitions, visit this guide.
Many outdoor enthusiasts believe that choosing composite decking automatically eliminates maintenance concerns, but this is a misconception that can lead to costly mistakes. In reality, not all composites are created equal, and understanding the subtle differences can significantly impact your project’s longevity and appearance. For example, some assume lighter-colored composites are easier to keep clean, yet darker shades often hide dirt better and stay cooler underfoot, which is a nuance overlooked by many. Additionally, a common myth is that all composite boards are entirely stain-proof; however, certain formulations are more resistant to stains like oil, red wine, or tree sap—knowing which product aligns with your lifestyle is crucial. One trap I’ve seen many fall into involves neglecting proper ventilation beneath your deck, which can trap moisture and accelerate deterioration, especially when combined with poor drainage or sealing practices. This oversight often results in mold, mildew, or wood rot, despite the composite surface itself being low-maintenance. Are you aware of how these hidden nuances could affect your outdoor living space?
What advanced mistakes do even experienced builders make when selecting materials for composite decks?
Experts warn that ignoring the composition’s mineral content can result in UV degradation or color fading over time, especially in exposed environments. For instance, mineral-core composites are increasingly recommended because they resist fading and maintain structural integrity longer, compared to traditional wood-polymer mixes. A study by the Forest Products Laboratory emphasizes that the balance of binders and fillers directly influences durability and color retention (USDA Forest Service, 2022). As a deck builder, I always advise clients to review these subtle material nuances to avoid premature replacement or aesthetic disappointment.
In essence, understanding these intricacies empowers you to make smarter choices—whether it’s selecting the right fasteners, designing with proper drainage, or choosing resilient colors. For more ideas on creating inspiring and durable outdoor spaces, check out how a skilled deck builder approaches these challenges. Remember, the devil is in the details—getting them right can elevate your outdoor living experience from average to outstanding. Have you ever fallen into this trap? Let me know in the comments.Maintaining a durable and beautiful outdoor deck requires more than just good intentions; it demands the right tools and techniques that can handle the unique challenges of composite decking and outdoor structures. Over the years, I’ve refined my toolkit to include hardware and software that elevate the quality of my projects and ensure long-term performance. One standout is a high-quality cordless impact driver, like the Milwaukee M18 Fuel, which provides the torque and control necessary for driving stainless-steel fasteners into dense composite materials without stripping or over-tightening. It’s a game-changer for quick, precise assembly and ongoing maintenance. Additionally, a digital moisture meter helps me monitor the wood or composite’s condition beneath the surface, preventing water intrusion issues that can compromise stability over time. This proactive approach aligns with emerging trends, such as mineral-core composites, which demand careful moisture management to maximize their lifespan, as detailed in the latest [composite decking trends for 2025](https://deckdesignbuild.com/composite-decking-trends-2025-the-ultimate-guide-for-outdoor-enthusiasts). Software tools like SketchUp assist in designing seamless transitions and expansions, making sure every repair or modification maintains structural integrity and aesthetic appeal. As the industry moves toward smarter outdoor living solutions, integrating these tools into your routine ensures your deck remains a safe, stylish, and functional space for years to come. How do I maintain outdoor structures over time? The key lies in regular inspections with a sturdy flashlight and a keen eye—checking fasteners, sealants, and visible support elements. Addressing minor issues early prevents costly repairs down the line and keeps your outdoor oasis inviting and secure. I recommend trying out a precision impact driver paired with a moisture meter; these two tools can drastically reduce maintenance headaches and extend your deck’s lifespan. For more insights on preserving outdoor investments, explore how partnering with a professional deck builder can make a difference.
Lessons That Changed My Approach to Outdoor Living
- Never underestimate the importance of proper hardware; skipping stainless-steel fasteners for the sake of saving money can lead to long-term headaches.
- Aligning brackets and checking your measurements twice isn’t just about precision—it’s about ensuring safety and durability in unpredictable weather.
- Sealing around fasteners with outdoor-rated caulk might seem minor, but it’s crucial for preventing water damage that could compromise your entire structure.
- Testing stability after installation helps catch issues early, saving time and money while giving you peace of mind for storms ahead.
- Investing in quality tools and understanding material nuances transforms a DIY project into a long-lasting outdoor haven.
Tools and Guides That Make a Difference
- Impact Driver (like Milwaukee M18 Fuel): Provides the torque needed for stainless-steel fasteners, making installation smoother and more reliable.
- Digital Moisture Meter: Helps monitor moisture levels beneath the surface, preventing rot and structural issues over time.
- SketchUp or similar design software: Assists in planning precise cuts, placements, and ensuring seamless transitions, especially when working with composite materials.
- These resources provide further insights into designing durable and beautiful outdoor spaces, guiding you from planning to execution.
Transform Your Outdoor Aspirations Today
Building a sturdy pergola on your deck isn’t just about aesthetics; it’s about creating a safe, inviting outdoor retreat. With the right knowledge and tools, you can elevate your outdoor living space to new heights of comfort and style. Embrace these lessons, choose quality materials, and don’t shy away from asking for expert advice—your perfect backyard oasis awaits. Are you ready to take your outdoor living to the next level? Share your plans or questions below, and let’s build something amazing together!