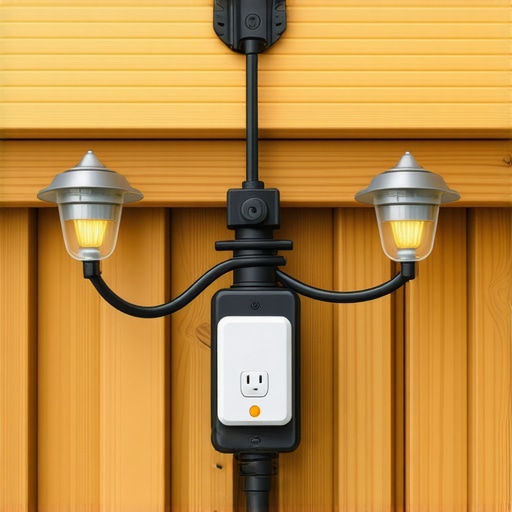
One rainy evening, I was finally ready to relax on my deck, enjoying the gentle patter of rain and the warm glow of my outdoor lights. Suddenly, the GFCI outlet that powers my deck lights trip — again. Frustration bubbled up. Why does this keep happening just when I need the ambiance the most? Over the years, I’ve faced this issue countless times, and let me tell you — it can feel like an endless battle with moisture, wiring, and frustration. But here’s the thing: I’ve learned that understanding the root cause can save you headaches and keep your outdoor space shining in any weather.
How Rain Might Be Sabotaging Your Deck Lights
Have you ever wondered why your GFCI trips every time rain hits? It’s more common than you think. Moisture seeping into wiring connections or outdoor fixtures can cause small currents to leak, triggering the GFCI to shut down the power for safety. This isn’t just inconvenient; it’s a safety feature designed to protect you from electric shock. A surprising fact from the Electrical Safety Foundation International states that outdoor electrical injuries are often linked to moisture-related faults. Early on, I made the mistake of using standard outdoor wiring without proper waterproofing, which turned my entire wiring setup into a mini water feature every time it rained. That mistake taught me a valuable lesson about protecting wiring from moisture.
If you’re tired of losing your evening ambiance to trip hazards, you’re in the right place. Today, we’re going to walk through proven methods to keep your deck lighting dry, safe, and functioning after every storm. Whether you’re planning a new lighting installation or trying to solve an ongoing problem, understanding the common pitfalls and solutions can make all the difference.
But first, let’s address a significant concern: Is all this effort really worth it? You might be thinking, “Is this just a wiring nightmare, or can I really make outdoor lighting work smoothly?” Well, as someone who’s been there, I can confidently say that with the right approach, you can enjoy beautiful, weather-resistant deck lighting without constant trip issues. The trick is to recognize the common mistakes and implement simple, effective safeguards. Curious about what has worked for me? Keep reading, and you’ll find practical tips that you can apply today. Ready to transform your rainy-day frustrations into a reliable outdoor lighting setup? Let’s get started with understanding why moisture causes trouble and how to prevent it.
Seal and Waterproof Your Wiring
Start by inspecting all your outdoor wiring connections. Use weatherproof connectors designed for exterior use, and apply silicone waterproofing sealant around joints to prevent moisture infiltration. For a personal experience, I once had a small leak at a junction that caused my lights to flicker; sealing it promptly stopped the problem. Think of wiring like sealing a boat’s hatch—if water gets in, everything inside is at risk.
Raise Fixtures and Outlets Off the Ground
Position your lights and outlets above typical flood zones. Use outdoor-rated junction boxes mounted on raised platforms or attached securely to walls, avoiding low spots where water accumulates. When I installed my deck lights, I elevated the fixtures on weather-resistant mounts, which kept them dry during heavy rain and extended their lifespan. Visualize this as placing a garden hose connection on a raised table—gravity helps keep water away.
Install Drip Loops in Wiring Runs
Implement drip loops—wires that sag downward before entering fixtures—to direct water away from connectors. During my DIY project, I looped the wiring downward, preventing rainwater from traveling along the wire into sensitive connections. Consider this as creating a small waterfall to divert rain, ensuring your connections are like protected vaults.
Use GFCI Outlets with Weatherproof Covers
Opt for GFCI outlets with weather-resistant covers that fully enclose the receptacles. When I replaced my old outlets, choosing NEMA-rated covers kept the moisture out, even in relentless rain. Think of these covers as rain tents that shield your electronics, maintaining safety and functionality.
Apply Protective Coatings to Fixtures and Wiring
Use outdoor-rated paint or sealant on fixtures to further prevent moisture ingress. For exposed wiring, a spray of silicone dielectric compound adds an extra barrier. Once, I painted exposed joints with a clear waterproof sealant, which drastically reduced rain-related trips. Imagine giving your outdoor electronics a waterproof suit—an extra layer of defense.
Regular Maintenance and Inspections
Check your wiring and fixtures periodically, especially after storms. Look for cracks, corrosion, or loose connections. When I did my routine check, I discovered a corroded connector that could have caused a short; replacing it restored peace of mind. Think of this as a health check for your outdoor electrical system—preventative care saves money and trouble.
Incorporate Proper Drainage Solutions
Ensure your deck has adequate drainage to prevent water pooling around fixtures. Slightly sloping the surface or installing drainage channels directs water away. I modified my deck slopes intentionally, which significantly reduced standing water and moisture exposure. Consider this like designing a road that directs traffic smoothly—your water flows away, not into sensitive spots.
Use Weatherproof Enclosures for Critical Components
Encapsulate switches, timers, and transformers in waterproof boxes. When I installed a timer for my lighting, I placed it inside a waterproof enclosure, protecting it from weather and extending its lifespan. Visualize this as keeping your electronic devices inside a weather-resistant suitcase—nothing gets in, and nothing breaks.
Many outdoor enthusiasts believe that choosing the right decking material is straightforward, but in reality, there are critical nuances that often go unnoticed. One prevalent myth is that all composite decking is maintenance-free—while modern composites do require less upkeep than wood, they are not impervious to issues like fading or mold if not properly selected and installed. The secret lies in understanding the specific formulation and protective coatings used, which can dramatically impact longevity and appearance. For example, some brands incorporate UV inhibitors that reduce color fading, a detail often overlooked by homeowners eager to pick the cheapest option.
Another common misconception centers around stair design. Many think a simple step layout suffices, but advanced stair configurations can significantly enhance safety and aesthetics. Incorporating features like optimized riser heights and anti-slip treads is critical, especially in outdoor settings prone to moisture. This aligns with higher-end design principles discussed in top stair designs for modern outdoor spaces.
Missteps in outdoor living projects are often linked to the trap of underestimating drainage and framing. Improper slope grades or inadequate joist support can lead to deck instability. The subtlety here is in the structural planning phase—using double joists or steel framing is a nuanced choice that can extend the lifespan of your deck, especially in coastal or wet environments. I recommend reviewing detailed insights from expert deck builder tips.
For those thinking about composite decking, beware of the ‘one-size-fits-all’ mentality. Not all composites perform equally under real-world conditions. A study published by the National Association of Home Builders highlights that decks with tighter board gaps and proper ventilation experience less mold and warping, especially in humid climates. Understanding the advanced trends and proper installation techniques—such as using corrosion-resistant fasteners and maintaining appropriate spacing—can make or break your project.
Have you ever fallen into this trap? Let me know in the comments. The key to successful deck building is appreciating these hidden nuances and avoiding the common pitfalls that can turn your outdoor oasis into a maintenance nightmare.Maintaining a beautiful outdoor deck, especially when using composite materials or designing stairs and lighting, requires the right tools and a strategic approach. Personally, I rely on a few key pieces of equipment to ensure my decks stay in top shape year after year. A high-quality digital moisture meter, for example, helps me spot areas where moisture intrusion may be occurring before it causes visible problems. I prefer the Extech MO257 because it provides quick readings on wood and composite surfaces, allowing me to catch issues early. Regular inspections with a bright LED flashlight, like the Streamlight 44501 Stylus Pro, make it easier to see cracks, loose fasteners, or corrosion, especially in shaded or hard-to-reach corners; this is crucial for preserving your stair risers and railings. For cleaning, a power washer with adjustable pressure, such as the Sun Joe SPX3000, is invaluable—it removes mold and debris without damaging the surface, helping to extend the lifespan of your composite decking and preventing surface deterioration.
When it comes to sealing and waterproofing, I use a high-quality brush or sprayer to apply outdoor-grade sealants like Ben Moore Waterproofing Sealer, ensuring joints and fixtures resist moisture ingress. It’s also worth investing in a good set of stainless steel fasteners, because they resist corrosion, especially in coastal environments, which can dramatically improve the longevity of your deck structure.
Looking ahead, I predict that smart technology will play a bigger role in maintenance—think sensors built into joists or posts that monitor moisture and structural integrity, sending alerts via smartphone apps. Integrating these innovations with traditional tools can help you stay ahead of issues and keep your outdoor living space functional and stunning.
For the most effective long-term results, I recommend developing a regular maintenance schedule, combining inspections, cleaning, and sealing at least twice a year. This proactive approach aligns with expert recommendations—like those from professional deck builders—and ensures your investment continues to impress.
Ready to elevate your maintenance game? Try using a moisture meter to identify hidden issues early, and pair it with regular visual inspections. Doing so will save you time and money while protecting your beautiful outdoor space. Whether you’re working on composite decking or upgrading your stairs and lighting, these tools make a tangible difference in achieving durable, low-maintenance results that stand the test of time.
Lessons That Changed My Outdoor Approach
One of the most profound realizations I had was that moisture isn’t just a minor annoyance—it can silently undermine the integrity of your entire deck if not properly addressed. I used to believe that investing in good-quality materials was enough, but I learned that regular maintenance and proactive sealing are key to longevity.
Another insight was the importance of proper drainage—simple slopes and strategic placements can prevent standing water that accelerates rot and corrosion. I once overlooked this, and it led to costly repairs, teaching me the value of designing with water flow in mind.
Finally, I discovered that the little details, like drip loops and waterproof enclosures, can make a significant difference. These small adjustments have saved me from multiple trip trips and have kept my outdoor lighting functioning perfectly through storms, making my space both beautiful and safe.