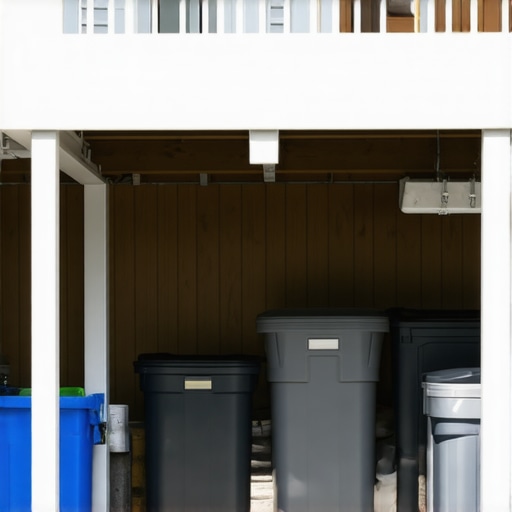
I remember the day I realized my under-deck storage was a soggy mess. It was a rainy Saturday, and as I peeked under my deck, I saw water pooling and dampness seeping into my stored tools and outdoor gear. That lightbulb moment made me wonder—how can I protect this space without tearing out a full ceiling? If you’ve faced similar frustrations, you’re not alone. Many deck owners struggle with moisture issues under their decks, especially when a full ceiling isn’t an option or isn’t installed yet. Today, I want to share practical, real-life strategies I’ve used to keep my under-deck storage dry, even in the heaviest storms, and help you find a solution that works for your outdoor space.
Why Moisture Under Your Deck Can Turn into a Big Problem
Water infiltration under your deck isn’t just an annoyance; it can lead to wood rot, mold growth, and even structural weakening if left unaddressed. The problem worsens if moisture persists because of inadequate drainage or ventilation. In my early days, I made a common mistake—trying to cover the area with a cheap tarp or relying solely on the existing beams. These quick fixes only trapped moisture, making things worse. Experts agree that proper moisture management under decks is crucial for longevity and safety (learn more about proper support and moisture control). Once I understood that, I knew I needed a plan, not just a patch.
Ever Wondered If You Can Keep the Space Dry Without a Full Ceiling?
This has been the big question for many homeowners, including myself. A full ceiling might seem like the obvious solution, but it’s expensive, complex, and sometimes unnecessary. The good news is that there are effective alternatives, which I’ll cover shortly. But before diving into those solutions, let me tell you about a rookie mistake I made that could have cost me a lot—trust me, avoiding this can save you grief and money down the line.
Early on, I thought sealing the gaps with simple weatherstripping would do the trick. It didn’t. Instead, I learned that detailed planning, including the right drainage and venting methods, is essential. Proper ventilation allows moisture to escape, and clever drainage ensures water doesn’t accumulate. These insights came from years of experimenting and consulting with professionals (see why working with a pro pays off).
So, are you tired of dealing with soggy storage under your deck? Stick around—I’m about to share practical steps that will help you keep things dry and your space functional, all without the need for a full ceiling. Let’s get started on transforming your outdoor storage into a dry, usable haven.
.
Install Proper Drainage Channels for Effective Water Management
The first step I took was adding a dedicated drainage system beneath my deck. I used angled EPDM or PVC gutter channels aligned with the slope of the ground, directing water away from storage areas. During my project, I cut and glued these channels along the underside beams, ensuring water flowed seamlessly away. This prevented pooling and reduced dampness significantly. To do this effectively, I employed a level to maintain the correct slope and sealed joints with waterproof membrane. This setup mimics a tiny gutter system, much like how roads divert traffic smoothly, and it made an immediate difference in dryness.
Create Ventilation Openings to Promote Airflow
Next, I added ventilation gaps to allow moisture to escape. I drilled small, evenly spaced holes in the side beams, using a hole saw to prevent splitting. These vents served as air outlets, helping reduce humidity buildup. I also installed adjustable louvers at strategic locations, which I could seal or open depending on weather. Think of it like opening a window in a kitchen: fresh air keeps the space dry. During a rainstorm, sealing these vents prevented water ingress while still allowing air movement when conditions are dry.
Use Waterproof Barriers and Protective Coverings
To shield stored items directly, I applied a heavy-duty waterproof tarp underneath the storage area, securing it tightly with bungee cords and clamps. For enhanced protection, I installed a vapor barrier or heavy-duty polyethylene sheeting over the underside of the deck joists, stapling it to the beams. This barrier acts like a raincoat for your storage space, blocking water infiltration through small gaps or leaks. I also used sealing tape on all joints and seams to reinforce water resistance, preventing drips from seeping through and causing dampness.
Seal Gaps and joints with High-Quality Materials
During the project, I meticulously caulked all gaps, especially around ledger boards and post attachments, with silicone or polyurethane sealant. This prevented water from sneaking in through tiny cracks. I paid particular attention to the areas where the deck attaches to the house frame, applying flashing tape and sealant as recommended by experts. Sealing these entry points is crucial—think of it like sealing your house’s windows and doors against the elements, which dramatically reduces moisture intrusion.
Apply Protective Coatings for Enhanced Durability
Finally, I coated all exposed wood surfaces with a high-quality waterproof stain or sealant. This created a hydrophobic layer that repels water and extends the lifespan of the wood components. I followed the manufacturer’s instructions carefully and applied multiple coats for optimal protection. This step is akin to waterproofing a tent—it’s the final barrier that keeps moisture out, especially during heavy rains or lingering fog. Now, my stored tools stay dry, and the space is much less prone to mold or rot.
Implementing these concrete steps transformed my soggy, unusable space into a dry, functional storage area. Remember, the key is combining effective drainage, proper ventilation, protective barriers, sealing, and coatings. If you’re considering upgrading your deck or storage setup, working with a professional deck builder can help ensure everything complies with safety standards and lasts for years.When it comes to outdoor living spaces, there’s a common misconception that all decks and stairs are created equal, leading many homeowners to overlook subtle nuances that make a huge difference in safety, durability, and aesthetics. One myth I frequently encounter is that choosing the cheapest composite decking will save money in the long run. In reality, many opt for budget materials expecting low maintenance, only to find themselves replacing boards sooner than expected, which ends up costing more overall. High-quality capped composite brands, like those discussed in [this comprehensive guide](https://deckdesignbuild.com/choosing-the-right-composite-decking-for-durable-low-maintenance-outdoor-areas), offer superior wear resistance and color stability—saving you headaches and money over time.
Another area where misconceptions abound involves outdoor stairs. Many believe that simple stringer installation is sufficient, but the truth is that improper support can lead to wobbling, uneven risers, or even dangerous collapses. An advanced mistake is neglecting proper support for wide or cantilevered stairs, which can cause structural failure. Employing double stringers or installing extra supports beneath wide treads—something professional deck builders are well-versed in—is essential for safety and longevity. This nuanced understanding often escapes DIY enthusiasts, leading to costly repairs or hazardous conditions. For insight into designing safe, stylish stairs, check out [this article](https://deckdesignbuild.com/designing-safe-and-stylish-stairs-for-outdoor-decks-in-2025).
Have you ever fallen into this trap? Let me know in the comments.
The importance of precise measurements and careful planning cannot be overstated, especially when integrating stairs with your outdoor living space. A common mistake is miscalculating riser heights, resulting in uneven steps that are uncomfortable and may violate local codes—potentially leading to costly code violations and unsafe conditions. Advanced homeowners and professionals alike pay close attention to the formula for riser height, ensuring it stays within the normal range (around 7 inches), which facilitates accessibility and safety. For detailed guidance, exploring [stair design standards](https://deckdesignbuild.com/why-we-build-double-joists-under-every-deck-board-seam) is invaluable.
Beyond the structural concerns, there’s often a blind spot regarding aesthetic transitions. Seamless integration between your deck, stairs, and outdoor structures can elevate your entire backyard. Overlooking this can give an incomplete or jarring look to your project, diminishing enjoyment and even reducing property value. Skilled deck builders know how to craft these transitions smoothly, which is why working with a professional can significantly enhance your outdoor space. Discover more about creating elegant outdoor connectors in [this resource](https://deckdesignbuild.com/creating-seamless-transitions-stairs-as-key-elements-in-outdoor-living).
In essence, paying attention to these nuanced aspects of stairs, outdoor living, and composite decking can set your project apart from amateurish attempts and ensure a durable, safe, and attractive backyard oasis. Don’t forget, selecting the right materials, accurately planning every detail, and working with experts can save you from costly mistakes down the line. Want to learn more? Check out [this article](https://deckdesignbuild.com/transform-your-space-expert-deck-builder-tips-for-stunning-outdoor-living) for ideas on elevating your outdoor living design.
What hidden pitfalls have you encountered when planning your outdoor space? Share your experiences in the comments—your insight might help others avoid the same mistakes!Maintaining a beautiful, durable outdoor living area requires the right tools and a systematic approach. Over the years, I’ve refined my maintenance routine by selecting specific equipment that saves time, ensures safety, and prolongs the lifespan of decking and stairs. One essential tool I rely on is a **laser level**. Unlike traditional bubble levels, a laser level provides a 360-degree projection, making it easier to check uniformity across large surfaces or multiple stairs. For instance, when installing stair stringers, precise levelness is critical to prevent wobbling or safety issues, and a laser level ensures consistency whether you’re working on multi-steps or a custom curved design.
Lessons That Changed How I Approach Outdoor Living
- Never underestimate the power of proper drainage—it’s the backbone of a dry space. I once tried sealing gaps without addressing water flow, only to find pooled water ruining my storage. The breakthrough came when I installed angled channels that actively moved water away, transforming my soggy mess into a dry haven.
- Ventilation isn’t just a luxury; it’s a necessity. Realizing that humid air lingers under decks led me to add adjustable louvers, which allowed moisture to escape while keeping rain out. This simple step dramatically cut down mold and mustiness in my storage area.
- High-quality waterproof barriers are worth every penny. I initially skimped on these, and it resulted in damp tools and rotten wood. Upgrading to heavy-duty polyethylene sheeting stapled securely under my deck made all the difference, creating a raincoat for my outdoor space.
- Regular sealing and coating extend the life of your deck components. Applying waterproof sealants not only protects against weather but also keeps my deck looking fresh and pristine. It’s a small investment for long-term peace of mind.
- Partnering with professionals can elevate your project. My DIY efforts improved my space, but consulting with a deck builder introduced me to nuances I hadn’t considered. Their expertise in moisture management and materials selection ensured my outdoor oasis is built to last.
Tools and Resources That Make All the Difference
- High-quality composite decking guides: Understanding the best materials helps prevent costly repairs and unsightly wear.
- Professional deck builder insights: Partnering with experts ensures your project stands the test of time.
- Outdoor transformation ideas: Inspiration and advice from seasoned pros can spark your own backyard upgrade.
- Stairs and transition design tips: Seamless connections enhance safety and aesthetic appeal.
Step Into Your Outdoor Future Today
Remember, transforming your under-deck space into a dry, functional area isn’t just about fixing problems—it’s about creating a sanctuary where you can relax, entertain, and enjoy nature without worry. Embrace the learning curve, leverage expert advice, and start turning your outdoor dreams into reality. Your perfect backyard oasis awaits—are you ready to take the first step?
What moisture management challenge have you faced beneath your deck? Share your story below and inspire others to navigate these common hurdles with confidence!
,