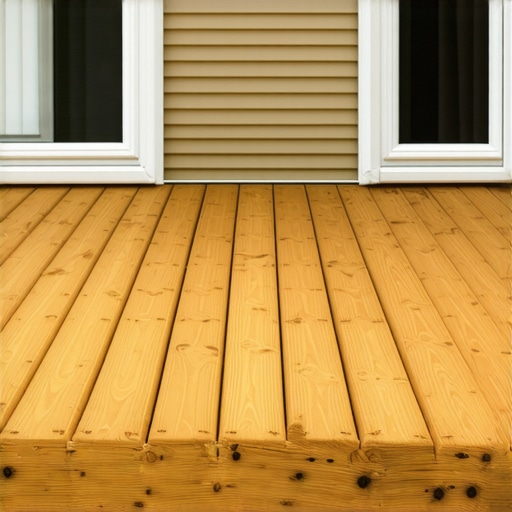
I remember the moment I finally decided to tackle that pesky gap between my deck and house siding. I was grilling with friends on a perfect summer evening, only to notice a gap so wide that it made my outdoor space look unfinished. It wasn’t just an eyesore; it was a haven for dirt, leaves, and critters trying to sneak underneath. That lightbulb moment led me down a rabbit hole of DIY fixes and professional advice, and let me tell you, it’s a common challenge many deck owners face but few know how to fix effectively.
Why That Annoying Gap Matters More Than You Think
This gap isn’t just about aesthetics. Left unaddressed, it can cause water to seep behind your siding, leading to rot, mold, and costly repairs. It can also invite pests or debris, turning your beautiful outdoor extension into a garbage trap. According to the Home Innovation Research Labs, improper deck-to-house connections are a leading cause of deck failure, often resulting from overlooked gaps or improper flashing. Taking care of this gap isn’t merely cosmetic—it’s a crucial step in prolonging the lifespan of your deck and maintaining your home’s integrity.
Is Sealing the Gap Really That Important? The Skeptics’ View
I used to think a little gap was no big deal—after all, how much difference could a few inches make? But I learned the hard way when I initially tried sealing it with just a few strips of weatherstripping. It looked decent for a while, but water seeped in, and I ended up doing the job twice. Early on, my mistake was underestimating the importance of proper flashing and drainage. It might seem like a small detail, but neglecting it can lead to significant damage, costing you far more in repairs down the line. Want to avoid making that mistake? You’re in the right place. We’ll go step-by-step to find a solution that lasts and looks great, backed by expert advice and my personal experience. For more ideas on creating an outdoor space you’ll love, check out some inspiring deck design tips.
Now, let’s dive into the best techniques to close that stubborn gap and keep your deck looking pristine for years to come.
Prepare Your Tools and Materials
Start with a measuring tape, utility knife, high-quality flashing tape, exterior-grade silicone sealant, shims of various thicknesses, and a rubber mallet. I remember the first time I tackled this task, I had a toolbox spread out, with spacers and sealant ready, but I initially overlooked the importance of precise measurements, which caused some fitting issues later.
Accurate Measurement of the Gap
Measure the width and height of the gap at multiple points. Think of it like fitting a puzzle piece; accuracy ensures a snug fit. I used a tape measure and a small level to check the uniformity. During my first attempt, I realized that even a quarter-inch miscalculation led to an uneven seal, emphasizing the need for meticulous measurement.
Shim the Gap for a Level Surface
Insert shims of varying thicknesses to fill the gap, creating a level and stable surface for sealing. Use a rubber mallet to gently tap shims into place without damaging the wood. I learned this the hard way when I tried forcing them in with a hammer, which led to splintering. Proper shim placement ensures a flat surface before sealing.
Securing the Shims
Once fitted, fasten the shims with exterior-grade screws or nails if necessary, especially in large gaps. This adds stability during the sealing process. During my project, I found that loose shims shifted over time, so anchoring them was crucial for a durable fix.
Applying Flashing Tape and Sealant
Carefully lay the flashing tape over the shimmed gap, extending it several inches onto both the deck and house siding to create a water-resistant barrier. Press firmly to eliminate air pockets. Follow with a bead of high-quality silicone sealant along the edges of the flashing for added protection. I remember using a caulking gun to apply a continuous line of sealant and smoothing it with a finger dipped in soapy water, which made a neat finish.
Ensuring Proper Drainage
Design your sealing to direct water away from the house. Slightly slope the flashing if needed, similar to how a roof shingle redirects water. During my experience, neglecting drainage caused water pooling, which eventually led to mold behind the siding. Proper sloping and sealing are vital for long-term durability.
Final Inspection and Adjustments
Check for gaps, bubbles, or loose areas. Test the seal with a gentle spray of water. Any leaks require reapplication of sealant or adjustment of shims. I once missed a small bubble in the flashing, which later allowed water ingress; fixing it early saved me from costly repairs down the line.
These steps transform a problematic gap into a durable, water-resistant seal, extending your deck’s lifespan and enhancing your outdoor living space. The key is patience and precision—don’t rush the process, and your efforts will pay off in years of hassle-free outdoor enjoyment.
When it comes to designing your outdoor space, there’s a lot more beneath the surface than most homeowners realize. Many believe that choosing the right composite decking or laying out stylish stairs is straightforward, but I’ve found that understanding the intricate details can make or break the longevity and safety of your deck. For example, a common misconception is that installing composite boards is foolproof—however, failing to account for expansion, contraction, and proper fastening can lead to warping and early deterioration, as highlighted by recent compositional studies. Moreover, many assume that expert contractors always use the best materials; in reality, some cut corners with subpar fasteners or inadequate flashing, which compromises safety and durability over time. These advanced mistakes often stem from overlooking subtle but critical factors like joist spacing, drainage slope, or weatherproofing techniques. Paying attention to these nuances ensures your outdoor haven remains pristine and safe for years to come. Ever wondered why your stairs squeak or how certain design choices prevent dangerous flexing? Dive into the details of [designing safe and stylish stairs](https://deckdesignbuild.com/designing-safe-and-stylish-stairs-for-outdoor-decks-in-2025) or consult a [professional deck builder](https://deckdesignbuild.com/the-benefits-of-working-with-a-professional-deck-builder-in-your-outdoor-projects) to avoid costly surprises down the line. Remember, the devil is in the details—so next time you plan your deck, consider these hidden elements to truly elevate your outdoor living experience. Have you ever fallen into this trap? Let me know in the comments.
Mastering Maintenance with the Right Tools
When it comes to maintaining your outdoor space, having the right equipment can make all the difference. I personally rely on a high-quality cordless impact driver, like the Milwaukee M18 Fuel, for tightening fasteners without stripping screws, especially when securing composite decking boards. Its power and portability allow me to work efficiently even in tight corners or overhead sections. Additionally, a digital moisture meter helps detect hidden water infiltration behind siding or under joists, preventing costly repairs before they escalate. Using these tools regularly ensures your deck remains sturdy and safe over time.
Why a Laser Level Is Your Best Friend
Creating perfectly level stair risers or deck surfaces is crucial for safety and aesthetics. I opt for a laser level like the Bosch GCL 2-260, which projects a clear horizontal line across large areas, making alignment a breeze. Unlike traditional bubble levels, laser tools save time and improve accuracy, especially on irregular terrain or when working at height. Consistent leveling prevents uneven wear or water pooling that can accelerate material degradation.
Software That Elevates Your Outdoor Projects
While most DIYers overlook digital tools, planning your deck layout digitally helps visualize dimensions and identify potential issues before construction begins. I recommend sketching with software like SketchUp, which offers precise measurements and 3D modeling. This approach helps in optimizing joist spacing, stair design, and overall flow. For those interested in long-term results, some software even allows material cost estimation, aiding budgeting and material selection, especially when integrating complex features like built-in seating or lighting.
Streamlining Maintenance with Use of Apps
Apps such as iHandy Level or Measure offer quick measurements and level checks on the go. These digital helpers are invaluable when you’re out in the yard, making adjustments without hauling bulky equipment. Regularly using these tools can extend the lifespan of your deck by ensuring all parts remain properly aligned and tightened, reducing the risk of structural issues over the years.
Future Trends in Outdoor Maintenance
Advancements in sensor technology and smart home integrations are poised to revolutionize deck care. Imagine sensors embedded in your joists or decking boards that monitor moisture levels and structural integrity in real-time, alerting you via smartphone when maintenance is needed. As composite materials evolve, their low-maintenance properties will become even more reliable, with enhanced resistance to fading and warping, as highlighted in recent composite decking trend reports. Embracing these innovations now will keep your outdoor haven resilient and beautiful for decades to come.
How Do I Maintain Composite Decks Over Time?
Consistent cleaning is key. Use a soft-bristle brush and a gentle cleaner formulated for composite materials, avoiding bleach or harsh chemicals that can degrade the surface. Regular inspections for loose fasteners or damaged boards help prevent larger issues. Applying a protective coating—if recommended by the manufacturer—can safeguard against UV damage and staining. For a detailed overview, check out the article on proper composite deck maintenance. Remember, proactive care now minimizes costly repairs later—so pick a day each season to inspect and clean your decking thoroughly. If you want professional guidance, I encourage you to reach out to seasoned deck builders for personalized advice, especially for complex projects like integrating stairs or outdoor kitchens. Don’t forget—the right tools, thoughtful planning, and regular upkeep are your secret weapons for long-lasting outdoor living spaces. Try one of these advanced maintenance tips today, and see the difference it makes in preserving your deck’s beauty and safety.
One of the most eye-opening lessons I learned was how crucial attention to detail can be in creating a durable, beautiful deck that lasts for decades. Initially, I underestimated the importance of precise measurements, which led to misfitting boards and uneven surfaces. This experience taught me that patience, meticulous planning, and understanding the intricacies of material behavior are the real game changers in outdoor living projects. Moreover, I discovered that investing in quality tools and staying informed about the latest trends can significantly reduce long-term maintenance and repair costs, giving you peace of mind and a stunning outdoor space that truly feels like an extension of your home.
My Secret Arsenal for Deck Success
Over the years, I’ve relied on a few trusted tools and resources that have made all the difference. A high-quality laser level like the Bosch GCL 2-260 is indispensable for ensuring perfectly aligned stairs and decking surfaces, saving me hours of rework. For data-driven insights, I turn to comprehensive guides like composite decking trend reports, which keep me ahead of material innovations. When planning, software like SketchUp allows me to visualize layouts, spot potential issues, and optimize costs before lifting a hammer. These resources create a solid foundation for craftsman-quality results, even on complex projects.
Igniting Your Passion for Outdoor Excellence
Every deck I build is an opportunity to create a personal sanctuary that enhances everyday life. Remember, mastering the nuances of deck building and outdoor living isn’t reserved for professionals—your dedication and willingness to learn are powerful tools. Don’t shy away from experimenting with new materials, layouts, or lighting designs—small changes can elevate your entire space. I encourage you to dive into these resources, refine your skills, and take pride in transforming your backyard into a breathtaking retreat. Your journey toward outdoor mastery starts today—what’s the first upgrade you’re excited to try? Share below, and let’s inspire each other to craft better, more inviting outdoor spaces.