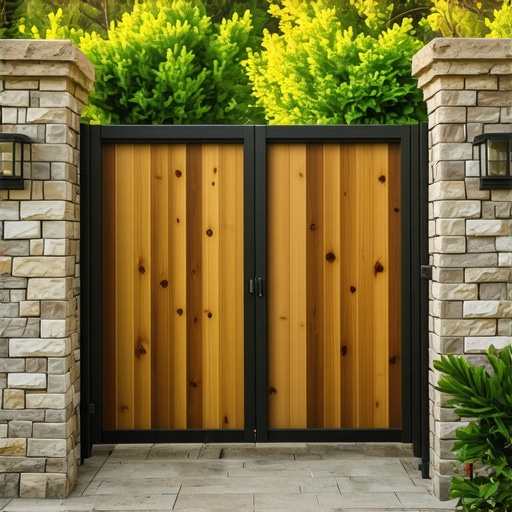
I’ll never forget the first time I built a gate for my backyard—an eager project that turned into a frustrating lesson in patience. It was one of those days when I thought, “How hard can it be?” but by the end of the afternoon, I was left with a sagging, unsteady gate that looked like it might give way at any moment. That lightbulb moment made me realize something crucial: a gate that sags isn’t just an eyesore—it’s a safety hazard and an ongoing headache.
The Real Struggle with Building a Lasting, Non-Sagging Gate
Fast forward to today, and I can confidently say I’ve cracked the code. Building a gate that remains square, sturdy, and functional over time isn’t magic; it’s about choosing the right materials, proper framing techniques, and smart geometry. My goal is to help you avoid the common pitfalls I fell into early on, especially the mistake of relying solely on regular hinges and simple framing without considering long-term forces acting on the gate. Trust me, once I started applying these proven principles, my gates stopped sagging—and I haven’t had to worry about constant adjustments since.
Is It Really Possible to Build a Gate That Won’t Sag?
Before we dive into the nuts and bolts, I want to address the biggest fear many homeowners have: “Can I really build a gate that stays straight for years without extensive maintenance?” Honestly, yes—if you understand the mechanics and do a bit of planning. Early on, I made the mistake of underestimating the importance of strong framing and proper hardware, which led to early sagging and eventually, replacement costs. By choosing quality materials and following some simple but effective design principles, you’ll be amazed at how durable your gate can be. For an in-depth look at choosing the right materials, check out this comprehensive guide to composite decking and durable materials.
Now, let’s get into the practical steps that will turn your gate from a sagging troublemaker into a lasting, reliable barrier. But first, tell me—have you ever faced the frustration of a gate that just won’t stay put? You’re not alone, and the good news is, it’s a problem you can fix with a few smart techniques.
Start with a Solid Frame
Use pressure-treated lumber or composite materials for framing to prevent warping over time. I once used cedar for a gate frame, thinking it looked better, but it warped within a year. Now, I prefer durable options that resist the elements, ensuring my gate stays square. Cut your top and bottom rails to exact length, ensuring they fit tightly between side posts, and attach them securely using galvanized screws.
Align and Secure Verticals Precisely
Place the vertical pickets or panels evenly, maintaining consistent gaps for airflow and aesthetics. During my first attempt, I didn’t measure carefully, resulting in uneven spacing. I now use a spacer block to keep gaps uniform. Secure them with screws, ensuring they’re flush with the top and bottom rails, and double-check alignment before fastening permanently.
Use Reinforced Hardware for Flexibility
Install heavy-duty hinges and a solid latch system designed for gates meant to prevent sagging. I once relied on generic hinges, which loosened over time, causing the gate to sag. Upgrading to commercial-grade, rust-resistant hinges and installing a diagonal brace dramatically improved stability. This brace acts like a steel backbone, distributing weight evenly and resisting gravity’s pull.
Apply Proper Reinforcements and Supports
Incorporate diagonal braces from the top hinge side down to the opposite bottom corner. This technique is like adding a support beam across a bridge to prevent sagging. I once skipped this step, and within months, my gate started to droop. After installing a steel brace, it remained perfectly upright through seasons of weather.
Adjust and Maintain for Longevity
Regularly check the gate’s alignment and tighten loose hardware. Spray hinges with lubricant annually to prevent rust and ensure smooth operation. During a project, I noticed my gate was slightly misaligned; a quick adjustment restored proper swing. Keep in mind that protective coatings on wood or composite surface treatments help sustain appearance and function over the years.
When it comes to outdoor living, many homeowners and even seasoned deck builders fall prey to common misconceptions that can undermine a project’s longevity and safety. One prevalent myth is that choosing premium composite materials automatically guarantees a maintenance-free experience. While high-quality composites like capped polymers offer remarkable durability, they still demand proper installation and regular inspections. Failing to account for thermal expansion, for example, can lead to warping or cracking over time, especially in climates with extreme temperature fluctuations. According to experts from the composite decking guide, understanding these subtle material behaviors is essential for a lasting deck.
Another mistake often made is underestimating the importance of proper framing techniques. Many assume that a simple ledger board installation suffices, but overlooking advanced details—like proper flashing, joist hangers, and seismic anchors—can result in structural failures or water damage. In fact, some DIYers fail to incorporate enough ventilation between the ledger and the siding, leading to hidden rot. For a comprehensive overview, check out transition strategies for stairs and framing.
The ‘Oops’ factor becomes even more pronounced in stair safety. Many think that standard stringer design and code minimums are enough, yet overlooking the nuances of tread depth, riser height consistency, and slip-resistant surfaces can cause accidents, especially at night. Advanced builder techniques recommend subtle adjustments, like incorporating edge lighting or textured treads, which dramatically improve safety and aesthetics. For example, innovative stair designs can make all the difference.
Here’s a question for the experienced: How can understanding the microclimate around your deck influence your choice of materials and design features? Climate-specific considerations, such as UV exposure, humidity, and wind, require tailored solutions—something that even a seasoned builder might overlook if they stick to generic recommendations. The expert insights emphasize that subtle environmental factors can accelerate wear and tear, affecting everything from railing stability to surface finishing.
Making informed choices about outdoor projects involves more than selecting fixtures and materials. Deep knowledge of material behavior, structural nuances, and environmental impacts ensures safety, durability, and aesthetic appeal. Have you ever fallen into this trap of oversimplification? Let me know in the comments!
Keep Your Outdoor Living Safe and Stunning with the Right Tools
Maintaining a flawless outdoor deck or staircase demands more than occasional inspections; it requires the right tools and a systematic approach. I personally swear by a high-quality cordless drill paired with a set of corrosion-resistant drill bits—I rely on these for everything from tightening deck screws to installing new hardware. My absolute favorite drill is the Makita XFD12Z, valued for its durability and battery life, which keeps me working without interruptions. For precise fastening, I use an impact driver with adjustable torque settings to prevent overdriving screws, a common mistake that leads to deck board damage.
How do I maintain my outdoor stairs and decking over time?
Regular cleaning is the foundation. I use a combination of a stiff-bristled brush and a deck-specific cleaner to remove dirt, moss, and grime—preventing slips and preserving the surface. A spray nozzle attached to my garden hose helps reach into tight corners and under railings. For thorough inspections, I keep a flashlight and a laser measure handy—these help identify hidden issues such as loose fasteners or subtle warping that might be invisible during daylight. I also recommend applying protective sealants or stain every couple of years, focusing on seams and cut ends, which are most prone to water infiltration and rot. Investing in a digital moisture meter allows me to monitor wood moisture content, ensuring my treatments are effective and that there’s no hidden internal decay.
Tools That Make Long-Term Care Easier
Aside from the basics, I rely on a set of specialized tools to simplify maintenance. A hammer drill equipped with a concrete bit is essential for securing deck footings to concrete slabs—this extra step prevents shifting or sinking over time. For subtle adjustments, I keep a set of shims and a level nearby; these help to realign posts or stair stringers without needing major disassembly. Additionally, a quality corrosion-inhibiting spray like WD-40 helps maintain hinges and moving parts, ensuring smooth operation year after year.
Future of Outdoor Maintenance: Smarter, More Integrated Solutions
Looking ahead, I see an exciting shift toward smart maintenance tools. IoT-enabled moisture sensors and remote inspection cameras could soon allow homeowners to monitor their decks’ health remotely, catching early signs of damage before it becomes visible. This proactive approach can save both time and money, ensuring safety and longevity. As a deck builder, I anticipate integrating these technologies into my projects, offering clients real-time updates and personalized maintenance plans. For current homeowners, equipping your deck with a moisture monitor or scheduling seasonal inspections using professional services like our expert team can extend the life of your outdoor space significantly.
What new tools or methods do you think will revolutionize outdoor deck care in the coming years?
To start, try using a moisture meter to assess your wood’s health annually. This simple step can help you determine if your protective treatments are doing their job or if it’s time to reapply. Remember, consistent maintenance with the right tools not only preserves the beauty of your outdoor space but also ensures safety—preventing accidents and costly repairs later on. For more insights into keeping your deck in top shape, visit our deck builder insights and stay ahead of potential issues.
Moments That Taught Me More Than Any Manual
- One of my biggest realizations was that even the most straightforward-looking gate can be a puzzle of physics and materials. My early mistakes taught me that sacrifice in framing or hardware is rarely worth the long-term headache—it’s all about quality and precision.
- I learned that incorporating a diagonal brace isn’t just an optional upgrade; it’s the backbone of a lasting gate, distributing stress and preventing sagging even after years of weather exposure.
- Understanding thermal expansion and contraction changed how I select materials and design joints, so my outdoor stairs and gates flex with the environment—not against it, reducing warping and cracking significantly.
- Discovering that regular maintenance, like tightening hardware and applying sealants, extends the life of a gate—turning a once-daily chore into a routine that keeps my outdoor spaces safe and beautiful.
- Realized that using the right tools, like impact drivers with torque settings and moisture meters, transforms maintenance from guesswork to precision work, saving time and costly repairs.
Resources That Elevated My Craft
- Deck Designer Software: Tools like SketchUp or specific deck design programs help visualize the project, anticipate challenges, and plan reinforcements, saving costly mistakes. I trust these because they’ve guided me through complex angles and elevations with confidence.
- Technical Manuals from Industry Leaders: Publications from brands like Trex and Simpson Strong-Tie provide detailed specifications for hardware and framing techniques, grounding my work in proven practices.
- Online Forums and Professional Networks: Communities such as Decks.com or the forums on Houzz have been invaluable for troubleshooting specific issues like standoff measurements and material compatibilities. Sharing experience accelerates learning and innovation.
- Local Building Codes and Inspection Resources: Staying current with code requirements ensures my projects meet safety standards. Regular review keeps me aligned with best practices and legal compliance.
Your Next Step in Building Resilience and Style
Building gates and stairs that resist sagging and weathering isn’t just a skill—it’s a commitment to long-lasting outdoor beauty and safety. Embrace the lessons learned from my journey, leverage trusted tools, and never underestimate the power of thoughtful design. Whether you’re a seasoned pro or just starting out, your outdoor spaces can be both stunning and enduring. Ready to elevate your project? Share your experiences or ask questions below—I love hearing how others are transforming their outdoor living with smarter, stronger solutions.