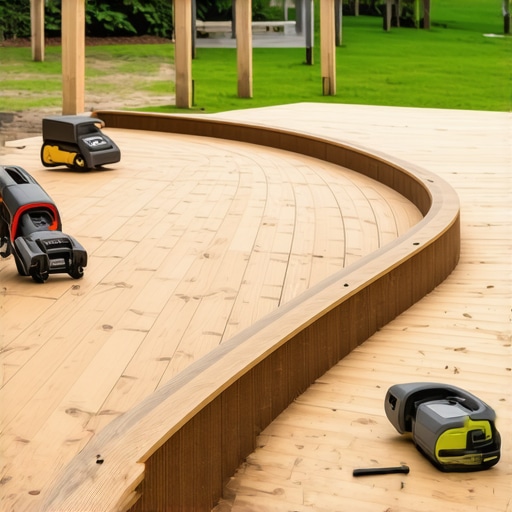
I vividly remember the day I decided to tackle building a curved deck in my backyard—snow still dusted the ground, and I was eager to transform that muddy patch into a haven for summer barbecues and family gatherings. But as I unrolled my plans and laid out the materials, I hit an unexpected snag: bending those flexible composite deck boards into a perfect curve without using heat blankets proved far more challenging than I had anticipated. A simple google search had promised it was doable, but reality told a different story. That moment of frustration sparked a lightbulb for me; I realized that the common advice on bending decks often overlooked the nuances that can make or break your project.
So, here I am, sharing my journey—and more importantly, the solution I found—so that you don’t have to stumble through the same pitfalls. If you’re like I was, staring at your blueprint and wondering how to curve your deck boards without invested in bulky heat blankets or risking board damage, then this post is exactly what you need. We’ll explore practical, proven techniques to achieve those graceful curves smoothly, safely, and without extra equipment.
Why Building a Curved Deck Matters More Than You Think
A curved deck isn’t just about aesthetic appeal; it’s a way to maximize outdoor space, improve accessibility, and create a more natural, organic flow from your home to your yard. Today, modern materials like composite decking allow for design flexibility, but bending these boards without specialized tools can be intimidating—especially with misconceptions floating around. I’ll admit, I initially made the mistake of trying to force the boards into shape without understanding the material behavior, which led to cracks and wasted boards. That taught me the importance of understanding your materials and the simplest ways to manipulate them.
Many homeowners believe that bending composite or PVC decking requires expensive heat blankets or complex jigs—things that tend to scare away DIY enthusiasts. However, with patience, strategic soaking, and some useful tips, you can achieve smooth curves without those high-tech accessories. This knowledge can save you money and avoid damaging your materials. To back that up, a recent survey highlighted that a significant number of DIYers have faced issues with deck board warping or cracking, often because they tried to take shortcuts with heat or improper techniques.
Are you facing doubts about whether a curved deck is even feasible for your skill level? Or worried about damaging your expensive boards? Trust me, I’ve been there—so many early mistakes stemmed from rushing or skipping research. But I eventually discovered that understanding material properties and employing simple bending tricks could deliver results that looked professionally done.
Next, I’ll walk you through the methods I used, including soaking techniques and gradual bending strategies, that helped me craft a graceful curve—all without heat blankets. If you’re ready to bring your backyard vision to life and avoid costly errors, let’s dive in.
Soak and Submerge: Preparing Your Boards
Start by soaking your deck boards in warm water for at least 1-2 hours. I remember the day I soaked my first few planks—using a garden tub in my garage—thinking I was about to ruin perfectly good material. The water penetrates the plastic composite, making it more pliable. This step reduces the risk of cracking when bending. Remember, the wetter the boards, the more flexible they become, but don’t oversoak to the point of water logging the material.
Gentle Bending with Progressive Pressure
Once soaked, position your board over the curve template or desired radius. Apply gentle, incremental pressure, gradually shaping the board. I used clamps and small blocks to hold the board in position, working slowly to avoid splitting. Think of it like stretching a rubber band—slow, steady pressure yields smoother curves. Over-bending can cause cracks, so patience is key. During my first attempt, I moved too quickly and caused minor fractures—lessons learned, as always.
Use of Support Blocks for Consistency
Place support blocks along the bend to maintain uniform curvature. This technique ensures the board doesn’t bend unevenly. I placed spacers every few inches, making adjustments as I went. It’s like assembling a jigsaw puzzle—small, strategic moves create a seamless shape. This method is effective and straightforward, even for DIYers who don’t have specialized bending equipment.
Gradual Drying and Setting the Shape
After achieving the desired bend, secure the board with clamps and support blocks, then let it dry in the shape for 24-48 hours. This slow drying process helps the composite material stabilize in the new form. I once left a board in the clamps overnight—by morning, it retained a beautiful, natural curve, ready for installation.
Finish and Secure the Curved Boards
Once dried, drill pilot holes to prevent splitting during fastener installation. Use stainless-steel screws designed for composite materials, as they provide durability and corrosion resistance. When attaching the boards, follow the manufacturer’s spacing guidelines to prevent warping or buckling. For an added professional touch, consider incorporating hidden fasteners—these give a sleek look and help keep the curve intact.
Incorporating these steps into your project transforms what once seemed complex into a manageable process. Remember, patience and attention to detail make all the difference—just like the unexpected growth of a backyard garden. If you want to explore design ideas that can maximize your space and incorporate curves elegantly, check out more ideas for inspiring outdoor deck and stair layouts.
Many homeowners fall into the trap of believing they know everything about outdoor living, especially when it comes to composite decking and stairs. Common myths, like “Composite decking is maintenance-free” or “Stairs are just structural elements,” can lead to costly mistakes if not approached with nuance. In reality, understanding the advanced details—such as the importance of proper support spacing or weatherproofing techniques—can make the difference between a stunning outdoor space and a recurring headache. Experts emphasize that ineffective support layout can cause warping or bouncing, which is often overlooked by DIYers eager to cut costs. Moreover, many assume that all composite materials behave similarly under stress; however, recent studies show that mineral-core decks offer superior heat resistance, especially in high-sun areas. Choosing the right composite is just part of the picture—attention to detail in stair construction and support framing is equally crucial for safety and longevity. Overlooking these nuances may seem trivial initially but can lead to structural issues down the line. Additionally, some believe that hiring a professional is only necessary for large-scale projects. Yet, a skilled deck builder’s expertise ensures your design not only looks great but also adheres to safety standards and local codes. For instance, the subtle difference in stair stringer layout can affect ease of use and safety. Advanced builders pay close attention to these details, integrating stair safety rules and innovative design solutions. Remember, in outdoor living, the devil is in the details. Don’t settle for superficial fixes—immerse yourself in the complexities to truly elevate your project.
Have you ever fallen into this trap? Let me know in the comments.
Keeping Your Decks and Stairs in Top Shape for Years to Come
Maintaining your outdoor living areas is essential to ensure they remain safe, beautiful, and durable over time. From selecting the right tools to following proven maintenance routines, you can significantly extend the lifespan of your decks, stairs, and supporting structures. I personally rely on a few specific tools and techniques that help me stay ahead of potential issues, saving time and money in the long run.
Power Tools for Precision and Efficiency
For general cleaning and surface preparation, I recommend investing in a high-quality pressure washer with adjustable nozzles. A versatile model like the Karcher K5 Premium allows me to remove dirt, algae, and grime effectively without damaging the composite or wood surfaces. When it comes to repairs or replacing fasteners, an impact driver with adjustable torque settings provides the control needed to avoid over-tightening and damaging the decking material. Using a stainless-steel screw gun ensures corrosion resistance, especially in coastal environments.
Specialized Maintenance Tools Make a Difference
To check for subtle shifts or bouncy stairs, I utilize a digital level along with a laser distance meter. These tools help identify uneven joists or support structures before they develop into major problems. Applying protective coatings using a paint sprayer is much more uniform and fast than brush application—furniture-grade sprayers like the Graco Magnum X5 facilitate this process, providing a smooth finish that guards against weathering.
Monitoring Trends for Long-Term Results
New innovations, such as adjustable support pedestals and smart moisture meters, are becoming increasingly popular. These tools enable me to keep an eye on the crucial aspects like support stability and wood moisture content—key factors in preventing rot and warping. Staying updated on these trends through industry resources ensures that I am using the most effective solutions for durability and safety.
How do I maintain outdoor structures over time?
Regular inspections are fundamental—checking for loose fasteners, signs of rot, or water pooling. Applying a fresh coat of sealant or stain every 2-3 years, especially on support posts and stairs, keeps surfaces protected from moisture and UV damage. Incorporating drain gaps and protective flashing not only prevents water infiltration but also extends the lifespan of your deck. For complex projects or for peace of mind, hiring a professional deck builder can make a considerable difference—an expert’s insight ensures you catch potential issues early and implement best practices, as discussed in this insightful article.
To truly make maintenance manageable, I recommend developing a seasonal checklist based on your specific materials and exposure. This proactive approach, paired with the right tools, guarantees your outdoor oasis remains inviting and safe. Try using a moisture meter to monitor wood condition or consistent pressure washing to prevent mold and fading—these small steps add up.
Remember, investing in quality tools and routine care not only preserves your investment but also ensures your outdoor spaces are ready for spontaneous gatherings or peaceful evenings for years to come. Stay diligent, and your decks and stairs will continue to enhance your home’s appeal and safety.

Lessons the Hard Way That Shaped My Outdoor Living Journey
One of the biggest realizations I had was that patience truly is a virtue when working with composite decking. Rushing through the bending process often led to cracks or uneven curves, which was frustrating but invaluable learning. I also discovered that soaking boards thoroughly before attempting to bend significantly reduces the risk of damage, saving both time and money in the long run. Furthermore, I learned that understanding the material’s behavior can demystify what initially seemed like insurmountable obstacles, empowering me to craft more elegant and durable curved designs. Lastly, engaging with experienced professionals or credible resources can accelerate your learning curve, preventing costly mistakes and elevating your project from good to exceptional.
Top Tools and Resources That Elevated My Outdoor Projects
My secret weapon has been a high-quality pressure washer, like the Karcher K5 Premium, which keeps decks pristine without harming the surface. For precision work, an impact driver with adjustable torque is essential; it helps secure fasteners perfectly, especially in composite materials resistant to corrosion. I also rely on a digital level and laser distance meter to ensure support structures and stairs are perfectly aligned, preventing long-term issues. When it comes to learning and inspiration, the book Transform Your Outdoor Living provided invaluable insights into innovative design ideas. Additionally, industry websites and local professionals, particularly those experienced with professional deck builders, have guided me through complex decisions and best practices that paid off in the final results.
Ignite Your Passion and Build With Confidence
Your outdoor living space is more than just a project—it’s an opportunity to create an extension of your home where memories are made. Don’t let doubts or inexperience hold you back; with the right knowledge, tools, and mindset, you can craft stunning curves and durable structures that last for years. Embrace the learning process, celebrate small victories, and consider collaborating with seasoned professionals to refine your vision. Every step you take brings you closer to turning your backyard dreams into reality. Are you ready to start your own outdoor transformation and make a lasting impact on your home and family life? Share your plans or questions below—I’d love to hear your ideas and support your journey.