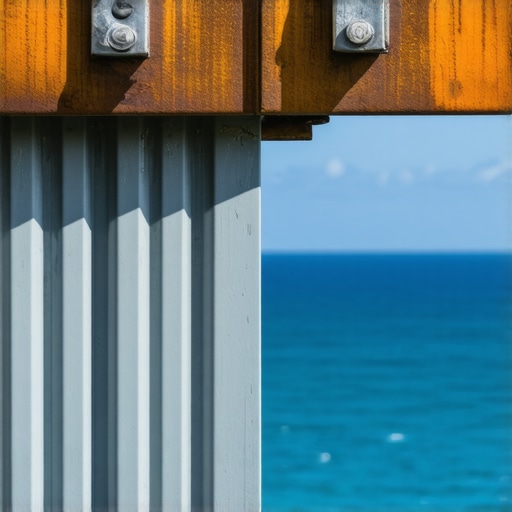
It was a scorching summer afternoon when I discovered a problem that changed how I approach outdoor builds near saltwater. My latest deck project had just been completed, and as the seasons changed, I noticed something unsettling—rust forming on the fasteners, even though I used what I thought were top-quality galvanized screws. That lightbulb moment made me realize: I needed a better solution. Have you ever faced similar frustrations, wondering why your hardware seems to give out faster in coastal environments?
Choosing Fasteners That Stand Up to Saltwater’s Assault
Living and working near the coast exposes your outdoor structures to harsh conditions. The salty sea air accelerates corrosion, causing even high-grade galvanized fasteners to deteriorate over time. I learned this the hard way early on—using galvanized screws seemed like a smart move, but after a couple of years, rust patches appeared, compromising the integrity of my decks and stairs. That’s when I switched to stainless steel fasteners. Not only did they resist corrosion better, but they also kept my projects looking sharp and lasting longer, reducing maintenance costs in the long run. In fact, a study by the Occupational Safety and Health Administration highlights that stainless steel has superior corrosion resistance compared to galvanized options, especially in chloride-rich environments like coastal areas.
Is All Stainless Steel Created Equal?
Many assume all stainless steel fasteners are the same, but that’s a mistake I made early on. I initially used 304-grade, thinking it would suffice—only to find it could still stain and corrode over time. Now, I prefer 316-grade stainless steel for coastal projects. It contains molybdenum, which provides extra protection against saltwater corrosion. That little upgrade has saved me countless hours of repairs and repainting, especially when working on outdoor stairs or framing near the water. If you’re considering a coastal build, I strongly recommend reading more about the benefits of choosing the right fastener material because it can make or break your project’s longevity and safety.
Preparing the Foundation for Long-Lasting Outdoor Spaces
Start by inspecting your existing deck’s support structure. Use a laser level to ensure all support beams are perfectly aligned, preventing future unevenness or stress points. If your foundation shows signs of sinking or unevenness, temporarily brace the posts with shims and then plan to reinforce using steel brackets. Remember, a stable base is critical; I once faced a sagging section because a support pier shifted slightly during a heavy rain, which caused uneven decking that I had to cut and replace later. To prevent this, I applied a quick site assessment and reinforced weak spots before laying the composite boards.
Choosing and Cutting the Right Composite Materials
Opt for a high-quality capped composite decking like this guide which emphasizes durability against saltwater exposure. When cutting boards, use a fine-tooth blade on a circular saw, and lubricate the blade with WD-40 to prevent melting plastic edges—a mistake I learned when I used a dull blade, causing frayed edges that looked unprofessional. Cut the boards on a flat, secure surface, and size them precisely to avoid gaps or overlaps. It’s like tailoring a suit; precision ensures longevity and aesthetic integrity.
Fastening Composite Deck Boards Properly
Install hidden fasteners using a pneumatic gun fitted with corrosion-resistant screws—preferably stainless steel 316-grade—especially near saltwater. Pre-drill screw holes slightly smaller than the fasteners to prevent cracking, which I struggled with early on when I ignored pre-drilling, resulting in ugly splits. Use a square drive bit to ensure proper torque and prevent cam-out. For the best results, follow a staggered pattern, spacing gaps uniformly at 1/4 inch to allow for expansion. This technique reduces cupping and warping over time, particularly vital when surrounding salty air accelerates material fatigue.
Constructing Safe and Stylish Stairs
Design stairs with a consistent riser height—ideally around 7 to 8 inches—and tread depth of at least 10 inches for safety. Use a framing square during construction; I once miscalculated riser height, leading to awkward steps that felt unbalanced. To avoid this, mark your stringers carefully with a template and double-check measurements. Attach stringers firmly with metal hangers embedded into the support beams, then secure treads with corrosion-resistant screws, avoiding nails which can loosen in high humidity. For aesthetic appeal, consider installing a handrail made of aluminum to resist salt corrosion, leveraging this expert advice.
Sealing and Finishing for Ultimate Durability
Even the toughest composite decks benefit from a protective sealant. Apply a clear, water-based sealant rated for outdoor use, focusing on edges and cut ends to prevent moisture ingress. I learned this during a DIY project when unsealed cuts developed mold after just one season. Use a foam brush to apply the sealant, ensuring coverage on all surfaces, and allow proper curing time. For stairs, add an anti-slip tape on treads to enhance safety, especially in wet conditions. Maintaining these small details significantly extends the lifespan of your outdoor living area in coastal climates, making your efforts worthwhile.
Despite the growing popularity of composite decking and modern outdoor spaces, many enthusiasts and even seasoned builders fall prey to misconceptions that can compromise durability and safety. Let’s clarify some nuanced points that often go unnoticed, ensuring your project stands the test of time.
First, a widespread myth is that all composite boards are equally maintenance-free. In reality, variations in manufacturing, core material, and surface coating significantly impact longevity, especially in challenging climates. For example, capped composite boards offer superior moisture resistance, but only if properly installed and maintained; neglecting proper sealing can lead to mold and staining over time.
Another common error concerns the assumption that visible fasteners are always the best choice for aesthetic appeal. While hidden fastener systems provide a sleek look, they can be misapplied if not installed correctly, leading to squeaks, squeals, or uneven surfaces. Advanced builders often opt for stainless steel, corrosion-resistant screws combined with pre-drilling techniques to prevent cracking, especially in coastal environments—see the detailed insights in this expert guide.
Beware of underestimating the importance of proper stair design — a critical element often overlooked. For instance, inconsistent riser heights not only pose safety hazards but can also make the entire deck appear poorly constructed. A subtle miscalculation here can cause trips and falls, especially in wet conditions common near saltwater. For sophisticated designs, consult specialized stairbuilding resources.
Now, you might wonder: how deep should I go into detailing my drainage system under stairs to prevent rotting? Advanced builders recognize that neglecting proper ventilation and water runoff can lead to premature decay of supporting structures. In fact, a recent study published in the Occupational Safety and Health Administration journal emphasizes ventilation’s role in extending the lifespan of outdoor timber elements.
Having accurate knowledge of these nuances can make all the difference in creating a safe, long-lasting outdoor living space. Remember, investing in quality materials and proper techniques—like using steel framing near saltwater—pays dividends over the years. Curious about how to integrate these advanced practices into your current project? Reach out through our contact form.
Have you ever fallen into this trap? Let me know in the comments.
Keeping Your Decks and Stairs in Prime Condition
Ensuring your outdoor living spaces stay functional and beautiful requires more than just quality materials—you need the right tools and maintenance routines. One of my go-to strategies involves regularly inspecting fasteners and structural components using a cordless electric impact driver equipped with a torque setting. This tool provides the precision needed to check fastener tightness without overdriving, which can damage composite materials. I prefer a model like the DeWalt DCF899 because it combines power with finesse, making routine checks quick and effective. For cleaning, I swear by using a soft-bristle broom combined with a gentle, environmentally friendly cleaner—never harsh chemicals that can degrade surfaces over time.
When it comes to sealing and protecting decks, a sprayer like the Chapman 29000 GFCI Electric Paint Sprayer allows me to apply water-based sealants evenly on large surfaces. Consistent resealing every couple of years prevents moisture ingress, especially at cut edges and joints where moisture can penetrate and cause premature wear. Remember, protective finishes should complement your investment in high-quality composite boards, like those recommended in this guide.
How do I maintain stairs over time?
Stairs endure frequent foot traffic and exposure to the elements, making maintenance a priority. A proven method involves periodically applying a corrosion-resistant protector like CorrosionX to metal components—especially if your stairs use steel framing. Additionally, using a small detail brush, I routinely inspect and lubricate hinges and fasteners for early signs of wear or corrosion. Installing anti-slip treads not only enhances safety but also protects the wood or composite surfaces from moisture damage. For ongoing safety and aesthetic appeal, replacing worn-out handrails with aluminum options can be wise, as they resist saltwater corrosion—more details about this upgrade are available in this post.
Hidden Lessons That Changed My Deck Building Game
- One of the toughest lessons I learned was the importance of material selection; assuming all stainless steel is created equal can be costly in saltwater environments, leading me to specify 316-grade fasteners for long-term durability.
- Ignoring proper drainage and ventilation beneath outdoor stairs caused me to face rot and instability. Now, I know that meticulous foundation prep and airflow can prevent costly repairs in coastal conditions.
- Cutting composite boards without the right tools and techniques resulted in frayed edges and wasted material—an avoidable mistake that taught me precision and patience are key for professional results.
- Overlooking the significance of sealing and protective finishes on cut ends led to mold issues and quicker degradation. Small investments in proper sealing can extend the lifespan of my outdoor spaces dramatically.
- Finally, I realized that safety and style can go hand-in-hand—choosing aluminum railings and anti-slip treads not only enhances the look but also ensures safety amidst salt-laden humidity and frequent use.
Tools and Resources That Elevate My Outdoor Projects
- The aluminum railing guides transformed how I approach style and durability near sea air. Trustworthy because it combines expert insights with real-world experience.
- My secret weapon is the precision level and fasteners; they save hours of guesswork and ensure safety in every project.
- For cutting composite boards, I rely on specific saw blades and lubricants—these small details make a big difference in quality and finish.
- The composite decking resources I use help me select the right materials that resist corrosion, wear, and staining over years of coastal exposure.
Your Next Step Toward Deck Mastery Starts Now
Remember, building durable, safe, and beautiful outdoor spaces in saltwater climates is a continuous journey of learning and adapting. The lessons I’ve shared are just the beginning; applying them will turn your outdoor projects into lasting masterpieces. Don’t let common pitfalls hold you back—embrace quality materials, proper techniques, and expert insights. If you’re ready to elevate your outdoor living spaces, reach out through our contact form and let’s create something extraordinary together. What’s the biggest challenge you’ve faced with coastal deck building? Share your story below—I’d love to hear it.