I remember three years ago, sitting on my brand-new composite deck with a perfectly grilled steak and a glass of wine. Within ten minutes, I wasn’t eating dinner; I was fighting a war. I had moths in my salad and mosquitoes treating my ankles like an open bar. It was a total failure of a night, and frankly, embarrassing for someone who prides themselves on building great outdoor spaces. The culprit? Those high-intensity, cool-white floodlights I’d installed thinking more light was better. I learned the hard way that when it comes to custom composite decking ideas, the lighting layout is just as important as the boards themselves. Today, I am going to show you exactly how to light your dining area so you can actually see your fork without inviting every insect in the county to join the party. We’re moving away from the ‘bug magnet’ approach and toward a strategic, low-voltage setup that focuses light where you need it, and not into the eyes of every passing beetle. Have you ever had a beautiful summer night ruined by a swarm of uninvited six-legged guests? Let me know in the comments because I truly thought I was the only one who had made such a rookie mistake.
Forget the Floodlights and Fix Your Lighting Strategy
The biggest mistake I made early in my career was assuming that ‘bright’ meant ‘better.’ I once installed a pair of 5000K daylight LEDs directly over a client’s dining table. It looked like a surgical suite, and every moth within a three-mile radius agreed. According to research published in the journal Ecological Applications, insects are significantly more attracted to the shorter wavelengths of blue and UV light found in those bright white bulbs than they are to the longer wavelengths of yellow and amber tones. By simply choosing a warmer color temperature, you can cut down your bug traffic by a massive margin. It’s about creating a glow, not a spotlight. I’ve found that using low-voltage transformers to power subtle, dimmable fixtures allows you to keep the light levels just high enough to enjoy your meal while keeping the surrounding area in soft shadow. We also need to think about safety, especially when lighting those deck stairs for guests who might be leaving the table after a few drinks.
Will switching bulbs really keep the mosquitoes away?
I get this question all the time from homeowners who think they need a massive bug zapper to have a peaceful evening. While no lighting setup is a magical ‘force field’ against every single gnat, shifting your spectrum to warm yellows (2200K to 2700K) makes your deck significantly less interesting to the local bug population. We want to light the surfaces—the table, the floor, the perimeter—rather than the air itself. When you aim lights downward or tuck them under a railing, you’re providing the visibility you need for dining without creating the massive ‘beacon’ effect that draws insects from across the yard. In the next section, we’ll dive into the specific fixtures that make this possible.
Hide the Bulbs to Save the Vibe
Lighting a deck is like seasoning a steak; you want to enhance the flavor, not bury it in salt. If you place a bright light directly over your head, you create harsh shadows that make your guests look like they’re in a witness protection program. Instead, we want to bounce light off surfaces. This is where how to install deck lighting under the handrail for a subtle glow becomes your best friend. By tucking small LED strips or puck lights under the top rail of your choosing the right composite decking for durable low-maintenance outdoor areas, you create a perimeter of light that defines the space without blinding anyone. Two summers ago, I was finishing a build for a client named Sarah. She had these beautiful, dark boards, but at night, the deck just disappeared into the woods. We tried standard post lights, but they just created glare on her wine glass. I spent three hours on my hands and knees retrofitting low-voltage wires through the joists to install under-rail LEDs. The moment we flipped the switch, the grain of the boards popped, and the ‘bug factor’ vanished because the light was hitting the floor, not the air where the gnats fly. It taught me that the lighting trick that highlights the grain of your wood isn’t just about aesthetics; it’s about control.
Why Downward Pressure is the Best Lighting Move
When you point a light up, you’re basically sending a flare to every moth in the neighborhood. When you point it down, you create ‘pools’ of light. Think of your dining table as a stage. You don’t need a spotlight from the balcony; you need a soft glow that lets you see your plate. I’ve found that using the lighting layout that makes a small deck look twice as big involves placing lights at the edges of your deck and pointing them inward toward the floor. This expands the visual boundaries of the space. If you have stairs leading off the dining area, you have to be even more careful. Avoid lights that shine directly into the eyes of someone walking up. Instead, use recessed riser lights. It’s about the best way to light stairs for safety without creating a glare, ensuring that each step is clearly defined by a shadow line rather than a blinding beam.
Can One Transformer Handle the Whole Yard?
The engine behind this entire setup is your transformer. If you’re planning a larger project that includes a dining area, a grilling station, and perimeter steps, you can’t just plug these into a standard wall outlet and hope for the best. You need to calculate your total wattage. I always tell my clients to buy a transformer with 20% more capacity than they think they need. This prevents ‘voltage drop,’ which is when the lights at the end of the line look dimmer and yellower than the ones at the start. Researching the best low-voltage transformers for large outdoor lighting projects will save you the headache of flickering lights halfway through a dinner party. It’s the difference between a professional-looking oasis and a DIY project that looks like it’s struggling to stay powered.
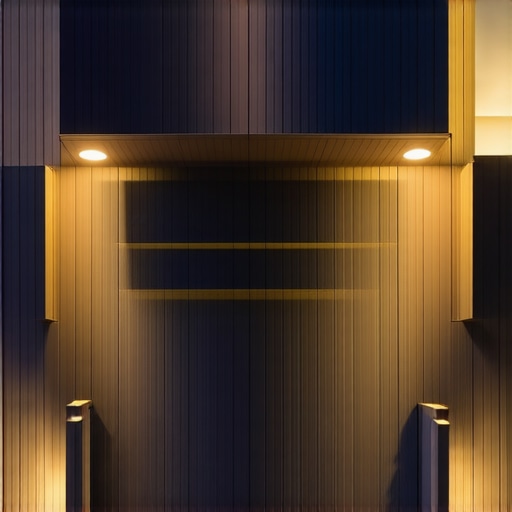
You might be thinking, ‘Okay, I’ll just buy the warmest bulbs and call it a day,’ but there’s a nuance most homeowners—and even some contractors—completely miss. Most people assume that to make a deck safe, you need to bathe every inch in light. But here’s the contrarian truth: over-lighting is often more dangerous than under-lighting. When you create high-contrast ‘hot spots,’ your pupils constrict, making the unlit areas—like that last step or a dark corner—appear pitch black to the human eye. This is a concept known as ‘disability glare.’ A study by the Illuminating Engineering Society (IES) highlights that uniform, low-level illumination is far superior for safe navigation than intense focal points. This is exactly why the best way to light stairs for safety without creating a glare involves subtle, recessed fixtures rather than overhead floodlights.
Have you ever fallen into the trap of over-lighting your space only to find it actually harder to see? Let me know in the comments, because I see this ‘more is better’ mistake happening on nearly every DIY project I’m called in to fix. Beyond the light itself, the physical structure often hides a secondary trap. When you transition from old wood to new materials, like those featured in composite decking trends 2025: the ultimate guide for outdoor enthusiasts, the thickness of the boards changes. If your builder doesn’t account for that extra quarter-inch, your first and last steps will be slightly off-height. It sounds minor, but the stair stringer measurement mistake that ruins your stride is a leading cause of trips and falls. Your brain expects every step to be identical; even a 3/8-inch variance is enough to cause a stumble.
Why do my new composite steps feel different than my old wood ones?
It usually comes down to the ‘rise and run’ calculation being ignored during a retrofit. I recently visited a project where the homeowner complained their stairs felt ‘clumsy.’ It turns out why your deck stairs feel like a ladder and how to fix the rise was the exact issue they were facing. They had installed thick capped-composite boards over a frame designed for thinner cedar. To fix this properly, you often have to re-cut the stringers or adjust the landing pad. This level of precision is one of the benefits of working with a professional deck builder in your outdoor projects. We don’t just slap boards down; we calculate the physics of how you move through the space. For a cleaner, more sophisticated look, I often recommend why your deck stairs should have closed risers for a modern look, which also allows for easier mounting of those crucial, low-glare LED safety lights.
The final ‘oops’ factor I see with advanced DIYers involves the deck surface itself. People get so excited about the aesthetics of choosing the right composite decking for durable low-maintenance outdoor areas that they forget the skeleton underneath. If you don’t know the joist spacing secret for a solid-feeling composite surface, your high-end boards will feel ‘spongy’ when you walk to the dining table. Furthermore, if you use the wrong hardware, you’ll encounter the hidden clip mistake that leads to buckling deck boards as the seasons change and the material expands. True expertise isn’t just about the glow of the lights or the color of the boards; it’s about the math and the invisible mechanics that keep your sanctuary standing for decades.
To achieve that level of precision where every board feels rock-solid and the lighting is perfectly balanced, you need to stop relying on standard household tools. I’ve seen too many DIYers struggle with basic drills when they should be using a dedicated impact driver for composite installs. If you are serious about a professional finish, you need a tool that provides consistent torque without stripping the heads of your fasteners. I personally use a hydraulic impact driver because it’s quieter and offers much smoother control. Even with the best gear, mistakes happen, so keep the best tool for removing a single stripped deck screw in your bag; it turns a potential half-hour of frustration into a ten-second fix.
Protect the Skeleton with This Invisible Shield
The biggest regret I hear from homeowners five years after a build isn’t about the color of the boards; it’s about the rot happening underneath. Before you even think about laying your first board, you must address the longevity of the frame. I always tell my clients about the hidden cost of skipping joist tape on a new build. This simple butyl tape creates a waterproof barrier on the top of your joists, preventing water from sitting in the screw holes and rotting the wood from the inside out. To take it a step further, I’ve found that why I paint the tops of my joists black before installing composite is about more than just aesthetics. It hides the bright green of the pressure-treated lumber in the gaps between the boards, making the shadows disappear and giving your deck a clean, high-end look. 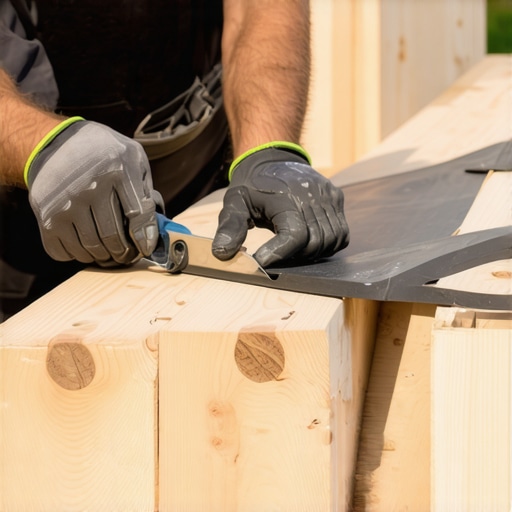
How do I maintain my composite deck and stairs over the long haul?
Maintenance for composite is famously easy, but it isn’t ‘zero.’ The worst thing you can do is get impatient and grab a high-powered cleaner. I constantly have to explain why you should never use a pressure washer on composite decks-2; the intense pressure can actually scar the surface and void your warranty. Instead, a simple seasonal scrub with warm, soapy water and a soft-bristle brush is all you need. If you’re worried about structural integrity, follow the guidelines from the North American Decking and Railing Association (NADRA), which recommends a professional inspection every year to check for ledger board security and stair stability. This is one of the benefits of working with a professional deck builder in your outdoor projects—we know exactly where the stress points are.
The Future of Smart Outdoor Spaces
Looking ahead, I predict we are going to see a massive shift toward ‘smart’ integration in the outdoor living sector. We are already seeing boards with better thermal resistance, but soon, integrated sensors for moisture detection and automated lighting that adjusts based on the sunset will be standard. To stay ahead of the curve, ensure your substructure is over-engineered. For instance, why I use structural screws instead of lag bolts for stairs is already becoming the industry standard because they offer superior shear strength and won’t loosen over time as the wood shrinks. My best advice for you right now? Try applying a 4-inch wide strip of joist tape to your next project; it’s a small investment that doubles the life of your frame and ensures your outdoor sanctuary stays safe and beautiful for decades.
What My First 100 Deck Builds Taught Me About Failure
It took me years to realize that even the most expensive composite decking is only as good as the skeleton it rests on. In my early career, I obsessed over board colors while ignoring the joist integrity beneath. I’ve since learned that the best results always come from understanding the benefits of working with a professional deck builder in your outdoor projects because we have already navigated the expensive mistakes most homeowners face. Another major ‘lightbulb moment’ was the discovery that safety isn’t just about sturdy railings; it is about how the human eye adjusts when moving from a brightly lit kitchen to a dim deck. If you want a space that feels solid and secure, you must prioritize the invisible mechanics. Finally, never settle for ‘close enough’ on your stairs; that extra quarter-inch of variance in step height is exactly what causes the trips you see at every neighborhood BBQ. Planning for the future means looking at innovative outdoor living ideas with composite decking in 2025 to ensure your project stays ahead of the curve.
The Shortlist of Tools for a Pro-Level Finish
#IMAGE_PLACEHOLDER_E#
When you are ready to move past the basics, these are the resources I personally trust to get the job done right. First, I always point people toward the North American Decking and Railing Association (NADRA) for their safety checklists; they are the gold standard for structural integrity. For the actual installation, a hydraulic impact driver is my go-to tool because it provides the smooth torque needed for composite fasteners without the bone-rattling noise of a standard driver. For those looking for deck builder insights designing your dream outdoor space, I recommend keeping a roll of butyl joist tape and a high-quality 60-watt transformer at the top of your shopping list. These small investments represent the difference between a deck that looks good for a summer and one that stays perfect for a decade. If you are feeling overwhelmed by the technical requirements, you can always reach out through our contact us page for expert guidance.
Your New Backyard Sanctuary is Only a Few Boards Away
Building a space where you can finally relax without the constant buzz of insects or the fear of a trip in the dark is worth every ounce of effort. Your outdoor living area should be a seamless extension of your home’s comfort, offering a place to recharge and connect with family. By focusing on smart composite decking choices and strategic lighting, you are doing more than just adding square footage; you are creating a backdrop for a lifetime of memories. Don’t be afraid to start small, but always build with the intention of longevity and safety in mind. What is the one thing that has been stopping you from finishing your dream deck this summer? Let me know in the comments below!