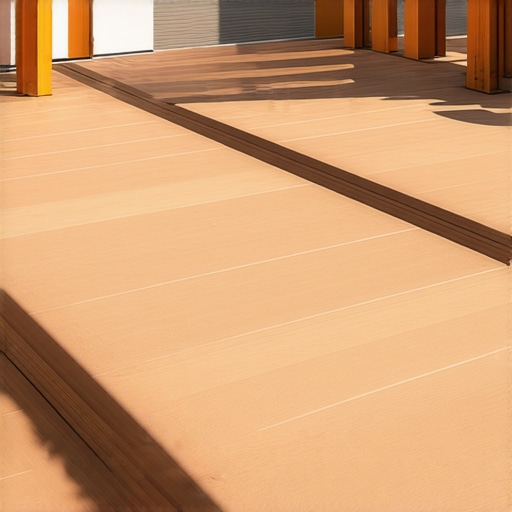
It was a warm summer afternoon when I finally looked out at my backyard and realized my deck was starting to feel… flat. The paint was chipped, the edges looked worn, and honestly, it lacked that polished finishing touch I secretly desired. That moment hit me hard—why was I so hesitant to give it the visual upgrade it deserved? I learned the hard way that picture-framing your deck isn’t just about style; it’s about protecting your investment and elevating your outdoor space. Today, I want to share what I discovered about this often-overlooked detail and how it can transform your deck into a masterpiece.
Adding Value and Style: The Unexpected Power of a Picture Frame
Picture framing, in decking terms, involves creating a clean, defined border around your entire surface using the same or contrasting materials. It’s a subtle detail, but one that dramatically enhances visual appeal. More than just aesthetics, it acts as a protective edge, shielding your deck’s perimeter from expanding and contracting seasons, moisture, and everyday wear. I used to think it was a purely decorative choice, but I found that a well-executed border can extend the lifespan of your deck, saving you money and hassle down the line.
The beauty of this technique is its versatility. Whether you’re working with composite decking, which I highly recommend for durability, or traditional wood, picture framing offers a uniform boundary that ties the entire design together. In fact, many professional deck builders advocate for this approach. If you want to see how it’s done and get inspired, check out this [transformative outdoor living idea](https://deckdesignbuild.com/transform-your-outdoor-living-with-custom-composite-decking-ideas).
But here’s the thing—missing this detail can lead to uneven board expansion, water infiltration, and even structural issues over time. I learned this early on the hard way when I skipped sealing the edges. It wasn’t long before I faced warping and splinters because I underestimated the protective power of a border.
Will Picture Framing Ruin the Deck’s Look? Is It Overkill?
Initially, I was worried that a border might look too bulky or out of place. My first attempt was a bit too heavy-handed, and it felt more like a band-aid than a design feature. The key is to match the border with your overall style—thin strips for a sleek look, or wider borders if your deck is grand and open. It’s a small detail, but it makes a big difference.
Looking back, one mistake I made early on was choosing the wrong material for the edging—cheap vinyl instead of durable composite or pressure-treated wood. That taught me that quality materials are worth the investment, especially since they offer better weather resistance and longevity. For expert tips on material choices, I suggest exploring this [guide to selecting the right composite decking](https://deckdesignbuild.com/choosing-the-right-composite-decking-for-durable-low-maintenance-outdoor-areas).
Now, if you’re wondering whether this is a project you can handle yourself or if you should call in a pro, I recommend reading about how a [skilled deck builder can turn your garden into a private oasis](https://deckdesignbuild.com/how-a-skilled-deck-builder-can-turn-your-garden-into-a-private-oasis). Often, a professional touch ensures that your picture framing not only looks great but also functions perfectly.
As we move forward, I’ll walk you through the steps to get your deck border just right—no more guessing, just practical, proven tips to make your outdoor space the envy of your neighborhood. Are you tired of your deck looking tired? Have you faced the challenge of upgrading a worn-out surface and wished for a simple way to boost its appeal? You’re in the right place.
Measure and Plan Your Border
Begin by assessing your deck’s dimensions and deciding on the width of your border. I once used a simple tape measure to mark 3-inch strips along each edge, drawing chalk lines to visualize the boundary. This step is crucial to ensure symmetry and a professional look. Think of it like framing a picture—precision matters for a clean, aligned finish.
Select Quality Materials
Choose durable materials like composite boards or pressure-treated wood for your border. During my first attempt, I initially grabbed cheap vinyl scraps, which warped after the first winter. Investing in quality pays off by maintaining appearance and stability over time. Refer to this guide to selecting the right composite decking for more tips.
Prepare the Deck Edges
Clean the edges thoroughly, removing dirt, old paint, or splinters. I used a wire brush and a garden hose to scrub the surface, ensuring proper adhesion. If the surface isn’t clean, your border might lift or warp. This step is like prepping a canvas before painting—attention to detail prevents future issues.
Cut and Fit the Border Boards
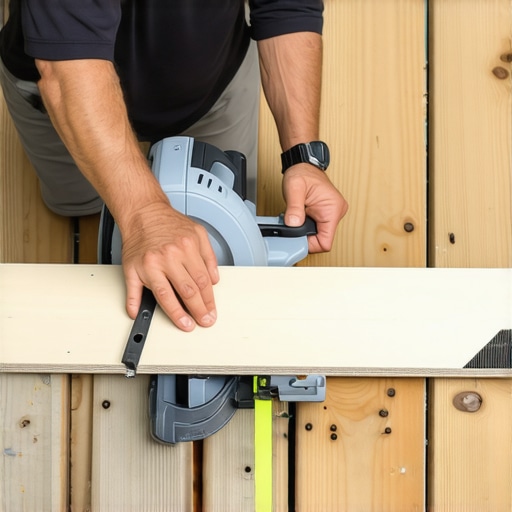
Measure and cut your border boards precisely, accounting for slight overlaps at corners. I used a miter saw to achieve clean 45-degree angles where borders meet. Accurate cuts prevent gaps and make installation smoother. Think of it as fitting puzzle pieces—each cut must be just right.
Attach the Border Boards Securely
Fasten the boards using corrosion-resistant screws, ensuring they sit flush. I pre-drilled holes to prevent splitting, then drove screws at consistent intervals—about every 12 inches. Proper fastening keeps everything stable, especially during weather shifts. For critical securement, consider using structural screws, as recommended in this leveling tip for decks.
Finish and Seal Edges
Seal the cut ends and the border joints with a weatherproof sealant, like an exterior-grade polyurethane. I applied a bead along the edges, which helped prevent moisture infiltration and warping. This final touch is like applying a varnish—it protects your work and prolongs its life. Don’t skip this step; it’s vital for durability.
Inspect and Adjust
Once installed, step back and review the border’s alignment and stability. I found a slight misalignment at one corner, so I removed the screws and adjusted the position before reattaching. This step ensures your border looks polished and functions correctly—no loose boards or uneven edges. Think of it as a final check before unveiling your masterpiece.
 Many homeowners believe that installing a deck or outdoor stairs is straightforward, but seasoned experts know there’s more beneath the surface. A common myth is that choosing the cheapest composite decking guarantees durability; however, not all materials are created equal. For example, some low-cost options may contain fillers or inferior resins that degrade faster when exposed to sunlight, leading to costly replacements. As I often emphasize in composite decking trends 2025, investing in high-quality materials saves long-term headaches.
Another nuanced mistake involves stair design. Many overlook the importance of proper stringer placement and support—skimping here can lead to wobbling or unsafe steps. Advanced builders know that every step should conform to the 11-inch tread rule for comfort and safety, as outlined in best stair practices. Overlooking this detail can result in trip hazards, especially for children or seniors.
Are Extra Supports Always Necessary for Larger Decks?
Contrary to popular belief, larger decks don’t always require more supports if the framing is engineered correctly. Relying solely on superficial reinforcement or standard ledger attachments can lead to structural issues over time. Many underestimate the importance of proper flashing and ledger board installation—an error that can cause water infiltration and rot, as highlighted in deck ledger security. Professionals understand that a robust foundation involves precise calculations and high-quality fasteners like structural screws, not just affordable hardware.
Stainless-steel fasteners and hidden fastener systems are often dismissed as overkill, yet they offer superior corrosion resistance, prolonging the deck’s lifespan. Skipping these can make your outdoor investment vulnerable, especially in high-moisture areas. I recommend consulting with a professional deck builder to understand these nuances.
Lastly, many homeowners get caught up in aesthetic choices, such as color or pattern, without considering how these decisions affect maintenance. Dark-colored composite boards, for instance, absorb more heat, leading to quicker degradation and cracking, especially in sunny climates. For insight into these subtle but impactful factors, definitely check out dark composite decking issues.
Have you ever fallen into this trap? Let me know in the comments.Maintaining your outdoor living space requires not only quality materials but also the right tools and proactive routines. Investing in precise equipment ensures your deck’s longevity and keeps it looking pristine over the years. For example, I rely heavily on a high-torque cordless drill with adjustable clutch settings, like the Makita XPH12, which allows me to drive fasteners accurately without overdriving and damaging composite boards. Such professionalism in tool selection speeds up the process and prevents costly mistakes.
How do I maintain my deck’s integrity over time?
A key aspect is regular cleaning and sealing to combat weathering. I prefer using a padded deck brush, which gently lifts dirt without scratching surfaces, paired with a biodegradable cleaner like Defy Wood Cleaner for environment-friendly maintenance. After cleaning, applying a quality sealant with a sprayer, such as the Wagner Power Painter Series, delivers a uniform coat that protects against moisture infiltration—crucial for composite and wood decks alike.
Future prospects in deck maintenance tools
The trend is moving toward smart technology integration; IoT-enabled sensors now monitor humidity and wear levels, alerting homeowners when maintenance is due. As these become more affordable, expect to see automated systems that can schedule cleanings or sealant applications, minimizing manual effort. This evolution aligns with the growing demand for sustainable and low-maintenance outdoor spaces. I recommend you try upgrading your deck care routine by incorporating a dual-action sprayer for sealants—it’s a game-changer in achieving professional-quality results with minimal effort. Keep your outdoor haven inviting and durable by staying ahead with the right tools and maintenance strategies.
The Hidden Lessons That Redefine Outdoor Living
One of the most profound insights I gained was the importance of viewing your deck not just as a surface but as a seamless part of your home’s lifestyle. It’s easy to focus on aesthetics alone, but truly durable and inviting outdoor spaces come from understanding load distribution and seasonal movement—details I learned through trial, error, and deep conversations with seasoned builders. Sometimes, overlooking these subtle aspects can lead to costly repairs down the line. Another lesson was recognizing the transformative power of small touches, like hidden fasteners and storm-proof sealants, which elevate functionality without sacrificing style. The importance of investing in high-quality materials became clear to me after realizing how much cheaper it is to do it right the first time than to redo flawed work later. Lastly, I discovered that backyard beauty isn’t just about the materials but also about thoughtful integration—blending your deck with surrounding landscaping and lighting for a cohesive look that’s both functional and inviting.