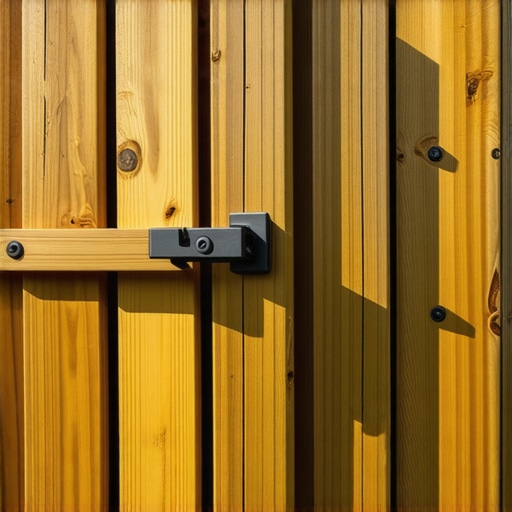
I remember a summer afternoon, sitting on my deck with friends, feeling proud of my DIY project—until someone swung the gate open unexpectedly. That moment of embarrassment made me realize: a latch that doesn’t hold is more than just an inconvenience—it’s a safety concern. Have you ever experienced the frustration of a gate that stubbornly refuses to stay shut? You’re not alone. Many homeowners invest time and effort into building beautiful decks, only to be disappointed when their gates swing open at the worst moments. That lightbulb moment prompted me to learn how to construct a reliable, durable deck gate that truly stays latched.
Why a Secure Deck Gate Matters More Than You Think
In outdoor living, gates serve as entry points and safety barriers—especially if you have little ones or pets running around. A gate that doesn’t stay closed defeats its purpose and can lead to accidents or unwelcome visitors. But what often trips up DIY builders and even some pros is the choice of latch and the way it’s installed. Early in my own projects, I made the mistake of relying on generic hardware, believing that a simple latch would suffice. The result? A gate that would slowly loosen over time, swinging open just when I least expected it.
Through my experience—and plenty of trial, error, and research—I discovered that the secret to a dependable gate isn’t just in choosing the right latch but in understanding the underlying hardware mechanics and proper installation techniques. If you’ve faced similar struggles, you’re in the right place. Today, I promise to share practical tips and techniques that will help you build a deck gate that not only looks good but stays firmly latched. For a deeper dive into customizing your outdoor space, you might want to check out [transform your outdoor living with architectural touches](https://deckdesignbuild.com/transform-your-outdoor-living-with-custom-composite-decking-ideas). Before we get into the nitty-gritty, let’s address one common concern.
Will a better latch really make a difference? Or is it just hype?
A good latch combined with quality installation can mean the difference between a gate that’s a safety feature and one that’s a hazard. I once installed a fancy-looking latch, only to find it failed after a few months because I overlooked a simple detail—the latch’s alignment and tension. Trust me, I learned the hard way that skipping these small but crucial steps can lead to big headaches later. To prevent this common mistake, pay close attention to hardware specifications and proper techniques.
Now that we’ve covered why a secure gate matters, let’s move on to how you can build one that stays latched, regardless of weather or use. Stay tuned for tips on choosing the right materials, precise installation methods, and some expert tricks to keep things tight for years to come.
Select the Right Hardware for Your Deck Gate
Start by choosing a heavy-duty latch designed for outdoor use, preferably with a stainless steel or galvanized finish to resist corrosion. I once bought a cheap plastic latch for my first deck gate, only to find it failed after a few months in the rain, leading me to learn this crucial lesson about durability. Consider options like enclosures with automatic locking mechanisms or sliding latches that provide more security.
Measure and Prepare Your Gate Opening
Use a tape measure to determine the exact width and height of your gate opening. It’s like tailoring a suit — precision matters. During my trial, I mistakenly measured once and cut twice, but double-checking saved me from redoing the entire frame. Mark your measurements on the gate and post accordingly to ensure proper alignment of the latch.
Aligning Hardware for Perfect Operation
Position your latch on the gate and striker on the post, ensuring they align smoothly when the gate swings closed. Think of it like a puzzle piece fitting perfectly; misalignment causes jamming or failure. I used a level and clamps to hold components temporarily, ensuring perfect alignment before securing. Avoid rushing—taking a moment here prevents future headaches.
Use a Spacer or Pencil for Accurate Placement
When marking screw holes, insert spacers or use a pencil to outline where tools will go, maintaining consistency. During my installation, I used a scrap piece of wood as a spacer, which kept the latch straight and functional. This small step guarantees that the latch operates smoothly and remains secure over time.
Secure Hardware with Proper Fasteners
Fasten the latch and striker using stainless steel or weather-resistant screws, driven in straight and tight. Over-tightening can strip the wood or deform the latch, so tighten just enough to prevent movement. I once over-tightened and stripped the screw, leading to a loose latch. Carefully alternating between hand screwdriver and drill ensures control and proper torque.
Test the Latch Under Real Conditions
After installation, close the gate multiple times, testing durability during windy days or heavy use. Adjust tension or reposition if necessary. I learned this by trial; initially, my latch stuck, but readjusting the strike plate improved its reliability immensely. Testing in real-world conditions confirms your work will stand up to everyday use.
Enhance Security with Additional Features
Consider adding a deadbolt, child-proof lock, or chain latch for extra safety. During my own upgrade, I installed a secondary lock, which eased my mind about little ones accidentally opening the gate. Think of it as adding layers of protection, much like reinforcing a bridge for heavier traffic.
Maintain Regular Checks and Adjustments
Over time, hardware may loosen due to weather or usage. Periodically inspect and tighten screws, replace worn components, and keep the latch clean. I found that a quarterly check-up prevented failures and prolonged the life of my gate hardware, ensuring safety and functionality without surprises.
Many homeowners and even seasoned builders often get caught up in surface-level decisions when designing outdoor spaces, but the real mastery lies in understanding subtle intricacies that can make or break a project. For example, a common misconception is assuming that choosing the thickest composite decking guarantees long-term durability. In reality, the hidden factor is the type of resin used and its UV resistance, which determines fade and stain resistance over time. According to research by the Wood Fiber and Composite Industry Association, UV stabilizers in the resin matrix significantly influence the lifespan of composite decking, yet many overlook this detail, risking premature discoloration.
Why Do Some Stair Designs Fail Over Time, Despite Modern Materials?
Interestingly, even the most advanced stair systems can encounter failures if not properly engineered for load distribution. Many builders believe that installing extra stringers or thicker treads alone suffices, but neglecting the importance of proper framing and local load calculations exposes the stairs to warping, cracking, or collapse. Incorporating a deep understanding of structural engineering principles, such as the optimized placement of support beams and flexible connection points, can prevent these issues. Want to see those principles in action? Check out [top stairs design ideas for modern outdoor spaces](https://deckdesignbuild.com/elevate-your-home-top-stairs-designs-for-modern-outdoor-spaces).
When it comes to creating seamless transitions between your deck and yard, many focus solely on aesthetics, forgetting that drainage and ventilation are equally critical. An entirely overlooked nuance is the use of adjustable joist hangers with integrated drainage channels, which not only support the structure but also prevent water accumulation and mold growth beneath the deck. Embracing this advanced detail can extend the life of your deck significantly, saving you money and headaches down the line.
Building a durable, visually appealing composite deck isn’t just about selecting the right planks; it also requires meticulous attention to hardware, fasteners, and installation techniques. For instance, hidden fastening systems improve aesthetics but demand precision during application. Using countersink bits and spacers ensures screws sit flush, preventing wood or composite from swelling and loosening. Many DIY builders falter here, resulting in squeaky, uneven surfaces. To master this, consider reviewing [innovative outdoor living ideas with composite decking in 2025](https://deckdesignbuild.com/innovative-outdoor-living-ideas-with-composite-decking-in-2025).
In conclusion, the realm of outdoor living and deck design is filled with underestimated nuances that can elevate your project from average to professional-grade. Paying close attention to materials’ UV resistance, structural load distribution, drainage solutions, and installation precision can make the difference. Have you ever fallen into this trap? Let me know in the comments.
Maintaining a beautiful and durable outdoor deck requires more than just initial construction; it demands the right tools and a strategic approach to ongoing care. Over the years, I’ve honed my toolkit to include specialized equipment that ensures my decks and stairs stay in top condition, saving time and extending their lifespan. One indispensable tool I’ve found is the cordless impact driver. Its power and portability streamline fastener installation and removal, especially when working with composite decking boards that can be stubborn. I personally prefer models like the Milwaukee M18 Fuel Impact Driver because of its brushless motor and adjustable torque settings, which prevent overdriving screws and damaging the material.
For precise measurements and alignment, a high-quality digital laser level is essential. It guarantees that railings, stair stringers, and even deck framing remain perfectly aligned over time, which is crucial for safety and aesthetics. I use the laser level from Bosch because of its accuracy and durability in outdoor conditions. Proper measurement tools help prevent common issues like uneven stairs or crooked railing installations that can compromise safety or necessitate costly repairs later.
When it comes to long-term results, investing in weather-resistant fasteners and sealants makes a world of difference. For example, I recommend using stainless steel screws and applying a high-quality composite deck sealant annually. The best practices for maintaining composite decking highlight that regular sealing prevents water infiltration, which can cause post rot or underlying frame decay. An easy-to-use power washer with adjustable settings, such as the Sun Joe SPX3000, helps keep the surface clean without damaging the material, but it’s vital to use the appropriate tip and pressure—read the manufacturer’s recommendations carefully.
How do I maintain my deck and stairs over time?
Consistent inspections are key. I schedule quarterly checks to tighten loose screws, replace worn hardware, and apply touch-up sealant. Additionally, maintaining adequate drainage around your deck prevents water pooling and minimizes moisture-related issues, especially in shaded or poorly ventilated areas. For stairs, ensure stringers are free from debris and cracks, and consider reinforcing with metal brackets if you notice any movement. Remember, a well-maintained deck not only looks better but can last decades longer.
Predicting future trends, I believe integrating smart sensors to monitor moisture or structural integrity could revolutionize outdoor maintenance. Imagine receiving alerts when a component shows signs of wear—this proactive approach could prevent damage before it becomes costly. As technology advances, investing in compatible tools now will prepare you for these innovative solutions. Don’t forget to explore creative ways to maximize your outdoor space while maintaining routine care: a balanced approach ensures your deck remains a safe, beautiful retreat for years to come. I challenge you to select one of these tools — perhaps your impact driver or laser level — and commit to its regular use. Over time, this habit will pay off by keeping your outdoor living space in pristine condition and ready for entertaining or relaxing anytime.
Lessons That Changed My Approach to Outdoor Living Projects
- Never underestimate the power of precise measurements. A fraction off can cause misalignment and compromise safety, as I painfully learned when my first gate wouldn’t latch properly despite the hardware’s quality.
- Choosing hardware isn’t just about aesthetics; durability in weather, material compatibility, and locking mechanisms can make or break your project’s longevity. My mistake was skipping research and paying the price later.
- Installation patience is a virtue. Rushing through steps like aligning latch components or securing fasteners often leads to recurring issues. Taking my time with alignment and testing paid off in the long run.
- Larger lessons come from setbacks. When my gate swung open unexpectedly, I realized that understanding hardware mechanics and correct installation techniques are essential—more than just following instructions.
Tools and Resources That Elevate My Deck Building Experience
- The Milwaukee M18 Fuel Impact Driver has been invaluable for securing hardware tightly without stripping screws, especially in weathered wood and composite materials.
- A reliable digital laser level from Bosch ensures perfect alignment of gates, rails, and stairs, preventing safety hazards and uneven surfaces that can detract from your outdoor aesthetic.
- Investing in weather-resistant stainless steel fasteners and high-quality sealants, like those recommended in top maintenance guides, extend the life of your deck and gate components, saving long-term frustration and costs.
- For design inspiration and expert insights, exploring [transform your outdoor living with custom composite decking ideas](https://deckdesignbuild.com/transform-your-outdoor-living-with-custom-composite-decking-ideas) has provided fresh perspectives on combining functionality with style.
Keep Your Outdoor Space Inviting and Secure
Remember, building a durable, safe, and beautiful deck gate isn’t just a task—it’s an investment in your comfort and peace of mind. Cultivate patience, embrace quality tools, and don’t shy away from learning from setbacks. Your outdoor retreat is worth the effort, and with each project, you’re creating a space that reflects your dedication and vision. What small tweak will you make today to improve your gate’s reliability? Share your plans below and keep the outdoor living journey going!