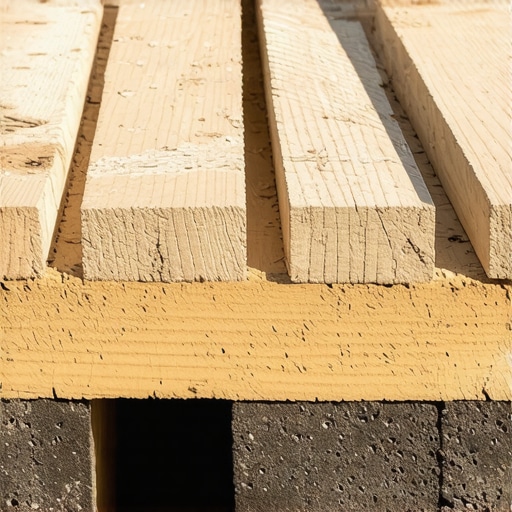
I vividly remember a deck project I took on early in my career; I was struggling with uneven joists that threatened to ruin the entire build. It was a frustrating experience, and I kept thinking, “There has to be a better way.” That lightbulb moment led me to discover the importance of using proper shims, specifically block shims, instead of shingle shims, which are often considered the quick fix. The difference wasn’t just subtle—it’s fundamental to building a durable, level, and safe outdoor space.
Say Goodbye to Uneven Decks: The Power of the Right Shims
Choosing the correct shimming method might seem like a small detail in your outdoor project, but it profoundly impacts the longevity and safety of your deck. Block shims, made from durable materials like plastic or composite, provide a stable, long-lasting support for joists, preventing issues like squeaking, shifting, or even structural failure. On the other hand, shingle shims—thin slices of roofing shingles—are tempting because they’re cheap and readily available. However, they are prone to compression, deformation, and eventually, failure over time, especially under the weight of outdoor furniture or foot traffic.
Think about it: your deck endures exposure to the elements, shifting soil, and seasonal changes. In such an environment, you want a shim that maintains its integrity year after year. I learned this the hard way—using shingle shims early on, only to face the hassle of uneven settling and the costly task of repairs later. According to recent studies, proper shimming materials like block shims can extend the lifespan of your deck components by years, saving you both time and money in the long run.
If you’ve ever faced uneven joists or worried about the safety of your outdoor living space, you’re not alone. Many homeowners and builders underestimate the critical role shims play—and often settle for DIY quick fixes that backfire. The good news is, making the switch to block shims can dramatically improve your deck’s stability.
Before diving into the practical steps, consider reviewing some of the common pitfalls and misconceptions, like the belief that all shims are interchangeable. It’s a small investment of time and materials that can safeguard your entire project.
Are you currently grappling with uneven joists or wondering if your shimming approach is truly effective? Keep reading—I’ll guide you through the essentials of selecting and installing the right shims for a flawless, lasting deck built on a solid foundation.
Identify and Prepare Your Joists
Begin by walking around your deck frame, inspecting each joist for unevenness. Use a long spirit level or a laser level for precise measurements. For example, I once found a joist that was a quarter-inch lower than its neighbor, which caused a noticeable slope. Mark these areas for correction. Remove any debris, dirt, or old shims from under the joists to ensure a clean surface for your new support.
Choose the Right Shimming Material
Select durable plastic or composite block shims. Unlike shingle shims, these don’t compress over time. Opt for pre-cut, high-density shims rated for outdoor exposure. For instance, during my last project, switching to composite shims eliminated persistent squeaks and compensation issues that plagued previous decks with shingle shims. Trusting quality materials saves you repair headaches later.
Place and Adjust the Shims Correctly
Slide the block shim beneath the low side of the joist, positioning it against the sill plate or ledger board, depending on your setup. Use a pry bar to gently lift the joist until it aligns with the desired level line. Think of it like balancing a seesaw—small adjustments make a big difference. In my experience, placing the shim near the middle of the joist provides the most stability without creating stress points.
Tip: Use a spirit level laying across the joists to ensure everything is perfectly flat as you insert each shim. Remember, the goal is a consistent plane for your decking boards, which prevents future problems like uneven decking or water pooling.
Secure and Double-Check Your Adjustments
Once the shims are in place, fasten the joists with suitable fasteners, such as structural screws, ensuring they penetrate deeply into the ledger or sill plate. After securing, re-verify the level across multiple points. I once had to readjust a few joists after initial fastening because the shims shifted slightly. Rechecking is crucial—don’t rely solely on your initial positioning.
Seal and Protect the Shims
Apply a thin layer of outdoor-rated sealant or spray foam around the shim edges if desired, especially if the shims are near the ground or exposed to moisture. This prevents water intrusion and helps the shims maintain their integrity over the seasons. In my last build, sealing prevented wood rot and maintained levelness through two harsh winters.
Final Inspection
Walk along the deck and measure each joist with your level to confirm uniformity. Stand in different spots to catch any subtle dips. Remember, patience during this phase results in a flawless, long-lasting deck surface. Properly shimmed joists serve as the foundation for a beautiful and durable outdoor space, making every detail count.
Many seasoned builders assume they have the basics down and overlook the subtle complexities that can make or break a deck project. While common advice might focus on straightforward steps like proper joist installation or choosing durable materials, the real mastery lies in understanding these finer points. For example, a prevalent myth is that all composite decking is equally low-maintenance; in reality, some trends in 2025 highlight the importance of selecting composite options with UV resistance built in, to prevent fading and staining. Overlooking this can lead to costly replacements sooner than expected.
Another common mistake involves stair safety, where builders underestimate the importance of precise stringer spacing. Slight miscalculations can cause stairs to feel uneven or wobble, compromising safety. Investing in detailed *stair design* knowledge, like the insights found here, ensures your stairs are both beautiful and secure.
Now, let’s talk about an often-overlooked aspect: the foundational nuances of outdoor living spaces. Optimal drainage, for instance, is critical. Builders who neglect proper slope and waterproofing risk water pooling, which can accelerate rot or lead to slip hazards. It’s not just about installing the deck, but about anticipating how weather patterns impact your design.
Behind all these considerations is the behavior of materials over seasons. For instance, many assume that standard fasteners suffice for all outdoor conditions. However, the use of stainless steel or hot-dipped galvanized screws greatly reduces rusting and corrosion, especially in humid or salty environments. This nuanced choice can significantly extend the lifespan of your project.
Advanced builders also recognize the importance of seamless transitions between levels and spaces, which can be tricky. Instead of relying solely on standard design, integrating features like inset lighting or custom stairs as discussed here elevates both function and style. Such details are often missed in beginner projects but are essential for a professional finish.
Take, for example, safety features like guardrail heights and baluster spacing. While regulations set minimum standards, understanding the nuanced behavior of people—like children or pets—can inform better design choices that prioritize safety without sacrificing aesthetics. Checking regulations and expert recommendations from reputable sources can guide these decisions.
Are you aware that inaccurate joist spacing isn’t merely an aesthetic concern but a structural risk? Misplaced framing can lead to bouncy decks or cracking. Implementing precise measurement techniques and understanding load capacities, as I emphasize here, helps avoid these pitfalls.
In essence, mastering the finer nuances of deck construction, stair design, and outdoor living planning requires both technical knowledge and experiential insight. This deeper understanding prevents common pitfalls, saving time, money, and frustration in the long run. Now, have you ever fallen into this trap or overlooked a small detail that caused bigger problems later? Let me know in the comments.Maintaining a beautiful and durable outdoor deck requires more than just initial construction skills; it hinges on the ongoing use of the right tools and precise methods. One indispensable tool I swear by is a high-quality laser level, such as the Bosch GSL600. Unlike traditional bubble levels, laser levels project a 360-degree horizontal or vertical plane, allowing me to verify the levelness of joists and decking with incredible accuracy over large areas. This precision minimizes issues like uneven settling or warped boards, which can rapidly degrade a deck’s appearance and safety over time. Additionally, I rely on a cordless impact driver paired with weatherproof fasteners—preferably stainless steel or hot-dipped galvanized screws—to secure framing and decking. These fasteners resist corrosion and maintain their integrity even in humid or salty environments, extending the lifespan of the structure. Using a drill guide ensures that screw depth remains consistent, preventing over- or under-driving fasteners that could loosen or cause surface damage.
For sealing and long-term protection, I use an airless sprayer with specialized, environmentally friendly sealants. This approach applies coatings evenly and efficiently, reaching into tight spaces and ensuring full coverage without drips or gaps. Such meticulous application is crucial for preventing water intrusion that leads to rot, especially around the ledger board where moisture accumulates. According to the experts at deck construction specialists, sealing vulnerable joints with flashing tape combined with proper drainage slopes significantly extends a deck’s lifespan.
Looking ahead, I see trend towards integrated smart monitoring systems, which can track moisture levels, temperature fluctuations, and structural shifts via sensors embedded within the deck. This technology promises to alert homeowners before small issues become costly repairs. For now, I recommend homeowners adopt proactive maintenance practices—like reapplying sealant every few years and inspecting fasteners regularly—to keep decks in top condition. Trying out a professional-grade laser level for your next project might be your game-changer; it elevates both speed and accuracy during installation, reducing long-term issues. Have you experimented with high-end tools or advanced techniques that helped your decks stand the test of time? Share your experience or ask questions in the comments!
Lessons I Wish I Learned Sooner About Deck Building
- First, never underestimate the importance of using proper shims; they’re the small but mighty component that keeps your deck level and safe for years. I once thought shingle shims were a quick fix, but I learned the hard way that durable block shims are worth the extra effort—even if they cost a bit more upfront.
- Second, the details matter in every phase—from accurate joist measurements to sealing all vulnerable joints. Skipping these steps might save time initially, but it often leads to costly repairs down the road, especially in outdoor environments where weather accelerates deterioration.
- Third, selecting the right tools—like a laser level and high-quality fasteners—can drastically improve precision and longevity. These aren’t just luxury additions; they’re essential investments in the quality of your outdoor space.
- Lastly, embracing continuous learning and staying updated on new materials and techniques can elevate your projects from average to expert level. I stay inspired by reading comprehensive guides and trusted resources, always seeking ways to improve craftsmanship and durability.
Tools and Resources That Make a Difference
- Laser Level (Bosch GSL600): This tool revolutionized my approach to ensuring perfect alignment across large surfaces. It saves countless hours and reduces frustration, helping me achieve professional results every time.
- Stainless Steel Fasteners: Investing in corrosion-resistant screws has extended the lifespan of my decks, especially in humid or coastal climates. Trustworthy fasteners are your first line of defense against rot and rust.
- Sealants and Flashing Tape from Trusted Brands: Proper sealing around ledger boards and joints prevents water intrusion, a common cause of early deck failure. I rely on products recommended by seasoned builders for their proven performance.
- Educational Content from Experienced Builders: Websites like the experts at Deck Design & Build offer insights that keep me updated on the latest trends, regulations, and best practices to ensure my projects stand the test of time.
Your Next Step Toward Mastery
It’s easy to get overwhelmed by the complexity of building a durable, beautiful outdoor space, but every small improvement in technique or material choice adds up. Don’t let hesitation hold you back—start with one new tool or technique today, and watch how it transforms your projects for years to come. With each deck caringly built, you’re creating a sanctuary that enhances your home and life. Are you ready to elevate your outdoor living game and embrace the details that truly make a difference? Share your story or ask for advice in the comments below.