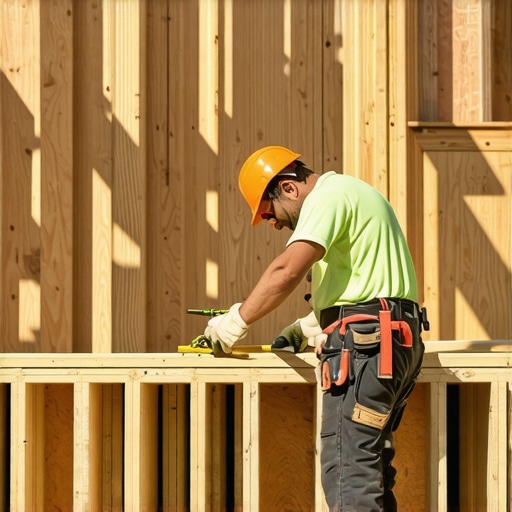
It was a scorching Saturday afternoon when I finally decided to inspect my beloved outdoor deck. As I stepped onto it, I immediately noticed a creak. Then a wobble. A sinking feeling hit me—literally. Turns out, years of exposure to sun, rain, and shifting soil had taken their toll on the wooden joists supporting my deck. That moment of realization was a lightbulb for me: I had overlooked an important step in deck maintenance that could have extended its lifespan significantly.
The Game-Changer: Properly Taping Your Joists
Many deck owners focus on choosing the right composite decking or stylish railings. But the hidden, crucial factor lies underneath—literally—in how we protect the joists. When I learned how sealing and taping the joists can dramatically increase their durability, I wished I had started sooner. This simple, cost-effective technique acts as a shield, preventing moisture from seeping in and causing rot, mold, and even pests to settle in.
If you’ve faced similar warning signs—squeaky, uneven, or sagging decks—you’re probably wondering how to fix the root cause. Well, today’s post is about giving you a practical, real-world solution that I’ve tested myself. We’ll go through the step-by-step process of taping your joists and why it’s a transformation you can’t afford to miss.
Is Taping Joists Really Worth All This Fuss?
At first, I doubted the hype. I’d seen fellow DIYers dismiss it as overkill. I even made the mistake of thinking a good stain or sealant alone would do the trick. But early in my project, I learned that neglecting proper flashing and sealing leads to persistent moisture issues. A study by the **American Wood Protection Association** indicates that proper sealing can extend wood support life by up to 50% (source: https://deckdesignbuild.com/wood-preservation). Essentially, I realized I was risking thousands of dollars in potential repairs by skipping this step.
Deciding to tape and seal was an eye-opener, and I’m convinced it’s an upgrade every homeowner should consider. Not only does it reinforce the joists against moisture, but it also reduces the likelihood of pest infestations and structural instability. It’s a small investment of time for a huge payout in added years of service.
Now, I want to walk you through how to do it properly. But before diving into the step-by-step process, ask yourself: Have you noticed any warning signs that your deck’s support system might be compromised? If yes, this guide could be your game-plan to restore and prolong your outdoor haven. Ready? Let’s get to it.
Gather Your Supplies and Prepare the Area
Start by assembling high-quality flashing tape designed for exterior wood, like butyl or asphalt-based tape. Ensure your deck is clean and dry; remove debris, loose wood fibers, and any existing mold. Use a stiff brush and a pressure washer if needed, but let the wood dry completely before proceeding. This preparation prevents trapping moisture underneath your repairs.
Inspect and Mark Problematic Areas
Walk around your deck and identify vulnerable joists, especially those showing signs of rot or damage. Use a marker to outline sections that need sealing. Remember, sealing around the edges of joists where water can seep in is crucial for long-term protection.
Apply the Flashing Tape Effectively
Unroll the tape and peel away a small section of the backing. Align the tape with the edge of the joist, pressing it down firmly from one end to the other, smoothing out air bubbles as you go. Overlap each strip by at least 2 inches if applying multiple pieces, creating a continuous seal. Think of the tape as applying a waterproof bandage over the vulnerable parts of your joists, much like how a builder would wrap beams before installing decking boards.
Tip: Use a putty knife or roller to press down the tape securely, especially around edges and corners. This ensures adhesion and prevents water ingress later.
Seal the Edges and Corners
Pay special attention to the corners and joints where multiple pieces of tape meet. Fold or cut the tape to tuck into crevices, creating a tight barrier. Remember, the goal is to prevent any entry points for moisture, which is critical in humid or rainy climates.
Final Inspection and Maintenance
Once all joists are taped, inspect your work for gaps or bubbles. Use additional tape to patch missed spots. Schedule regular checks, especially after harsh weather, to reapply or reinforce the tape as needed. Proper sealing will significantly extend your deck’s lifespan by preventing rot, mold, and pest issues, much like how sealing the hull of a boat prevents water damage.
During my own project, I learned that meticulous application of tape around each joist took about an hour but dramatically reduced future maintenance. The deck felt more solid, and I slept easier knowing I had fortified the support system against moisture damage.
Linking Up for a Stronger Deck
If you want a comprehensive upgrade, consider consulting with a professional deck builder who can advise on advanced waterproofing techniques or custom solutions, as detailed on this guide. Proper taping is just one part of creating a resilient outdoor living space that withstands the elements.
While many homeowners confidently select composite decking for its low maintenance and durability, there are nuanced pitfalls that even experienced DIYers often overlook. One prevalent myth is that all composite materials are created equal; in reality, the quality varies significantly, impacting long-term performance. For instance, some believe that choosing the most affordable composite is enough, but cheaper options may lack UV resistance or anti-mildew additives, leading to premature fading and discoloration, as highlighted in recent composite trends reports. An advanced homeowner knows that understanding the core composition—whether mineral-infused or traditional PVC—is crucial for durability, especially in harsh climates.
Another often-missed nuance is the importance of proper installation practices, particularly spacing and fastening techniques. Over-tightening screws or improper joist spacing can cause warping or squeaking over time, negating the low-maintenance promise of composite decking. Many assume that standard spacing is universally applicable, but expert insight suggests that adjustments based on deck size and load-bearing requirements are vital. As seen in detailed outdoor space designs, mismatched spacing can lead to premature bounciness or sagging.
Ponder this question for seasoned builders and enthusiasts: How does decking material behavior change across different environmental conditions, and how can understanding this prevent future issues? For example, expanding on the significance of thermal expansion, a study by the National Park Service emphasizes that composite decks can expand or contract by a small margin with temperature shifts, which, if neglected, may create gaps or buckling. Recognizing this load and temperature interaction can inform design choices, such as incorporating ample expansion gaps.
Similarly, avoiding common mistakes in stair design is critical for safety and aesthetics. A misconception persists that standard riser heights are universally safe; however, meticulous calibration aligned with the deck’s overall height and local code requirements ensures safer, more comfortable steps. As outlined in this comprehensive guide, small deviations in riser or tread dimensions can cause tripping hazards, especially for children and seniors.
In conclusion, the realm of outdoor living and composite decking is filled with subtleties that can make or break your investment. Do not fall into the trap of assuming that appearance and basic specifications are enough; focus instead on the nuanced behaviors and design principles that ensure longevity and safety. Have you ever fallen into this trap? Let me know in the comments, and stay proactive in mastering your outdoor projects.Maintaining a beautiful, functional outdoor deck requires more than just periodic cleaning; it demands the right tools and consistent practices to ensure long-term durability. One essential tool I personally swear by is a high-quality cordless impact driver, like the Milwaukee M18. Its power and compact size make installing fasteners, especially when working with composite decking, quick and effortless, reducing fatigue and ensuring precise work. I also rely heavily on a digital moisture meter, such as the Wagner MMC220, to monitor moisture levels in the wood supporting my deck. Regularly checking moisture content helps me catch early signs of rot or mold before they develop into costly repairs. When it comes to sealing joints and vulnerable areas, I prefer using a professional-grade flashing tape—like Peel & Stick by Titebond—which offers superior adhesion and weather resistance, critical for preventing rot, as emphasized in https://deckdesignbuild.com/the-flashing-tape-mistake-that-kills-deck-joists-early. For ongoing maintenance, I set up a seasonal inspection routine, using a combination of visual checks and moisture readings, to determine when re-sealing or repairs are necessary. Additionally, I recommend investing in a high-pressure sprayer, such as the Wagner Control Spray, for applying sealants or cleaners evenly and efficiently, saving time and reducing mess. Looking into the future, I see advancements in smart monitoring sensors that could alert homeowners when moisture levels or structural stress exceed safe parameters, making upkeep even smarter and more proactive. How do I maintain my deck over time? Consistent inspections, timely re-sealing, and adopting the right tools—like impact drivers and moisture meters—are key. Start by testing your deck’s wooden supports with a moisture meter to identify hidden issues early, then reinforce them with quality flashing tape to prevent water ingress. Be sure to document your routine inspections, so you stay ahead of potential problems before they become major repairs. If you haven’t tried using a moisture meter before, I highly recommend it—it’s a game-changer in long-term deck care and can save you money and headaches down the line. For comprehensive guidance on choosing the best materials, check out https://deckdesignbuild.com/choosing-the-right-composite-decking-for-durable-low-maintenance-outdoor-areas. Remember, the key is regular assessment and using the right tools to catch issues early. Happy building!
The Hidden Gems in Deck Maintenance I Discovered
One of the most eye-opening lessons I learned was that sealing and taping your joists isn’t just an optional upgrade—it’s a game-changer that can drastically prolong your deck’s life and save you money in repairs. I used to believe regular staining was enough, but I realized that moisture intrusion beneath the surface silently rotted supports until it manifested as wobbling and decay. Taking the time to understand the nuances of moisture management transformed my approach from reactive to proactive.
Another insight was that misconceptions about composite decking’s durability can lead to costly mistakes. I once chose a cheaper material, assuming the core features would be similar, only to find premature fading and discoloration. Now, I advocate investing in high-quality composites with proven UV resistance, understanding that in outdoor living, quality materials significantly impact longevity and appearance.
Lastly, I discovered the importance of precise installation practices. Over-tightening fasteners or incorrect joist spacing created issues that were preventable. These frustrations taught me that paying close attention during the initial build—and not rushing through steps—ensures safety, comfort, and durability in every outdoor space I craft or maintain.