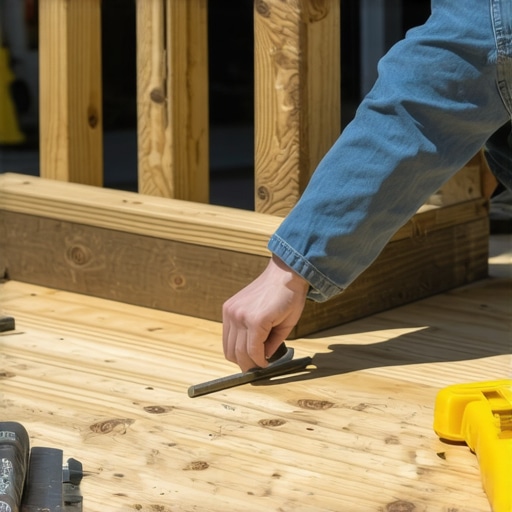
It was a crisp Saturday morning when I finally realized why my deck stairs kept wobbling and looking crooked no matter how many times I tried to level them. After hours of frustration, a lightbulb went off—little things matter more than I thought, especially when those “little things” are shims. Like many DIY enthusiasts, I had assumed that a basic level would do the trick, but I was dead wrong. The secret isn’t just in the tools but in the right approach, and today, I want to share that with you.
Why Level Stairs Make All the Difference in Outdoor Living
Imagine stepping onto your outdoor space every day, feeling proud of its flawless execution. But instead, you’re met with uneven, wobbling stairs that make you second-guess your entire project. That’s the reality for countless homeowners who underestimate the importance of correctly shimmed and leveled stairs. Properly installed, stairs not only enhance safety but elevate the overall aesthetic and functionality of your deck.
In my early days of building, I made a common mistake—failing to account for uneven ground and using inadequate shims that compressed over time. I learned the hard way that quality shimming is worth it. An incorrectly leveled set of stairs can compromise the stability of your entire deck, leading to costly repairs or even safety hazards. According to the latest building codes, ensuring your stairs are level is crucial for compliance and peace of mind. As highlighted in [Deck Design Build](https://deckdesignbuild.com/creating-seamless-transitions-stairs-as-key-elements-in-outdoor-living), seamless transitions between your deck and stairs directly impact outdoor safety and visual appeal.
If you’ve faced similar issues, you’re not alone. But here’s the good news: mastering a simple shim trick can make all the difference. Whether you’re working with composite decking or traditional wood, understanding
Start with Precise Ground Assessment
Before jumping into shimming, I remember a time I ignored ground irregularities, and my stairs remained uneven. To avoid this mishap, use a long carpenter’s level to survey the ground where your stairs will sit. Mark high and low spots, identifying where adjustments are most needed.
Choose the Right Shims for Stability
Opt for high-quality, weather-resistant shims—preferably composite or cedar—that won’t compress over time. I once used cardboard shims, and after a season of rain, they disintegrated, causing wobble. Select shims slightly thicker than your uneven gaps for easier adjustment.
Position the Stairs and Initiate Shim Placement
Set your stairs in place on the ground, aligning stringers to your marked levels. Insert shims beneath the stringers at contact points with the ground or framing, starting with the highest point. Think of shims as the ‘spacers’ that help you fine-tune the angle of your stairs, much like balancing a leaning picture frame.
Use a Level to Achieve Perfect Horizontal Alignment
With shims in position, place your carpenter’s level on the stair treads or stringers. Tap shims gently to adjust the level until exact horizontality is achieved. I once used a scrap piece of wood as a lever to nudge a stubborn shim, which saved me time and kept the stairs perfectly flat.
Secure the Shims Once Level
When satisfied with the alignment, fix the shims in place using appropriate fasteners— galvanized or stainless steel screws are ideal for outdoor durability. This prevents shifting during construction or weather changes, ensuring long-term stability. Remember, like in creating seamless transitions in outdoor living, precision here sets the foundation for safety and aesthetics.
Double-Check and Finalize Installation
Remove any excess shims sticking out, and recheck the level. Walk up and down the stairs to ensure no wobbling or creaking occurs. Once tested, proceed with installing treads and risers securely. During my own build, I found this last step crucial—an overlooked adjustment could lead to future sagging or noise, undermining the entire project.
While many DIY enthusiasts and even seasoned contractors share similar assumptions about deck construction, there’s often a gap between popular belief and the nuanced realities that determine long-term success. One widespread myth is that choosing the cheapest materials guarantees an affordable project; in reality, inexpensive decking or fasteners can compromise durability, especially in harsh climates.
Are All Composite Deckings Truly Equal in Performance?
Everyone hears about the low-maintenance benefits of composite decking, but not all composites are created equal. For instance, some brands incorporate mineral cores for enhanced resistance to moisture and mold, backed by studies from the Wood Plastic Composite Research Institute, which show that mineral-infused composites last significantly longer in poolside or high-humidity environments. Overlooking these subtle differences can lead to premature warping or discoloration, especially if you ignore manufacturer specifications and overuse certain colors or profiles that absorb more heat—an advanced mistake that many overlook.
Misconceptions About Stair Safety and Design
Many assume that standard stringer framing and uniform riser heights suffice for safe outdoor stairs. However, subtle inconsistencies in framing, stringer spacing, or the degree of slope can make stairs feel bouncy or even dangerous underfoot. Advanced builders pay close attention to the hidden details, such as proper stringer notching and precise measurements—areas I’ve detailed in my post on designing safe stairs for 2025. Ignoring these complexities can cause future wobbling or uneven tread alignment, which is less apparent but more critical over time.
What Advanced Mistakes Do Most Outdoor Living Projects Overlook?
Many project failures stem from neglecting drainage and ventilation behind enclosed or semi-enclosed structures. A common mistake is to assume that outdoor covers or overhangs are enough to prevent moisture buildup; however, without proper flashing or weep-hole placement, water can seep into framing and cause rot—an issue some contractors only discover after years. In my experience, employing detailed moisture management strategies—such as incorporating hidden drainage channels or vapor barriers—can dramatically extend the lifespan of your deck, especially when using newer, low-maintenance materials like innovative composite boards. To get it right the first time, review my insights on creating seamless transitions and effective drainage. The key takeaway is that understanding these nuanced details can save you costly repairs and ensure your outdoor space remains inviting for years to come. Have you ever fallen into this trap? Let me know in the comments.
Keeping your deck and stairs in top shape requires the right tools and techniques to ensure longevity and safety. From specialized equipment to clever methods, investing in quality tools makes regular maintenance more efficient and effective. One indispensable tool I personally swear by is a high-precision digital angle finder. Unlike traditional levels, this device provides exact measurements of any slope or tilt, which is crucial when adjusting deck boards or stairs for perfect alignment. I use models like the Bosch Digital Angle Finder because of its durability and ease of use, especially in outdoor conditions where small inaccuracies can lead to uneven surfaces over time.
Another essential instrument is a pneumatic nail or screw gun equipped with adjustable torque settings. This allows for rapid fastening while preventing overdriving fasteners, which can compromise composite decking’s appearance and integrity. I prefer a model like the DeWalt XRP, as it combines power with control, significantly reducing the time spent on maintenance tasks such as tightening loose boards or replacing damaged fasteners. Proper fastener management becomes even more important when you are maintaining a large deck or stair system, ensuring everything remains secure against weather and wear.
In addition to hand tools, software has become a game-changer in planning and long-term upkeep. I recommend using 3D design programs like SketchUp or Decks.com’s deck planner to visualize maintenance routines, identify potential issues, and plan for scaling improvements. These tools help me anticipate areas prone to moisture because of poor drainage or shading, allowing preemptive repairs that save money and extend the life of your outdoor spaces. Predicting these challenges aligns with the trend toward smart outdoor living setups, where technology supports sustainable, low-maintenance designs.
For long-term monitoring, I also suggest installing moisture sensors beneath your deck surface. These sensors alert you early to water intrusion or rot, especially in hidden or poorly ventilated areas. Coupling these with regular inspections using my recommended tools creates a proactive maintenance routine, preventing costly structural repairs later on. According to a recent study published by the Forest Products Laboratory, moisture management is critical for extending the lifespan of composite and wood decking alike. Implementing these measures keeps your outdoor living area safe and inviting for years to come.
How do I keep my deck functioning smoothly through the years?
Start by establishing a routine incorporating the right tools and smart practices. Always use a precise angle finder when making adjustments—this ensures your stairs stay level and safe, even after years of exposure. Regularly tighten and replace fasteners with a quality screw gun to prevent squeaks and wobbling. Additionally, plan periodic inspections with visual checks aided by digital design insights, and install moisture sensors for peace of mind. Maintaining your deck is an ongoing process that benefits greatly from these specialized tools and methods. I encourage you to try out a digital angle finder this season to see firsthand how it can improve your maintenance precision. Want personalized advice on a specific project? Reach out through my contact page to get expert tips tailored to your outdoor space.
What I Wish I Knew Before Starting My Deck Stairs
One of the hardest lessons I learned was that small details, like the type and placement of shims, can make or break the stability and appearance of your deck stairs. Overlooking ground irregularities initially cost me time and effort, but now I know that thorough ground assessment is key to a flawless build.
Why Proper Shimming Transforms Outdoor Living Spaces
Mastering the art of shimming ensures your stairs are not only safe but also visually appealing. Investing in weather-resistant shims and precise placement can save you from future wobbling or uneven surfaces, turning your outdoor space into a true sanctuary.
Embracing the Minimalist Wizardry of Leveling
Using a high-quality digital angle finder was a game-changer in my projects. It allowed me to achieve perfect horizontality on every step, saving me hours of guesswork and rework. This tool is a must-have for anyone serious about outdoor living construction.
Lessons from My Most Common Pitfalls
I often underestimated the importance of secure fasteners and proper drainage behind the structure. Now I understand that neglecting these details can lead to long-term rot, squeaks, or dangerous wobbling—issues that are preventable with informed attention to detail.
How I Elevated My Deck Experience with Smart Tools
Integrating moisture sensors and 3D design software into my routine helped me anticipate issues and plan proactive maintenance. These resources have given me peace of mind and extended the lifespan of my deck and stairs, proving that the right tools are investments in your outdoor living’s future.
Explore More and Elevate Your Outdoor Space
If you’re ready to transform your deck with confidence, consider checking out some of my favorite resources like the tips from seasoned experts or reaching out through my contact page for personalized guidance. Remember, attention to detail today creates beautiful outdoor retreats for years to come.