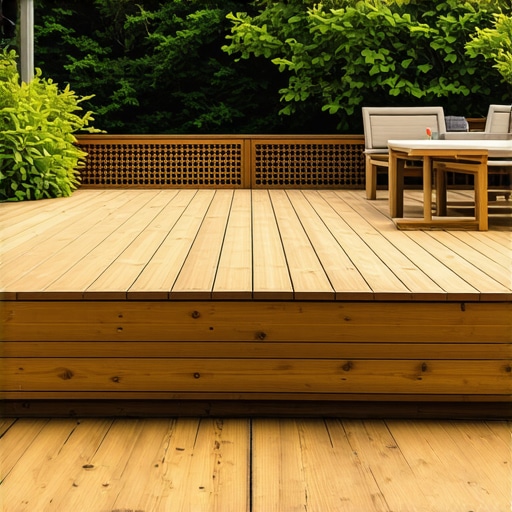
I remember the day I stepped onto my backyard deck, expecting a clean, polished look. Instead, I was met with a creeping feeling of disappointment as I noticed the loose, sagging lattice that had been my go-to for deck skirting. It wobbled and rattled every time someone walked by, making the space feel unfinished and more like an afterthought than a stylish outdoor extension. That moment was a lightbulb for me—a realization that the standard lattice, once a popular choice, was no longer serving my needs or expectations for durability and aesthetics.
Leaving Behind the Old for Something Better
Deciding to ditch the conventional lattice was not just about replacing an old look; it was about elevating my entire outdoor space. I wanted something that could handle weathering, resist pests, look attractive over time, and still be easy to maintain. After some research and personal trial-and-error, I discovered that there are more innovative options out there that can transform your deck skirting from a simple barrier into a stylish feature. Today, I aim to share that journey with you and help you avoid some of the pitfalls I encountered early on.
Is Relying on Traditional Lattice Still Worth It?
Many homeowners still believe that standard wood lattice is the most cost-effective and easiest solution. However, I made the mistake of assuming it would hold up without much fuss. I didn’t realize that untreated wood lattice is prone to rot, pest infestation, and warping—especially if it’s exposed to the elements. In fact, according to a recent deck builder insights article, more durable materials can significantly extend the lifespan of your outdoor structures, saving you time and money in the long run.
So, before you invest in the traditional lattice again, ask yourself—are you prepared for the maintenance, replacement, and potential aesthetic decline? If not, you’re not alone. Many homeowners face these issues because they stick with what’s familiar, not realizing there are better options.
In the next sections, we’ll explore practical solutions that can seamlessly upgrade your deck skirting, making it both beautiful and resilient. Whether you’re considering composite panels, decorative screens, or innovative design techniques, there’s a solution that fits your style and budget. Ready to transform your outdoor space? Let’s dive in.
,
Select the Right Materials for Your Deck Skirting
Start by choosing durable materials that withstand weather and pests. Inspired by my experience, I opted for composite panels instead of traditional wood lattice. To get a seamless look, measure your deck perimeter meticulously, accounting for stairs and any odd angles. When I was doing this, I used a tape measure to record each side’s length, then added a couple of extra inches for overlap during installation. This precise measurement prevents gaps and ensures a clean finish.
Prepare Your Surface and Frame
Clear the area below your deck and inspect the frame for stability. I used a pry bar to remove any debris and checked the ledger board to ensure it’s securely attached. For framing, I used pressure-treated lumber, which resists rot, and installed vertical posts at regular intervals—every 16 inches—using galvanized fasteners. This not only provides support but also helps prevent wobbling, as I learned from past shaky installations. For stairs, pay special attention to the stringers, ensuring they are sturdy and properly spaced.
Hidden fasteners make a significant difference, providing a clean, screw-free surface—more on this in this guide. After installing the frame, I added a vapor barrier to protect the wood and prevent moisture buildup, which is essential for longevity.
Install the Composite Panels or Alternative Skirting
Lay out your chosen material and cut it to fit each section using a saw designed for composite materials—I’ve found that a carbide-tipped blade reduces heat buildup and prevents melting or chipping. Secure the panels using hidden fasteners or clips, following the manufacturer’s instructions; this creates a polished appearance. When I did this with my project, I made sure to leave small gaps between panels for expansion, mimicking natural airflow and avoiding warping during temperature changes.
For a more decorative touch, consider installing lattice inserts or decorative screens and integrating lighting to highlight your deck at night. Proper spacing and fastening are critical to prevent panels from buckling, especially in fluctuating weather. To enhance safety, ensure that any gaps are small enough to prevent pests and debris from entering, while maintaining good air circulation.
Secure and Finish
Complete the installation by sealing all exposed fasteners with a weather-resistant compound and painting or staining your skirting if desired. I applied a clear sealant to my composite panels, which kept the color vibrant and protected the surface. Check all attachments and make adjustments as needed—wobbly panels or fixtures can be re-secured for stability. For stairs, ensure that handrails and risers are firmly attached, following safety standards. Properly finished skirting not only enhances visual appeal but also extends the lifespan of your entire deck structure, turning a simple barrier into an integrated design feature.Many homeowners assume that choosing composite decking automatically guarantees a low-maintenance, durable outdoor space. While composite offers significant advantages over traditional wood, my experience reveals nuanced pitfalls that can undermine your project’s longevity and safety. One common myth is that all composite brands are equal; in reality, variations in composition and manufacturing processes mean some products are more prone to warping, staining, or discoloration if not selected carefully. For example, a study by deck experts highlights how certain cap layers and core materials impact lifespan and resistance to weathering. Overlooking these subtleties can lead to costly replacements or hazardous conditions, especially when stairs and supporting structures are involved. An advanced mistake I often see is neglecting proper expansion gaps and ventilation during installation—these minor details are crucial because composite expands and contracts with temperature fluctuations. If ignored, warping and buckling occur, compromising safety and aesthetics. Additionally, many enthusiasts underestimate the importance of professional consultation. DIY projects may seem straightforward but can miss complex load calculations and code compliance, which a seasoned deck builder would catch. For stairs, improper riser and tread measurements not only violate safety standards but also cause awkward stepping patterns, increasing risk of trips or falls. Precision and understanding of reinforcement techniques make all the difference—details that only seasoned professionals master. Curious about how to elevate your outdoor creations beyond common pitfalls? Consider engaging experts who bring both artistic vision and technical mastery. They can help you avoid the trap of unfinished or unsafe structures, ensuring your deck not only looks spectacular but also endures the test of time. Remember, paying attention to the hidden nuances ensures a seamless, safe, and beautiful outdoor living space. Have you ever fallen into this trap? Let me know in the comments.
How do I maintain my composite decking over time?
Maintaining your deck requires using the right tools and following a disciplined routine to preserve its appearance and structural integrity. I personally rely on a vapor-compatible pressure washer fitted with a soft brush attachment—this combination effectively removes dirt and grime without damaging the surface. Regularly brushing off leaves and debris with a microfiber push broom prevents staining and mold growth. For stubborn stains, I prefer a specially formulated composite cleaner, such as the products recommended by expert deck builders, as they do not contain harsh chemicals that could deteriorate the material over time.
Investing in a high-quality cordless drill with adjustable torque helps when securing panels or making minor repairs. I always opt for stainless steel fasteners because they resist corrosion, especially in environments with high moisture or salinity. To safeguard against warping and ensure longevity, periodically checking fastener tightness and applying a protective sealant or conditioner is essential. For routine inspection, a good LED flashlight with a flexible neck helps uncover issues like small cracks or pest intrusion before they escalate.
Future trends in deck maintenance tools and techniques
Looking ahead, I believe the integration of smart sensors into decking materials—monitoring moisture levels, temperature, and structural shifts—will revolutionize how homeowners approach maintenance. These innovations could alert you via smartphone app before damage occurs, saving time and costly repairs. Additionally, advancements in eco-friendly, self-cleaning surface treatments might soon eliminate the need for manual cleaning. Incorporating such future-ready tools today can significantly extend your deck’s lifespan and reduce ongoing effort.
What are best practices for long-term deck upkeep?
To achieve lasting results, establishing a seasonal maintenance schedule is crucial. In spring and autumn, I recommend a thorough inspection, clearing gutters, and reapplying protective coatings as needed. Professional consultation, like working with a deck builder, can guide optimal care routines and suggest tailored solutions based on your specific environment. Remember, neglecting these steps can lead to issues like warping, mold, or hardware deterioration, which compromise safety and aesthetics. Implementing smart tools and routine checks today prepares your outdoor living space for years of enjoyment.
Try integrating a high-grade composite cleaning solution with your regular maintenance, and see how much easier it becomes to keep your deck looking pristine. With the right tools and habits, your outdoor haven will stand strong against time and weather, ensuring that your investment continues to pay off in comfort and style.
The Hardest Lesson I Learned About Composite Decking, Deck Builder, Stairs, Outdoor Living
One of the most profound lessons I encountered was realizing that selecting the right materials and installation techniques can make or break your outdoor space’s longevity. I once underestimated the importance of expansion gaps in composite decking, leading to warping and costly repairs. This experience taught me that paying attention to small details—like proper ventilation and weatherproofing—is crucial for a durable and beautiful deck. Another revelation was understanding that professional guidance isn’t just for complex structures; even DIY enthusiasts benefit from expert insights, especially when it comes to safety-critical components like stairs. Finally, I learned that embracing innovative design ideas, such as hidden fasteners and integrated lighting, elevates your outdoor living space from average to extraordinary, making each project a true personal sanctuary.