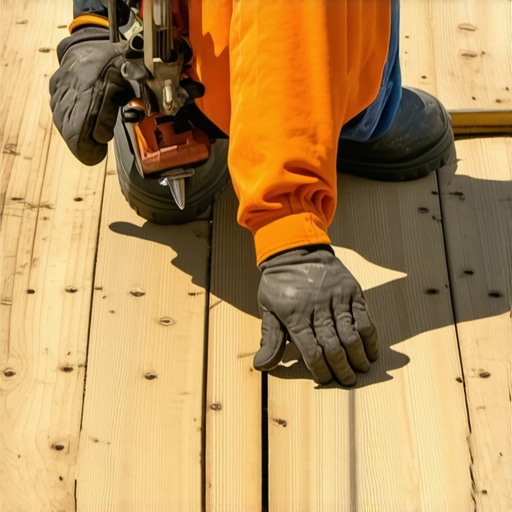
I remember the first time I tackled installing hidden fasteners on an angled deck. It was a sunny Saturday, and I was pumped to finally give my outdoor living space a sleek, modern look. But within an hour, I was knee-deep in a maze of complications—fasteners refusing to sit flush, screws misaligned, and a frustrating feeling that I’d bitten off more than I could chew. That moment was a real lightbulb: hidden fasteners are so much trickier on decks that aren’t perfectly level or square.
The Hidden Challenges of Angled Decks
Is the Hype Worth It, or Just a Headache?
One common mistake I made early on was assuming that the same hidden fastening techniques used on level surfaces would work seamlessly on inclined or irregular decks. Turns out, gravity isn’t the only factor at play—angle changes can complicate fastener placement, causing uneven joist alignment and increased installation time. Not to mention, the risk of damaging the decking boards or creating an uneven surface that ruins that clean, continuous look you’re after.
Experts agree that deck angles can significantly affect installation ease and longevity. According to a recent survey by the National Association of Home Builders, outdoor projects with complex angles require more precise planning and specialized fasteners to prevent issues like creaking, board curl, or even deck failure over time. My own early mistake was underestimating how much these angles would impact my fastener choice and technique.
So, what can you do? Today, I’ll walk you through the hurdles I’ve faced and share practical tips that actually make installing hidden fasteners on angled decks manageable—even rewarding. Whether you’re redesigning your space or constructing a new one from scratch, understanding these nuances will save you headaches and dollars in the long run. Ready to dive into solutions that work? Let’s get started.
Prepare Your Materials for Precision Fitting
Start by selecting fasteners designed for angled decks, such as clip systems with adjustable angles. I learned the hard way that generic fasteners can cause misalignment, especially on slopes. Organize your screws, spacers, and power tools beforehand to streamline the process and prevent mistakes.
Measure and Mark with Laser Accuracy
Using a laser level, mark the precise locations for each fastener, accounting for the deck’s incline. I once skipped this step and ended up with uneven spacing, which ruined the sleek look I aimed for. Marking accurately ensures each clip sits flush and aligns with the joists.
Cut and Adjust Fasteners for the Angle
If your fasteners aren’t adjustable, modify them with a quick cut or bend to match the deck’s slope—think of it as customizing a puzzle piece. I used a cordless grinder to bevel the edges slightly, which helped the clips sit snugly. This customization prevents gaps and ensures a seamless surface.
Secure Fasteners with Controlled Force
Using a power screwdriver set to low torque, drive the fasteners in snugly—avoid over-tightening, which can distort the clips or damage the boards. I learned that a steady, controlled approach prevents misalignment, especially on uneven surfaces. Consistent pressure guarantees a tight fit without deforming the hardware.
Check Alignment After Each Row
After installing each row, step back and visually inspect the surface for smoothness. Adjust fasteners if necessary. I once ignored this and found my boards subtly shifting over time, resulting in a bumpy surface. Regular checks catch misalignments early, saving time and effort.
Finalize Installation and Seal Edges
Finish by sealing the edges and applying anti-corrosion treatments if needed—especially near coastal areas. I used a stainless steel fastener system, which resists rust and maintains the deck’s appearance for years. Proper sealing prevents moisture intrusion, which is critical on angled decks where water can pool.
Leverage Expert Insights for Lasting Results
Consulting professional resources, like this guide on deck builder insights, helped me avoid costly mistakes. Remember, precise measurement, customization, and steady technique are your best allies in achieving a flawless finish on angled decks. For tailored advice, consider reaching out via contact us.
Many homeowners assume that choosing the right decking material or stair design is straightforward, but the reality is far more complex. A common misconception is that all composite decking offers the same durability and aesthetic appeal, yet recent studies, such as those from the American Institute of Architects, highlight significant differences in formulation and performance, especially in coastal or high-traffic areas. For example, some homeowners neglect the importance of mineral-core composite boards, which provide superior fire resistance and longevity compared to traditional capped composites. This oversight can lead to costly replacements earlier than expected.
A frequent myth in outdoor living circles is that rustic, untreated wood offers a natural look with minimal maintenance—nothing could be further from the truth. Untreated wood is highly susceptible to rot, insect damage, and warping, especially when exposed to moisture and temperature fluctuations. Opting for treated or composite materials, combined with proper sealing techniques, extends the lifespan and reduces long-term upkeep. An advanced mistake many overlook is neglecting the ventilation and drainage considerations for deck stairs and landings. Poor airflow can trap moisture, accelerating deterioration. Designing with adequate clearances and using weather-resistant fasteners, such as stainless steel, are critical practices for durability.
When it comes to stairs, getting the rise and run right isn’t just about code compliance—it affects the overall feel of your outdoor space. Beginners often focus only on compliance and miss the importance of consistent riser heights and tread depths, which can make stairs feel awkward or unsafe. Experts emphasize that a slight deviation as small as 1/8 inch can significantly impact comfort and safety. To prevent this, meticulous measurement and pre-assembly are key, as is leveraging tools like laser levels for precision. Additionally, many underestimate the importance of aligning stair stringers with the deck’s framing and incorporating anti-slip features for safety.
What about common mistakes in integrating your deck with outdoor features like fire pits or planters? A critical but often overlooked detail is the heat and moisture transfer from these elements. Building close without proper insulation or heat barriers can cause warping or discoloration of adjacent boards. Also, incorporating gradual transitions between deck levels, rather than abrupt steps, enhances usability and aesthetic flow. Consulting with experienced professionals and staying updated on trends—like those outlined in the latest composite decking trends for 2025—can help you avoid these pitfalls.
One often overlooked aspect is the myth that DIY installation can match the quality of professional work. While DIY can be satisfying, the nuances involved in framing, fastener selection, and waterproofing require expertise to prevent issues like squeaking, wobbling, or premature rot. Investing in a skilled deck builder not only guarantees safety and longevity but also adds maximum value to your home. For comprehensive guidance, I recommend reviewing these expert tips for outdoor transformation. Have you ever fallen into this trap? Let me know in the comments.
Keeping It Working: Tools I Recommend for Outdoor Living Mastery
Maintaining a beautiful and durable outdoor space requires the right equipment. Over the years, I’ve refined my toolkit with specific tools that make inspections, repairs, and cleaning more effective and precise. One essential item is a high-quality telescoping pole with different attachments, which allows me to reach high rails or post tops without the need for ladders, ensuring safety and efficiency. Additionally, a digital moisture meter helps me identify early signs of moisture intrusion or wood rot, especially critical for staircase stringers or low-slope areas prone to trapping water.
I rely heavily on a cordless carbide-tipped saw for trimming composite boards during repair or customization. Its clean cut minimizes chipping and melting, which is vital for maintaining the integrity of capped composite materials. For fastener maintenance, a powered impact driver with a torque setting of around 30-40 inch-pounds provides control, preventing over-driven fasteners on delicate surfaces like composite decking. This is especially useful when replacing or adjusting hidden fasteners on angled or uneven sections.
Once a year, I use a power wash system with adjustable pressure settings to thoroughly clean the decking, highlighting the importance of selecting equipment with a turbo nozzle to remove built-up grime without damaging the surface. Be cautious; excessive pressure can cause flickering or discoloration, so I prefer setting the pressure below 1500 PSI and avoiding direct contact with the boards. For inspection and alignment, a laser level is indispensable, offering precision for checking deck surface flatness, stair riser consistency, and post plumbness.
Looking ahead, I predict that smart technology will become more integrated into maintenance routines. Imagine sensors embedded in the joists that alert you to moisture levels or structural shifts via a smartphone app. Such innovations could revolutionize long-term deck care, making it more proactive and less reactive. To stay ahead, consider exploring advanced moisture meters and remote monitoring devices, which are becoming increasingly affordable and user-friendly.
How do I maintain my composite decking and stairs over time?
Regularly inspecting for loose fasteners, cleaning with a gentle power wash, and promptly replacing damaged boards are foundational. Always use corrosion-resistant fasteners like stainless steel, especially in coastal environments, to prevent degradation and ensure safety. Applying a specialized composite deck cleaner annually helps preserve the factory finish, while sealing any exposed wood components with a high-quality exterior-grade sealant protects against moisture and UV damage. For stair safety, replacing worn or loose handrails and ensuring consistent riser heights is crucial, which I find is best achieved with a laser level for precision. For more in-depth strategies on keeping your outdoor space pristine and functional, I recommend reviewing insights from this guide. Don’t hesitate to try out a new maintenance tool like a moisture meter—it’s a game-changer for proactive repairs.
Hidden Lessons That Changed My Approach to Deck Building
One of the most unexpected insights I gained was realizing that every angled deck demands a tailored fastening strategy. Blindly applying standard techniques often leads to misalignment or damage. Embracing customization, like bending or cutting fasteners for specific slopes, made a huge difference in my results.
Another revelation was the importance of patience and meticulous measurement. Rushing through the initial stages not only prolonged installation but also compromised the final appearance. Now, I double-check each marking and adjustment, understanding that precision at the start prevents headaches down the line.
I also discovered that sharing experiences with fellow builders unlocks solutions you might never find alone. Engaging in online forums or local workshops provides practical tips tailored to complex angles, especially for structures near water or uneven terrain.
Finally, I learned to see challenges as opportunities for creative problem-solving, not obstacles. Whether it’s modifying fasteners or experimenting with new materials, approaching each issue with curiosity leads to better craftsmanship and personal growth.
Tools and Resources That Elevate My Craft
My go-to tool is a high-precision laser level, which ensures accurate measurements across irregular surfaces. I trust this guide for expert insights on aligning decks seamlessly. A quality impact driver with adjustable torque helps prevent over-tightening fasteners, saving time and material costs. For detailed reference, I lean on this resource on selecting durable materials. Additionally, a set of adjustable fasteners gives me flexibility when working on angled surfaces, making each project more efficient. Investing in these tools and knowledge bases has truly empowered me to tackle challenging outdoor projects with confidence.