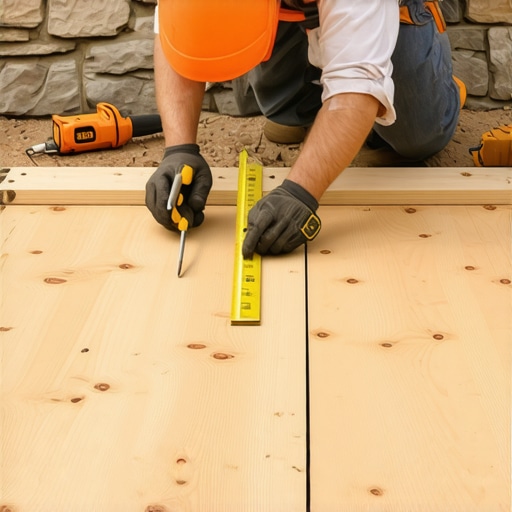
I’ll never forget the first time I tried to fit deck boards along a rugged stone wall, only to realize my measurements were off. The boards looked like they belonged in a different universe—gaps here, overlaps there, and a sense of frustration creeping in. It was a lightbulb moment for me: no matter how perfect your decking materials are, an uneven wall can throw a wrench into even the most well-planned project. If you’ve been there, you know that the challenge isn’t just aesthetic; it’s about creating a safe, durable, and beautiful transition between your deck and a stone surface that doesn’t play by conventional rules.
Why Scribing Deck Boards to a Jagged Wall Might Be the Most Important Step You Skip
Not all surfaces are created equal—especially when they’re as unpredictable as a stone wall
When I started my own deck project, I thought I could just cut the boards in straight lines, assuming the wall was relatively level. Big mistake. That oversight resulted in gaps that collected debris and even caused water to pool—definitely not the kind of outcome I wanted. It wasn’t until I took the time to properly scribe my boards that everything clicked into place. Scribing is a simple technique but one that can make or break the overall look and integrity of your outdoor space. According to recent research, proper installation techniques can extend the lifespan of your deck by years—something worth investing time in.
What I want to share with you today is how to tackle this common yet often overlooked challenge. Instead of dreading the unevenness, you’ll learn proven methods to make your deck transition smooth, safe, and visually appealing. Whether you’re a seasoned builder or a weekend warrior, mastering this skill will give your project that professional touch.
Addressing Your Biggest Fears
Is scribing really worth the effort? Won’t it take forever?
I’ve been there—questioning if scribing is just an unnecessary step or if it truly makes a difference. Honestly, skipping this process might save a bit of time upfront, but it will cost you in adjustments and repairs later on. Taking the time now ensures your boards fit snugly against irregular surfaces, preventing issues down the line. I learned early on that rushing through this step leads to more work later, and trust me, it’s not worth cutting corners on something that impacts durability and safety.
So, if you’ve ever felt unsure about whether to invest that extra effort into scribing your deck boards, consider this: it’s a small task with a big payoff. Want to see how experts handle uneven transitions? Check out some professional insights at this resource promising tips for durable, beautiful outdoor builds.
Now that we’ve addressed why this step matters, let’s dive into the practical methods to get a perfect fit every time.
Prepare Your Tools and Work Area
Gather a flexible contour gauge, a pencil, a saw (preferably a circular or jigsaw), measuring tape, and clamps. Clear the area around your wall and deck to ensure safe, unobstructed access. Having all tools within reach streamlines the process and minimizes errors. Here’s a tip: set up your workspace on a stable surface to keep your measurements accurate and your cuts precise.
Mark the Contour Gauge Along the Wall
Position the flexible contour gauge against the irregular surface of your wall. Carefully press the pins against the stones, ensuring the gauge conforms to every nook and cranny. Tighten it in place, then trace along its edge with a pencil on your decking board. This initial mark captures the wall’s unique shape and serves as a reference for your cut. I remember a particular instance when I used this method on a wall with a protruding stone, and the fit was so snug it felt custom-made—saving me hours of sanding and adjustments later.
Transfer the Contour to Your Decking Board
Place the marked board onto the remaining boards you plan to cut, aligning it properly to maintain a consistent gap and pattern. Use clamps to hold it steady. Trace around the board, following the contour marks. Repeating this across multiple boards ensures each fits perfectly against the uneven surface. Don’t rush this step—precision here prevents gaps, water ingress, and trip hazards down the line.
Cut Along the Contour for a Perfect Fit
Set your saw to a shallow depth to avoid splintering or cutting too deep. Carefully follow the traced outline, ensuring the cut replicates the wall’s irregularities. It’s better to cut slightly outside the line and sand down if needed, than to cut too small and have to redo the cut entirely. Remember the importance of safety: always wear eye protection and work in a well-ventilated space. If you encounter stubborn stones or hard spots, a jigsaw with a fine blade allows more control over complex shapes.
Test Fit and Fine-Tune as Needed
Place the cut board against the wall to check the fit. Minor gaps can be sanded or shaved with a hand plane. For larger discrepancies, re-trace the contour with a file or rasp for finer adjustments. This iterative process ensures your boards will sit flush, enhancing both aesthetic appeal and structural integrity. I once had a board that was slightly too wide; a quick pass with a hand rasp made all the difference, achieving a seamless transition.
Seal and Finish for Longevity
Once satisfied with the fit, proceed to seal the cuts if your boards require sealing against the elements. Applying a matching stain or sealant prevents moisture ingress and decay, extending the lifespan of your deck. For composite decking, cleaning and inspecting fasteners is crucial—learn more about protecting your investment at this guide. Remember, precision in scribing and cutting results in a cleaner, safer, and more professional-looking finish that brings your outdoor space to life.
While many DIY enthusiasts and even seasoned contractors believe they know everything about composite decking, there’s a world of nuances and misconceptions that can trip up even the most experienced. A common myth is that composite materials are completely maintenance-free, but in reality, neglecting proper installation techniques can lead to premature wear and costly repairs. For instance, improper spacing or overlooking ventilation can cause warping, mildew, or mold—issues that aren’t immediately obvious but can significantly reduce the lifespan of your deck. According to expert insights, such as those shared by professional deck builders at this resource, paying attention to subtle details in the planning and execution stages makes all the difference in long-term durability. Many overlook the importance of correctly calculating and accommodating thermal expansion, which can cause boards to buckle or split if ignored. Advanced builders understand that composite decking isn’t just about choosing the right color or finish; the hidden intricacies of climate adaptation and structural support play vital roles. Myths like ‘all composite boards are alike’ can lead to poor choices—some products are designed for specific conditions, and mismatched applications can result in lifespan issues. Additionally, the placement around stairs or elevated areas often gets less attention, yet it’s critical for safety and stability. For example, proper drainage and ventilation can prevent water accumulation that accelerates wear. A misstep here can turn a beautiful outdoor space into a safety hazard. Have you ever fallen into this trap? Let me know in the comments. Mastering these nuances elevates your project from average to extraordinary, ensuring your outdoor oasis remains stunning and functional for years to come.
Keeping your composite decking and outdoor stairs in top shape requires more than just initial installation. Investing in the right tools and adopting effective maintenance routines ensures your outdoor living space remains stunning and durable for years to come. One essential piece of equipment I personally rely on is a high-quality orbital sander with variable speeds. It allows me to gently sand down any rough spots or minor imperfections on the surface without risking damage to the composite material. For cleaning, I prefer a soft-bristled deck brush paired with a gentle, non-toxic cleaner; this combination effectively removes leaves, moss, and dirt without degrading the decking finish. Regular inspections are crucial, especially around stair risers and handrails, where wear and tear tend to accelerate. Using a digital moisture meter helps me monitor areas prone to water retention, preventing mold and rot onset.
In terms of software, I utilize 3D project planning tools to map out complex designs before actual construction. Programs like SketchUp allow me to visualize how custom features like built-in planters or privacy screens will integrate seamlessly, saving time and reducing errors during installation. Embracing technology not only streamlines the building process but also enhances quality control — something especially vital when scaling outdoor projects or managing multiple decks simultaneously. Looking ahead, I believe advancements in smart decking solutions—such as sensors that indicate moisture levels or structural integrity—are on the horizon, promising even longer-lasting and maintenance-free outdoor spaces.
How do I maintain composite decking over time?
The key to long-term maintenance involves routine cleaning, prompt repairs, and protective measures. I recommend scheduling a deep clean at least twice a year, focusing on joints and high-traffic areas. Using a pressure washer carefully—preferably with a fan tip and low PSI—can remove stubborn dirt without damaging the surface, but always maintain a safe distance to prevent etching. For repairs, keeping a stock of matching composite filler or patch kits ensures quick fixes for any chips or cracks. Applying a deck-specific protective sealant annually helps resist UV degradation and staining—this practice preserves color vibrancy and safety. Additionally, installing subtle drainage improvements around your deck, such as strategic gutters and weep holes, can dramatically extend its lifespan by preventing water pooling. According to a recent technical report from the American Society for Testing and Materials, proper drainage and surface protection are fundamental in preserving composite materials against weathering.
For staircase safety and longevity, consider upgrading to modular railing systems that facilitate easier repairs and adjustments over time. Also, regularly tightening fasteners and checking for corrosion ensure stability, especially in coastal or humid environments. Remember, consistency is vital: a little effort every season pays off by avoiding costly replacements or safety hazards down the line.
If you haven’t already, try integrating one of these advanced maintenance tips, such as using a moisture meter to identify vulnerable spots early. This proactive approach can save you significant renovation costs and avoid major disruptions. For more expert insights and tailored advice, consult professional resources like this comprehensive guide.
Lessons That Changed My Outdoor Vision
One of my biggest surprises was realizing that a perfect-looking deck isn’t just about choosing beautiful materials; it’s about paying attention to the details that most overlook. The first time I skipped the scribing step, I ended up with unsightly gaps that accumulated debris and water, leading to future headaches. That experience taught me the value of patience and precision, especially when dealing with uneven surfaces—reminding me that craftsmanship often lies in the minor steps. Additionally, I learned that tools like contour gauges are game-changers in achieving a flush fit, saving hours of sanding and adjustments later. Finally, I discovered that embracing the uniqueness of your project’s surface—instead of fighting it—can elevate the overall aesthetic and durability, making your outdoor space distinctively yours.