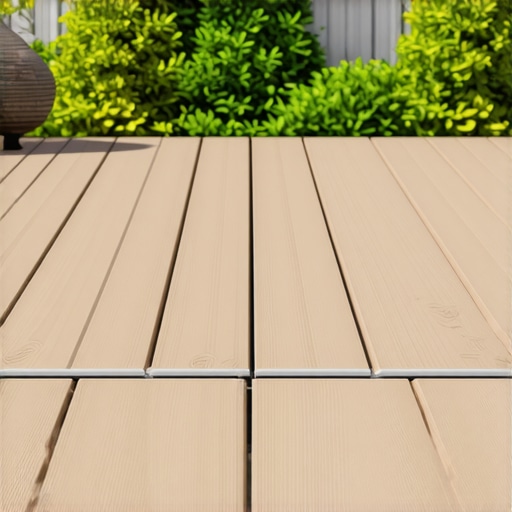
I remember the moment clearly—standing on my deck during a heavy rain, watching water seep into a corner storage box I’d hastily built. It was a lightbulb moment that made me realize: if I’m going to invest in a beautiful outdoor space, I need storage that doesn’t just blend seamlessly but also keeps everything dry and protected. That experience spurred me to discover the secrets of building a hidden trapdoor for waterproof deck storage. If you’re tired of stuffed-to-the-brim storage with soggy tools and weathered cushions, then you’re in the right place.
Why Waterproof Hidden Storage Matters More Than Ever
Every seasoned deck builder knows that outdoor storage isn’t just about convenience—it’s about protection. A waterproof trapdoor ensures your gear stays dry, extending its lifespan and saving you money on replacements. Plus, when cleverly concealed, it maintains the aesthetic appeal of your deck rather than disrupting its sleek, modern lines.
Is Concealed Storage Truly Worth the Effort?
I’ll admit, I was initially intimidated by the idea of integrating a hidden trapdoor. I worried it might leak, be difficult to access, or ruin the deck’s appearance. Early on, I made the mistake of rushing through the sealing process—believing a simple coat of paint would suffice. Trust me, that was a rookie error. Proper waterproofing requires attention to detail and understanding how water flows beneath your deck. But with the right approach, you can create a hidden storage compartment that looks fantastic and keeps everything dry, no matter the weather.
In this post, I’ll walk you through each step—covering everything from selecting materials to sealing techniques—so you can build a trapdoor that’s both discreet and durable. Ready to transform your deck’s functionality while maintaining its beauty? Let’s dive into the practical solutions that turned my backyard into a weatherproof oasis.
Choose Durable Materials for the Trapdoor Frame
Start by selecting pressure-treated or composite framing lumber that resists moisture and decay. During a project I tackled last summer, I used composite framing to ensure longevity against the elements. Cut your frame pieces precisely, and measure the space within your deck to ensure the trapdoor fits snugly, avoiding gaps that water could seep through. Think of it like designing a secret door in a fortress—timing and fit are everything.
Properly Seal the Edges and Seams
Apply a high-quality, waterproof sealant or flashing tape along all edges and joints of the frame before installation. I once rushed this step, which led to minor leaks after heavy rain. To prevent this, I used flexible flashing tape designed for outdoor use and pressed it firmly into all corners. This creates a barrier that water cannot penetrate, just like sealing a waterproof bag. Sealant should extend under the lip of the trapdoor to channel water away from the opening.
Implement a Slope for Water Runoff
Design the trapdoor with a slight slope—about 1/8 inch per foot—so water naturally drains away rather than pooling on top. I made the mistake of installing mine flat; after a storm, water pooled and seeped through tiny gaps. To fix this, I added a slight incline using shims during installation. Consider the slope like an umbrella—water runs off effortlessly, keeping your storage dry.
Integrate Effective Drainage Solutions
Install a discreet drainage gap or weep holes just below the trapdoor opening to direct water away from the storage compartment. For my deck, I drilled small, spaced holes beneath the trapdoor’s lip and added gravel underneath to aid drainage. This prevents water from collecting underneath and causing rot. Think of it as giving water a path to escape—much like a drain in your kitchen sink.
Secure with Weatherproof Hardware
Use stainless steel hinges and latches designed for exterior use, resistant to corrosion and rust. I opted for stainless steel, which held up perfectly after a year of exposure. Fasten components tightly, and ensure the latch mechanism allows for easy access yet stays secure against wind or theft. Visualize it as a bank vault—accessible but protected against the elements and intruders.
Test and Adjust Over Time
Once installed, test the trapdoor during a heavy rain to observe water flow and drainage. Check for leaks or pooling. I discovered that slight adjustments to the slope and sealing improved performance. Keep maintenance simple: reseal edges annually and inspect for damage, just like caring for a car. Over time, these tweaks will keep your outdoor storage watertight and functional, seamlessly blending into your deck’s aesthetic.
This approach transforms a simple trapdoor into a reliable, waterproof entry that maintains your deck’s beauty and utility. For more ideas on enhancing your outdoor living space, consider exploring innovative outdoor living ideas or consult professional deck builders who specialize in customized solutions.
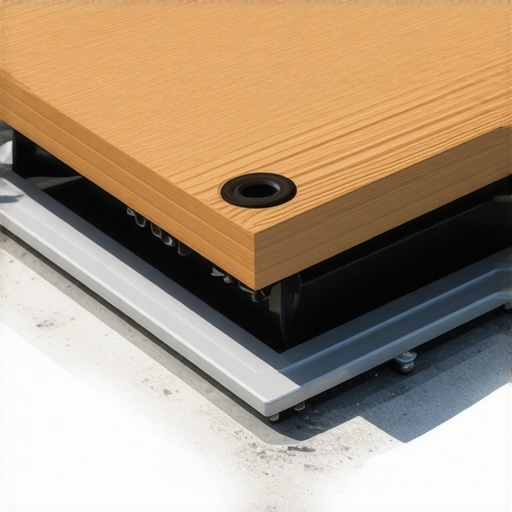 When it comes to outdoor living, many assume they have it all figured out, but beneath the surface lie subtle pitfalls that can undermine even the most well-planned decks and stairs. One common myth is that using standard deck hardware suffices for longevity. In reality, selecting stainless steel or specialized fasteners significantly extends the lifespan of your structure, especially in saltwater or high-humidity environments. Skimping on quality here is a surefire way to invite corrosion and future costly repairs. Additionally, a frequent oversight is neglecting proper water runoff design. A slight miscalculation in slope or drainage can cause pooling, leading to rot and structural damage over time. Remember, water management isn’t just about avoiding immediate puddles but preventing long-term decay, as highlighted in expert research on outdoor timber durability.
Many DIYers are also misguided by the idea that composite decking requires no maintenance. While composite boards are low-maintenance compared to natural wood, they still benefit from regular cleaning and sealing to prevent mold and color fading. An advanced mistake is assuming all composite materials respond similarly to weather; some brands with mineral cores perform better in extreme temperatures, which is worth investigating before your purchase. Furthermore, when designing stairs, a common error is ignoring the importance of consistent riser heights. Small variations—even a fraction of an inch—can cause safety hazards and feel uncomfortable underfoot. Skilled deck builders prioritize precise measurements to ensure smooth, safe ascent and descent, integrating innovative solutions like adjustable stringers for flawless uniformity.
For those contemplating the leap from novice to expert, understanding these nuances can dramatically improve the durability, safety, and aesthetic appeal of your outdoor space. If you want tailored advice or assistance with your project, don’t hesitate to reach out via our contact page. Remember, overlooking these details might be your biggest obstacle to perfect outdoor living. Have you ever fallen into this trap? Let me know in the comments.
Maintaining outdoor decks, stairs, and composite structures demands precise tools and proven methods. I rely heavily on a high-quality cordless impact driver, like the Milwaukee M18 Fuel, because its power and portability allow me to tighten fasteners securely and quickly, especially when installing durable stainless steel hardware. For detailed precision work, I prefer a Bosch GO 2 Professional Electric Screwdriver, which minimizes hand fatigue during repetitive tasks like securing joist hangers or handrails. Using the right tools not only accelerates the maintenance process but also ensures your structures will endure the test of time.
How do I maintain outdoor structures over time?
Consistent inspection is key. I set a quarterly maintenance schedule, where I check for rusted hardware, sealant wear, and water pooling. Applying a weather-resistant sealant, like Loctite PL Marine Sealant, to critical joints prevents water seepage and wood rot. Additionally, incorporating a pressure washer with a wide spray tip helps remove mold, dirt, and debris without damaging composite surfaces. To stay ahead, I keep a digital log of maintenance dates and tasks, which I find invaluable for tracking wear patterns and scheduling proactive repairs.
Looking toward the future, advancements in smart sensors might eventually enable real-time moisture detection and structural health monitoring—saving homeowners time and costly repairs. Some emerging products, as discussed in the 2025 trends guide, are making this a reality.
Why investing in the right tools pays off
Investing in quality tools, like a digital moisture meter, allows me to verify the effectiveness of sealing and drainage solutions. For example, using a Moisture Meter pin-type helps identify hidden moisture pockets in wooden stairs or framing before they cause significant damage. This proactive approach, supported by studies such as those from the Forest Products Laboratory, extends the lifespan of your outdoor structures and reduces long-term costs.
Take time to experiment with advanced maintenance tricks, such as resealing joints with solvent-based sealants or upgrading fasteners with corrosion-resistant options. For your next project, try applying a coat of weatherproof sealant to vulnerable areas using a foam brush for precision. This small step can make a significant difference in durability and appearance. Do you have a favorite tool or maintenance method you swear by? Share your experience, or contact us through our contact page for personalized advice.
What I Wish I Knew Before Installing Hidden Storage
- Patience is key—rushing sealing or misjudging water runoff can lead to leaks that undermine your entire project. It took me multiple adjustments to get my trapdoor perfectly waterproof, but the effort was worth it.
- Choosing the right materials makes all the difference. I learned that not all composite or framing lumber resist moisture equally—invest in quality to avoid early decay and costly repairs down the line.
- Sealing is an art—apply sealants meticulously, especially at joints and edges. The small details prevent big problems, as I discovered after heavy rains seeped through earlier sloppy work.
- Integrate drainage thoughtfully—discreet weep holes and slopes are your best friends. Skipping them might save time upfront, but water pooling causes rot, which I faced firsthand.
- Durability isn’t just about hardware—regular maintenance and inspections prolong the lifespan of your waterproof trapdoor, saving you money and stress in the future.
Tools and Resources That Changed My Approach
- Milwaukee M18 Fuel Impact Driver: My go-to for securing fasteners tightly, especially stainless steel hardware resistant to corrosion near coastal areas.
- Loctite PL Marine Sealant: For sealing edges and joints effectively—trust me, proper sealing is what keeps water out.
- Moisture Meter (Pin-Type): Helps me detect hidden moisture pockets before they become major problems, rooted in research from the Forest Products Laboratory.
- Consulting Professional Deck Builders: Their experience saves me hours of trial and error—don’t hesitate to seek expert advice through our contact page for tailored guidance.
Your Next Step in Outdoor Living Evolution
Building a waterproof hidden trapdoor transformed my entire outdoor space into a durable, beautiful sanctuary. Remember, meticulous planning, high-quality materials, and ongoing maintenance are your best allies in this journey. Every deck deserves to be both stunning and resilient—so why not take the next step towards optimizing your outdoor area today? If you’re curious about more design ideas or need professional assistance, explore our tips for stunning outdoor living or get in touch through our contact page. Your perfect backyard is just a project away!