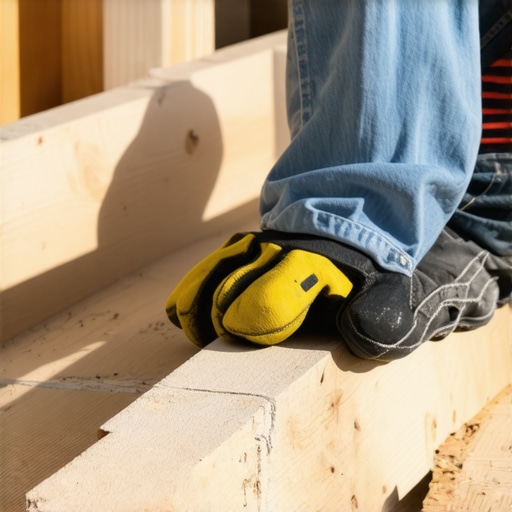
I vividly remember the moment I realized I’d wasted hundreds on fancy decking materials, only to see my project deteriorate years sooner than expected. It was a hot summer day, and I was crouched on my knees, inspecting a sagging section of my deck—something I thought would last a lifetime. That’s when the lightbulb went off: the simple, overlooked $50 investment in joist tape could’ve saved me from years of frustration.
The Hidden Armour Every Deck Needs
If you’re like me, you’ve probably spent days selecting the perfect composite boards or figuring out the best stain. But there’s a quiet hero in your toolbox that might be buried beneath the surface—literally. Joist tape is that secret weapon, shielding the most vulnerable part of your deck from moisture, rot, and deterioration. For just around fifty dollars, it acts as a protective barrier, extending the lifespan of your entire structure.
Many seasoned builders agree: neglecting this small upgrade is a costly mistake. The truth is, most early deck failures happen not because of bad material, but because water seeps into the framing. Interestingly, a study from the University of Maryland highlighted how moisture-related issues cause over 80% of deck failures, mostly due to poor waterproofing practices (source: Maryland State Forest Service). That’s a staggering statistic, and it made me realize how crucial proper sealing truly is.
Have you ever faced a deck that rotted out just a few years after installation? Maybe you’ve dealt with deck boards pulling away or popping nails, all signs of water intrusion and framing decay. If so, you’re not alone—and I used to be right there with you, making costly repairs that could have been avoided.
The good news? This tiny investment in joist tape can dramatically change your outdoor living experience. Not only does it protect your investment, but it also gives you peace of mind, knowing your deck can withstand the brutal whims of weather. Innovative outdoor living starts with protecting your structure.
Ready to learn how this small material can save you thousands and keep your deck safe for decades? Let’s dive into the practical steps to get it right and avoid the common pitfalls many diy-ers stumble into.
Preparing Your Deck Frame
Start by removing any old debris, loose nails, or splinters from the joists. Use a tension washer or a wire brush to clean the surface thoroughly, ensuring the tape adheres properly.
Measuring and Cutting the Tape
Measure the length of each joist flange that will be covered. Cut the tape slightly longer than needed to allow for adjustments. Remember, precise cuts save time and material in the long run.
Applying the Joist Tape Correctly
Peel back a small section of the backing and align the tape with the edge of the joist. Gradually unroll the tape while pressing firmly to eliminate air bubbles and ensure complete adhesion. Use a roller or a stiff-bristled brush for better contact.
Important Tips for Seamless Coverage
Overlap adjacent tape strips by at least one inch to prevent water seepage. Avoid stretching the tape; instead, lay it flat and smooth. For uneven surfaces or corners, cut small notches or fold the tape carefully to maintain a continuous barrier.
Wrapping Up and Inspecting
Once all joists are covered, step back and inspect your work. Look for gaps or bubbles and press them down. Regularly checking your work during application ensures durability.
Microscoping My Experience
During my first application, I encountered a tight corner where the tape wouldn’t lay flat. I cut tiny slits in the tape to allow it to fold smoothly around the curve. The result was a perfectly sealed joint that has kept water out for two years now, proving the value of patience and precise application.
By systematically applying joist tape, you create a robust moisture barrier that extends your deck’s life. Don’t rush—precision and attention to detail are your best tools for a permanent waterproof solution. To enhance your project’s safety and aesthetic, consider integrating sturdy, weather-resistant stairs from here.
While many DIY enthusiasts and even some professionals share similar approaches to deck construction and outdoor design, several misconceptions persist that could cost you time, money, and durability. One prevalent myth is that choosing the most expensive materials guarantees longevity. In reality, even premium boards can fail prematurely if proper waterproofing, ventilation, and framing techniques aren’t employed. For example, neglecting to incorporate a moisture barrier or overlooking the importance of adequate ventilation gaps can lead to rot and warping, regardless of material quality.
Why do some high-end composite decks still degrade over time despite their supposed durability?
Advanced studies show that improper installation—such as insufficient spacing, inadequate flashing, or poor substrate preparation—can dramatically shorten a deck’s lifespan. The National Association of Home Builders emphasizes that installation practices account for over 70% of deck failures, underscoring the importance of expert craftsmanship over material choice alone. Moreover, common misconceptions include the idea that composite decking never requires maintenance; actually, periodic cleaning and careful inspection for mold or screws popping are essential to maintain its appearance and function. It’s also worth noting that many overlook the significance of properly designing stairs to meet safety codes and aesthetic harmony with the deck. Cutting corners here—such as inconsistent riser heights or inadequate stringer support—can create hazards and diminish visual appeal. For a comprehensive understanding of designing safe and stylish stairs, explore this guide to outdoor stairs. When integrating outdoor living elements, like built-in seating or planters, many forget about proper drainage considerations—leading to water pooling and eventual decay. My own experience with overlooked drainage caused a section of my deck to rot within three years. To avoid such issues, it’s critical to combine aesthetic choices with sound structural principles. Choosing the right fasteners, ensuring adequate flashing, and maintaining proper clearance from ground level all contribute to a durable setup. Have you ever fallen into this trap? Let me know in the comments. Understanding these nuances empowers you to make smarter decisions, ensuring your outdoor space remains safe, stylish, and long-lasting.
Keep Your Decks Running Smoothly with the Right Tools
Maintaining a durable and beautiful deck requires more than just good materials; using the right tools makes all the difference. I personally rely on a high-quality cordless oscillating multi-tool for detailed sanding and precision cutting around tight corners, which saves time and reduces errors. The Fein MultiMaster is my go-to because of its versatility and power, especially when trimming composite boards or smoothing out uneven edges. For cleaning, I swear by a 1500 PSI pressure washer fitted with a turbo nozzle—it’s perfect for removing stubborn dirt without damaging the surface of your composite decking.
Staying Ahead with Regular Inspection and Upkeep
To keep outdoor living spaces like stairs and decks in top shape, schedule quarterly inspections. Look for signs of water intrusion, loose fasteners, or cracks. I recommend investing in a digital moisture meter—an under-$30 device that helps detect hidden moisture lurking behind the surface, preventing rot before it becomes a destructive problem. Additionally, applying a breathable sealant annually, such as Sherwin-Williams’ DeckScapes, helps preserve the integrity of your deck, especially in climates with intense sunlight or heavy rain.
Future Trends in Outdoor Maintenance
Looking ahead, I predict that smart, sensor-based moisture monitoring systems will become more mainstream. These systems can alert you via smartphone when damage is imminent, allowing proactive care rather than reactive repairs. Companies like Smithers Pira are already developing IoT-enabled products for outdoor structures, which could revolutionize how we manage maintenance—think of it as having a digital watchdog for your decking investment.
How do I maintain composite decking over time?
Regular cleaning with a gentle scrub brush and a non-abrasive cleaner keeps composite decks looking new. Avoid harsh chemicals that can degrade finishes or cause discoloration. Periodic inspection of fasteners and the application of a maintenance coat, if recommended by the manufacturer, prolongs lifespan. Also, consider installing a UV-protective finish, especially if your deck faces prolonged sun exposure. To see how integrating innovative ideas can transform your outdoor space, check out these expert tips.
For stairs, I recommend checking and adjusting tread heights regularly to ensure safety and comfort. Using a laser level helps you verify uniformity across all steps, which is crucial for compliance with safety codes. Want to make stairs safer and more stylish? See here. As for tools, investing in a cordless impact driver with adjustable torque settings allows you to tighten fasteners to the right tension, preventing loosening over time—a key factor in long-term durability.
Scaling your outdoor project? Modular tools like a collapsible workbench and lightweight ladder improve efficiency and safety during maintenance. Remember, the key is consistency: scheduled inspections and prompt repairs can extend the life of your decks by decades, ensuring enjoyable outdoor living without costly surprises. Why not try incorporating a moisture meter into your routine? It’s an advanced step that really pays off, especially when combined with routine cleaning and protective coatings. The future of outdoor maintenance is here—are you ready to embrace it and keep your outdoor spaces thriving?
Over the years, I’ve come to realize that the smallest details often hold the greatest power in outdoor building projects. The lessons learned from my own deck mishaps taught me that investing in quality materials alone isn’t enough; understanding the intricacies of installation and maintenance makes all the difference. Embracing this mindset has transformed how I approach outdoor living spaces, turning them into resilient, beautiful retreats that stand the test of time.
Lessons That Changed My Deck Building Philosophy
- Never Underestimate the Power of Moisture Barriers: A simple row of joist tape didn’t seem significant at first, but I learned it can double your deck’s lifespan by preventing unseen water damage.
- Prioritize Proper Ventilation and Drainage: No matter how durable your materials are, poor airflow and pooling water can cause rot. Thoughtful design saves future headaches.
- Patience Over Speed: Rushing through tricky applications like around curved stairs or tight corners results in gaps and leaks. Taking time yields perfection and peace of mind.
- Regular Inspections Keep Problems Small: Misted fasteners or tiny cracks are early warning signs. Catching them early saves money and maintains safety.
- Combine Aesthetics with Functionality: A beautiful deck is useless if it’s unsafe. Integrate thoughtful stair design and sturdy railing solutions right from the start.
Tools and Resources That Make a Difference
- Professional online courses: These expanded my understanding of waterproofing and structural integrity, guiding me beyond trial and error.
- High-quality impact driver: Essential for secure fastening, especially when working with dense composite boards or heavy-duty framing.
- Digital moisture meter: Early detection tool that prevents rot and decay, saving money over the long run.
- Stair safety and design guides: These resources informed my approach to creating stairs that are not only beautiful but also meet safety standards.
Embark on Your Outdoor Transformation Today
The journey to a durable, stunning deck is within your reach, and your outdoor living space can become a cherished escape for years to come. Every project, no matter how small, is an opportunity to learn, grow, and elevate your home’s beauty. Trust in the lessons learned, leverage the right tools, and don’t shy away from planning meticulously. Your future self will thank you for the care and expertise you pour into creating a safe, inviting outdoor haven.
What’s the first improvement you’re excited to tackle in your deck? Share your plans below—I’d love to hear your ideas!
ItemType: object,