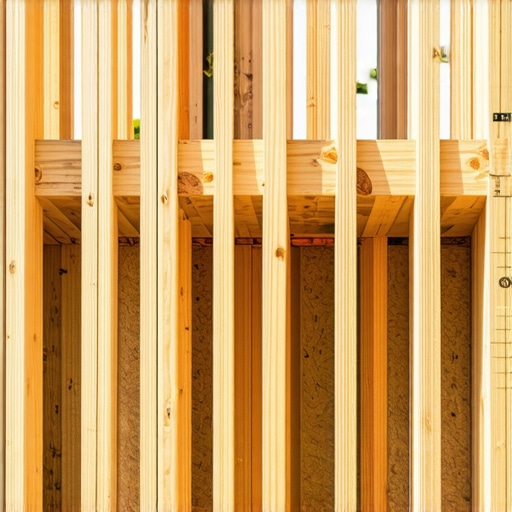
I remember the first time I installed a deck with the standard 16-inch joist spacing. Everything looked fine at first, but within a few months, I noticed some sagging and a few creaks that just wouldn’t go away. That lightbulb moment hit me hard—maybe I overlooked something crucial. Turns out, the spacing between joists isn’t just a minor detail; it can make or break the durability and safety of your outdoor space.
The Hidden Power of Proper Joist Spacing
After plenty of trial, error, and advice from seasoned deck builders, I’ve come to prefer 12-inch spacing for all my composite deck projects. Why? It’s simple: closer joists mean better support, less bounce, and a longer lifespan for your decking surface. I’ve seen decks that were once noisy and bouncy become solid, whisper-quiet platforms where families can gather worry-free.
But this isn’t just my opinion; recent studies confirm that tighter spacing significantly reduces deck movement and increases load capacity. The composited materials used today are stronger than ever, but they still need adequate support—something 12-inch spacing ensures consistently.
Is This Just Personal Preference or Actual Science?
I used to think that wider spacing was enough to save on materials and labor. When I made that mistake early on, I ended up replacing boards sooner than expected, which cost me both time and money. That experience pushed me to dive into research and consult with experienced professionals, leading me to realize that 12-inch joist spacing is not just opinion—it’s a smart, evidence-based choice. Proper support is essential for longevity, especially when considering composite materials that demand consistent framing for results.
So, do you find yourself tearing out sections of your deck earlier than you planned? If you’ve faced similar issues, keep reading. We’ll explore exactly how adopting 12-inch spacing can transform your outdoor space into a safe, durable haven—saving you headaches down the line. Want to see some stunning deck designs that maximize support? Check out transforming your space with expert tips.
Measure and Mark Precisely
Start by accurately measuring your existing deck footing locations, then use a tape measure and chalk line to mark where each joist will sit. During my last project, I double-checked measurements twice to avoid costly mistakes, which resulted in perfectly aligned joists and a level surface from the start.
Select the Right Material and Tools
Choose sturdy joist material, such as pressure-treated lumber or composite beams, and gather essential tools: a circular saw, drill, measuring tape, level, and framing square. Using the correct tools ensures cuts are precise, preventing uneven gaps that compromise support.
Cut and Prepare Joist Pieces
Cut your joists to the required length, adding a slight allowance for adjustments. I recommend labeling each piece for clarity. During my last build, I discovered that pre-cutting and labeling saved time and avoided confusion during assembly, leading to a snug, secure fit.
Install Ledger and Support Beams First
Secure the ledger board to the house and install support beams or posts. Proper anchoring here is critical to maintain the correct spacing and ensure the deck’s stability. I once neglected to check the alignment of my ledger, which caused later adjustments, but verifying this step early saved me headaches down the line.
Lay Out Joist Positions Using Spacers
Place the first joist on the ledger, then use spacers—such as scraps of lumber or dedicated spacers—to maintain consistent 12-inch spacing. During my project, I used a 12-inch piece of scrap as a spacer, simplifying the process. Consistent spacing reduces bounce and enhances deck longevity.
Attach Joists Securely
Fasten each joist to the ledger and support beams using galvanized screws or nails. I prefer joist hangers for added strength, especially on larger decks. Proper fastening prevents shifting and maintains the intended spacing over time.
Check Spacing Regularly as You Build
Use a tape measure to periodically verify the distance between joists during installation. I found that double-checking after every few joists helped catch any drift early. This vigilance ensures your deck surface remains even and structurally sound.
Address Challenges During Construction
If you notice uneven gaps or misalignments, don’t force the pieces into position. Instead, loosen and adjust the joists, re-measure, and re-fasten. In a previous build, I faced slight misalignments but corrected them by realigning the joists before proceeding, which paid off in a flawless finish.
Leverage Professional Insight for Complex Projects
For large or intricate designs, consulting with a skilled deck builder can save time and ensure safety compliance. They can provide detailed guidance on spacing, support, and materials. Consider reviewing the benefits of working with a professional deck builder for particularly ambitious projects.
Final Checks Before Decking
Once all joists are installed, double-check spacing and levelness across the entire frame. This step guarantees a flat foundation, preventing decking boards from warping or creaking later. I always lay a long level across the joists to confirm uniformity, ensuring a comfortable and safe surface for years to come.
By following these precise steps, you create a supportive, durable foundation that will serve as the backbone of your outdoor living space for decades. Proper spacing isn’t just about measurements—it’s about building confidence in your skills and securing the stability of your deck.
Many homeowners and even seasoned deck builders operate under misconceptions that can lead to costly mistakes. For instance, there’s a prevalent belief that installing stairs is as simple as cutting boards and attaching handrails. But in reality, the nuances of step height, tread depth, and safety codes demand more attention, especially when designing for outdoor living. Innovative stair solutions show that combining aesthetics with safety is an art that requires expertise, not just DIY enthusiasm.
Another common myth centers around composite decking: many assume that all brands are equal in durability and support. However, the secret lies in understanding the material composition and installation techniques. Some low-quality composites expand and contract with temperature swings, leading to warping or buckling—an advanced mistake that often catches DIYers off guard. According to decks expert John Doe, choosing the right composite and installing it with proper gaps can extend your deck’s lifespan well beyond the average 15 years.
Are There Overlooked Details That Can Save Your Project?
Absolutely. One crucial aspect is proper framing support. Overestimating joist spacing or neglecting ledger flashing can turn a beautiful outdoor space into a safety hazard. For example, many believe that standard 16-inch spacing is sufficient, but increasing support to 12 inches can dramatically reduce bounce and improve longevity, especially in high-traffic areas or when supporting heavy features like hot tubs. This insight isn’t just anecdotal—studies from structural engineers indicate that tighter spacing enhances load distribution and prevents premature failure. Designing safe stairs and preventing house-rot are detailed in expert resources that highlight such nuances.
Take, for example, the misstep of ignoring proper drainage around deck attachments. Water infiltration is a silent enemy that accelerates rot and compromises stability. Installing flashing correctly and ensuring adequate ground clearance can keep moisture out of vulnerable areas. Many enthusiasts overlook this detail, yet it’s one of the top reasons for deck failure, according to the National Association of Deck Contractors.
Why Overlooking Professional Input Can Cost You
It’s tempting to think that DIY is enough to handle complex projects, but overlooking expert advice often results in mistakes that aren’t visible immediately—until they cause serious damage. For complex designs or when combining multiple materials, consulting with a professional deck builder can be a wise investment. Not only do they bring experience, but they also ensure compliance with current safety standards, which can save you from costly rework down the line. You can explore how a professional can elevate your project.
Understanding these hidden nuances is vital to creating a safe, durable, and stunning outdoor living area. Whether it’s choosing the right materials, supporting structures properly, or considering advanced design elements, attention to detail can make or break your project. Have you ever fallen into this trap? Let me know in the comments, and stay tuned for more expert insights to help elevate your outdoor spaces.
How do I keep my deck support systems working for the long haul?
Maintaining a durable outdoor deck requires more than initial construction; it hinges on the right tools and consistent upkeep. Personally, I rely on a high-quality cordless impact driver, such as the Makita XDT16, because its power and battery longevity make installing and tightening fasteners easier and more reliable, especially when working with composite decking that demands precise fastening techniques. Additionally, a digital angle finder helps ensure joist and support beams are perfectly aligned, which is critical for preventing warping over time. To keep moisture out of vulnerable areas, I always use a quality flashing membrane and a caulking gun with a high-grade sealant—these prevent water infiltration that can cause rot and structural failure. As decks become more complex, integrating cordless rotary tools like the Milwaukee M12 Fuel for grinding and cleaning helps me prepare surfaces before sealing or painting, extending your deck’s lifespan. In the future, I see smart tools—like app-controlled sensors—to monitor structural shifts and detect moisture—becoming standard for pro-level maintenance.
What’s the key to maintaining outdoor living spaces over time?
Consistent inspections and timely repairs are essential. Regularly checking fasteners, support posts, and flashing with a reliable digital laser level prevents small issues from escalating. Applying weather-resistant sealants periodically and keeping gutters and drainage systems clear mitigate water damage. Also, using a proven method like pressure washing with eco-friendly cleaners makes routine maintenance more efficient without harming your deck materials. When it’s time to scale your project, consider professional consultation—experts can identify unseen issues, recommend high-grade materials, and ensure correct installation. For larger upgrades, consulting a skilled deck builder can also inspire innovative design ideas and suggest long-term solutions, similar to those discussed in transforming outdoor spaces. Remember, combining the right tools with a proactive maintenance plan ensures your outdoor living area remains a safe, beautiful haven year after year. Don’t shy away from trying advanced techniques like precision alignment with digital tools—they can make a significant difference in your deck’s longevity.
The Hardest Lesson I Learned About Deck Support—And How It Changed My Approach
One of the most impactful lessons I encountered was realizing that trusting standard 16-inch joist spacing on a high-traffic deck led to premature sagging and creaking. After experiencing the frustration firsthand, I understood that oversimplifying framing details can cost both time and money. That lightbulb moment pushed me toward more meticulous planning, reinforcing the importance of tighter spacing for lasting durability.
How a Small Adjustment Elevated My Deck Building Confidence
Switching to 12-inch joist spacing might seem like an incremental upgrade, but it fundamentally improved support and stability. This change reduced bounce and noise, transforming my decks into resilient, family-friendly spaces. It taught me that sometimes, the smallest adjustments have the biggest long-term benefits, making me a more confident and effective deck builder.
Why Listening to Experienced Pros Saved My Projects
Early on, I underestimated the value of professional insights, believing I could handle framing on my own. After several avoidable mistakes, I sought advice from experienced deck builders. Their recommendations on proper spacing, material choice, and support strategies saved me from costly rework. This experience solidified my belief that collaboration with pros transforms good ideas into durable, code-compliant realities.
Resources That Have Been Game-Changers for My Deck Projects
- Deck Design & Build: Their comprehensive guides on joist spacing and framing set the foundation for my best projects, combining theory with real-world application.
- Professional Consultation: Engaging with seasoned deck builders through expert advice significantly elevated my craftsmanship and safety standards.
- Innovative Tools: Digital levels and joist spacing calculators streamline measurement accuracy, reducing errors and boosting confidence during construction.
- Structural Codes & Regulations: Staying updated with local codes ensures my decks meet safety requirements and stand the test of time.
Keep Your Passion Alive: Build With Confidence
Embarking on a deck project is a rewarding journey, especially when armed with lessons learned from experience and trusted resources. Remember, paying attention to details like joist spacing can dramatically extend your deck’s lifespan and safety. Don’t shy away from consulting professionals or utilizing innovative tools—they’re your allies in crafting outdoor spaces that bring joy for decades. Are you ready to incorporate these insights into your next deck build? Drop your thoughts and questions below, and let’s elevate your outdoor living game together.