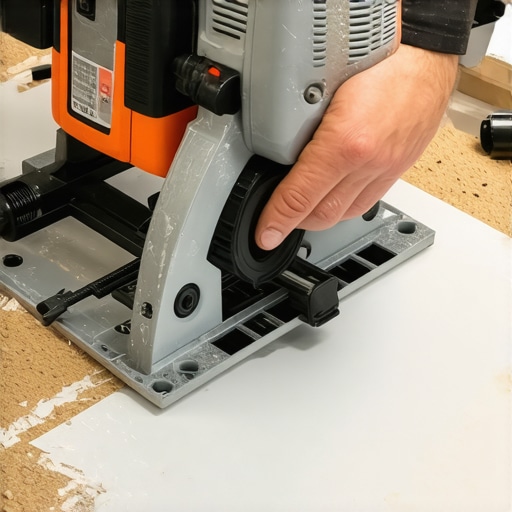
I still remember the moment when I nearly ruined a beautiful new deck. There I was, trying to cut a composite board for a custom stair tread, only to see the plastic singe and melt under my saw blade. It was a frustrating mess—and a pricey lesson in what not to do. That experience taught me something crucial: cutting composite decking isn’t just about grabbing a saw and getting to work. There’s a real art—and science—to doing it right, especially if you want clean cuts and a deck that lasts.
Why Cutting Composite Boards Is Different From Wood
Composite decking has become my go-to choice for outdoor projects. It’s durable, low-maintenance, and looks fantastic when installed correctly. But here’s the catch: unlike traditional wood, composites are a blend of plastic and wood fibers. This means they’re more sensitive to heat. When cuts get too hot, the plastic tends to melt or burn, leading to rough edges and weak spots that can compromise your project.
The big question is: how do you cut composite boards without turning them into a hot mess? Well, I found out the hard way that using standard saw blades or insufficiently cooled tools can cause significant damage. Early on, I made the mistake of assuming that what worked for wood would work for composites. That mistake cost me time, money, and a lot of salvaged boards. To avoid spinning your wheels, it’s important to understand the techniques and tools that will keep your cuts clean and your boards intact.
If you’re facing similar frustrations, you’re certainly not alone. Many DIYers and even experienced builders grapple with this challenge. Luckily, with a few adjustments and some insider tips, you can master the art of cutting composite boards effectively. For inspiration on creating stunning outdoor spaces, check out [transform your outdoor living with custom composite decking ideas](https://deckdesignbuild.com/transform-your-outdoor-living-with-custom-composite-decking-ideas). Understanding the nuances of working with composite materials can dramatically improve the quality of your projects.
Now that we’ve set the stage, let’s dive into the key methods to slice through composite decking safely and smoothly, ensuring your project’s success from start to finish.
Select the Right Tools for Cutting
Start with a high-quality, carbide-tipped saw blade designed specifically for composite materials. I learned this the hard way when I used a standard blade, which caused melting and rough edges. Investing in a blade made for composites ensures cleaner cuts and prolongs your saw’s life. For detailed recommendations, check out choosing the right composite decking.
Prepare Your Work Area Properly
Set up a stable, flat surface with ample support to prevent the board from bending or vibrating. Use clamps to secure the board firmly. I once attempted to cut a warped board on a unstable table, resulting in a jagged edge. Proper support during cutting is essential to prevent movement that could ruin your cut. Think of it like sawing a piece of wood on a stable sawhorse—stability equals precision.
Control Heat and Dust During Cutting
Composite boards generate heat and dust that can affect cut quality. Use a dust collection system or vacuum to keep your workspace clean. Also, employ a saw with a slower no-load speed setting if possible, to minimize heat buildup. I experienced melting when I overworked a piece without cooling intervals; taking small passes and pausing prevents this. Heat management is crucial for a clean finish.
Master the Cutting Technique
Make smooth, steady passes with your saw, maintaining consistent speed and pressure. Avoid forcing the saw through the material, which can cause chipping or melting. When I cut a large deck board, I found using a slow, controlled motion reduced burn marks. Think of it like carving with a sharp knife—the smoother and more deliberate, the better the outcome.
Finish the Edges for a Professional Look
After cutting, lightly sand the edges to remove any burrs or rough spots, especially if you’ll see the cut ends. This step also helps the fascia or trim sit flush. I once overlooked this step and noticed splinters later, which weren’t ideal for barefoot walking. Proper edging gives your project a polished, professional appearance.
Implement Safety Measures
Always wear safety goggles, dust masks, and hearing protection. Cut composites can produce fine particles that irritate your eyes and lungs. I learned this from a close call when I ignored my dust mask—better to be safe than sorry. Maintaining safety ensures a smooth workflow without setbacks.
While many believe that installing composite decking is a straightforward upgrade, the reality is far more nuanced. One common myth is that all composite boards are created equal—yet, advanced enthusiasts recognize that quality varies dramatically, affecting durability and aesthetics. For example, some decks suffer from warping or discoloration due to improper material selection or installation techniques. Skimping on these details often results in costly repairs and shortened lifespan.
How can subtle differences in installation impact long-term performance?
Studies, such as those by the North American Deck and Railing Association, highlight that shading, ventilation, and precise fastener placement can prevent issues like mold buildup and board delamination. Overlooking these nuances—like failing to leave proper gaps or ignoring manufacturer bespoke instructions—can turn a dream outdoor space into a maintenance burden.
A frequent emotional trap is the allure of low-cost options, which often compromise on sturdiness and safety, especially when building stairs or supporting heavy features like hot tubs. Working with a professional deck builder ensures mastery over these intricate details, resulting in safe, long-lasting outdoor structures. For comprehensive guidance on these aspects, visiting seasoned resources such as the [transform your outdoor living](https://deckdesignbuild.com/transform-your-outdoor-living-with-custom-composite-decking-ideas) page provides invaluable insights.
It’s also critical not to underestimate the importance of choosing the right fasteners—stainless steel or specialized composites—to prevent rust or corrosion over time. Remember, superficial assessments can hide potential pitfalls; always scrutinize material warranties and installation guidelines. This insight underscores why advanced DIYers and professionals alike prioritize expert consultation early in their projects.
Don’t fall into the trap of assuming that a visually appealing deck will stay flawless without ongoing care. Regular inspections, cleaning, and understanding the subtle telltale signs of wear are essential. Whether you’re upgrading your current outdoor space or building from scratch, mastering these nuanced details sets truly experienced builders apart. Have you ever fallen into this trap? Let me know in the comments.
How Do I Keep My Composite Decks and Outdoor Living Spaces in Top Shape?
Maintaining a durable composite deck isn’t just about cleaning it regularly; it requires the right tools and a proactive approach to upkeep. I personally swear by using a high-quality cordless drill with variable speed settings, particularly when installing or adjusting fasteners like stainless steel screws, known for resisting corrosion in coastal environments. These tools give me the control needed to secure boards tightly without risking damage or over-tightening.
Another staple in my maintenance arsenal is a solid, long-handled deck brush combined with a gentle, eco-friendly cleaner. This combo helps me remove dirt and algae buildup without harming the composite material. For stubborn stains, I turn to a soft plastic scraper to lift grime without scratching the surface.
To protect the investment, I routinely inspect for loose fasteners or any areas where the boards may be flexing. Using a torque wrench set to the appropriate setting (often recommended by the manufacturer) ensures that all fasteners are tightened correctly, avoiding potential warping or cupping over time. This proactive “tuning” makes a significant difference in the lifespan of your deck.
What Tools Are Best for Scaling and Long-Term Results?
As your outdoor space evolves, so should your toolkit. For larger projects or renovations, I recommend a powered orbital sander equipped with a medium grit pad to smooth rough edges after cutting or if repairs are needed. This ensures a seamless appearance and prevents splinters, especially in high-traffic zones and stairs.
To foster a lush, inviting landscape that complements your deck, I include a quality soil moisture meter to inform watering decisions. Healthy plants, especially around the perimeter, extend the lifespan of your decking by minimizing debris and moisture retention that can lead to mold or rot—especially if your deck is near lush foliage or shaded areas.
Looking ahead, technology will likely continue to streamline maintenance routines. Smart sensors embedded in the decking could alert you to moisture buildup or structural stress long before visible signs appear, thus promoting preventive care. Some innovative companies are already exploring such integrations, which could revolutionize how we care for outdoor living spaces in the coming years.
Learning From Experts and Continuous Improvement
To ensure your composite deck remains a stunning feature, I suggest consulting professional resources like working with a professional deck builder. They can provide tailored advice, especially for scaling your project or tackling long-term challenges.
One advanced tip I actively use is periodically applying a UV-resistant sealant designed for composite materials—this step isn’t always necessary but can prevent fading and discoloration over years of exposure. Trying this out could be a game-changer for maintaining color integrity, especially if your deck receives intense sunlight. For detailed guidance, review this article.
Embrace these tools and maintenance practices to maximize your deck’s performance and aesthetic appeal for years to come. Regular inspection and timely upgrades will help you enjoy your outdoor oasis without worries.
What I Wish I Knew Before My First Cut
One of the most eye-opening lessons I learned was the importance of testing your tools and techniques on scrap pieces before diving into your actual project. Small, controlled experiments reveal how different blades, speeds, and cooling methods affect the cut quality and prevent costly mistakes. Trust me, skip this step at your peril.
Another insight was realizing that patience is key. Rushing through cuts often leads to melt marks and splinters. A slow, steady approach, paired with the right safety gear, makes a world of difference. I found that slowing down and maintaining consistent pressure results in cleaner, smoother edges that look professional.
Finally, I discovered that investing in quality tools isn’t just about longevity but also project success. A carbide-tipped blade designed for composite materials reduces heat buildup and ensures the saw remains sharp longer, saving time and money in the long run. Small upgrades like these elevate your work from amateur to pro.
Gear Up with Proven Resources for Success
My go-to tool is the high-quality, composite-specific saw blades. They cut through resilient materials effortlessly, giving you precise results and extending your equipment’s lifespan. Pair this with a sturdy work support system like a rigid work table or sawhorses to keep your boards stable during cutting—stability prevents mistakes and enhances safety.
For detailed guides, expert articles covering finishing touches and installation nuances have transformed my understanding of composite decking. Learning from seasoned builders helps avoid rookie errors and instills confidence in your craftsmanship.
Last but not least, I rely on a professional consultation when planning large projects. Even small tips from pros can prevent common pitfalls like improper gap spacing or misaligned boards, which impact both aesthetics and durability.
Your Deck, Your Masterpiece — Now It’s Your Turn
Armed with insider lessons, trusted resources, and a willingness to learn, you’re ready to elevate your outdoor living with beautifully cut, long-lasting composite decking. Remember, each precise cut and careful detail adds value and beauty that endures through the seasons. Don’t hold back—embark on your next project with confidence and craftsmanship that stands out.
What’s the biggest challenge you’ve faced when working with composite decking? Share your experiences below, and let’s learn together!