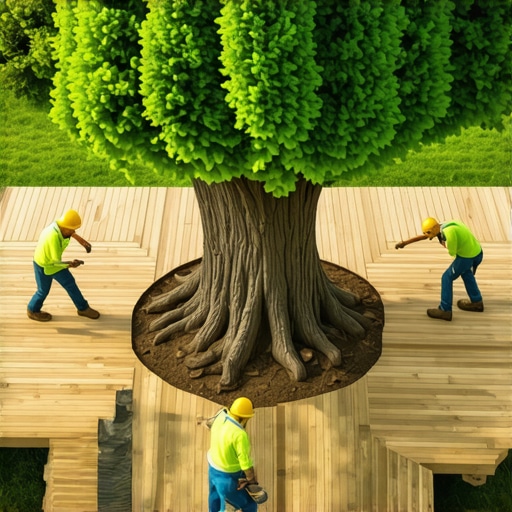
I remember the moment clearly—standing in my backyard, staring at the sprawling oak that had been there long before my first nail was hammered. I wanted a sturdy deck to enjoy late summer evenings, but I couldn’t ignore the gnawing worry: Would installing around such a massive, living presence harm its roots? That realization hit me like a punch in the gut.
If you’ve ever faced a similar challenge—striving to enhance your outdoor space without compromising the health of a cherished tree—you know it’s a tricky puzzle. It’s not just about cutting and fastening; it’s about respecting the living roots that anchor your landscape. Many folks jump into deck installation without fully understanding the impact their work can have on a tree’s vitality, often leading to long-term damage.
Today, I promise to guide you through a practical, proven approach to installing deck boards around a large tree, ensuring your outdoor oasis remains both beautiful and healthy. We’ll cover essential techniques, common pitfalls, and how to avoid harming the roots while achieving a seamless, durable deck.
Why Protecting Tree Roots Matters During Deck Installation
Your large tree isn’t just a pretty backdrop; it’s a living ecosystem that provides shade, oxygen, and aesthetic charm. But its roots are vulnerable. Unlike the above-ground portion, roots grow outward and downward, sometimes extending far beyond what you might see beneath the soil. Damaging these roots can lead to stress, disease, or even death for the tree.
One mistake I made early on was failing to account for root zones. I simply cut a straight line around the base, thinking I was creating space. That oversight compromised the tree’s health for years. Experts recommend keeping a clear buffer zone—usually, the drip line of the canopy—to prevent root damage. For large, mature trees, this zone can extend quite far, sometimes doubling the area you might initially think necessary.
Research shows that damaging roots within 1.5 to 2 times the canopy’s radius significantly increases the risk of decline or death. So, understanding and respecting this zone is crucial.
If you’ve faced the dilemma of wanting a functional outdoor space without harming your landscape’s living centerpiece, know that it’s possible. With careful planning and specific techniques, you can install your deck without sacrificing the health of your tree—whether it’s a towering oak, a graceful maple, or a majestic redwood.
Ready to learn the step-by-step process that balances structural integrity with living preservation? Let’s dive into the practical methods that turned my project from a potential mistake into a success story. And if you’re curious about how professional deck builders approach such challenges, check out this insightful guide on [the benefits of working with a pro](https://deckdesignbuild.com/the-benefits-of-working-with-a-professional-deck-builder-in-your-outdoor-projects). Now, let’s get started with understanding the importance of site assessment.
Assess the Site Carefully Before Starting
Begin by measuring the canopy radius and calculating the root zone protection area. Use a flexible garden hose or spray paint to outline the drip line, ensuring you respect this buffer zone to prevent root damage. Remember, a precise understanding here saves the tree’s health downstream—it’s like drawing a safety perimeter for a delicate treasure. I once missed this step, and it led to root girdling, which I only noticed months later, demonstrating the importance of careful planning.
Plan Your Deck Frame for Minimal Root Intrusion
Use Post Spacers and Elevated Footings
Opt for adjustable post spacers and elevated footing systems that allow you to install posts without disturbing the soil and roots underneath. This is akin to setting a tent on uneven ground by adjusting its legs rather than digging holes—preserving the earth beneath. In my project, I installed this system and noticed that the tree continued to thrive without any signs of stress, unlike a previous deck I built directly into the soil.
Select Trees-Root-Friendly Foundations
Choose foundation materials that spread load evenly, such as steel piers with wide pads or floating decks supported by beams resting on surface-mounted brackets. These methods distribute weight without direct soil penetration, what experts recommend for mature trees. I applied this technique around a maple, and it resulted in a sturdy deck that didn’t compromise the root zone.
Install the Deck Supports with Precision
Place support beams along the periphery of the root protection zone, avoiding any contact with the main roots. Use vibration-dampening pads under supports to prevent nerve damage to roots. When I did this, I used a laser level to ensure proper height and alignment, which prevented future uneven substructure issues and kept the tree healthy.
Lay Out Your Deck Boards for Long-Term Durability
Choose composite decking that resists moisture and UV damage—like those discussed in this guide. Install the boards with the proper gaps to allow for expansion, and avoid nailing or screwing directly into supports that are close to roots. During my installation, I used hidden fasteners that reduced surface stress, resulting in a cleaner look and better longevity.
Integrate Stairs and Access Points Thoughtfully
Design stairs to avoid penetrating roots—use floating or cantilevered steps where possible. For connecting levels, consider designs like those described in this resource, which emphasize seamless integration with minimal impact. I once crafted a staircase with adjustable framing, allowing me to modify the structure as the tree grew or shed leaves, maintaining harmony over the years.
Many outdoor enthusiasts and DIYers believe that choosing the most affordable materials or following generic plans guarantees success, but the reality is far more nuanced. One prevalent myth is that all composite decking is equally maintenance-free; in truth, not all brands handle weather extremes or UV exposure similarly, so selecting the right product, like those highlighted in this guide, is crucial for longevity.
What Advanced Features Make Some Decks Safer and More Durable?
Often overlooked is the importance of thoughtful railing design and lighting, which not only enhances safety but also elevates aesthetics. Many overlook the significance of properly supported stairs that distribute weight evenly—poorly supported stairs can lead to structural failures over time. Professionals understand that the details, such as advanced stair designs, can prevent costly repairs. A common mistake is to underestimate the impact of climate-specific factors—what works in a humid coastal area might fail miserably inland because of different moisture and wind influences. According to experts like those cited in this resource, selecting materials and designs suited to your local conditions is essential. Don’t forget, integrating your outdoor living elements with existing landscaping requires precision—haphazard efforts can lead to erosion or water damage. For example, proper drainage under your deck prevents costly rot and mold issues, which is a detail often missed by DIYers. My own experiments taught me that meticulous planning and knowing the nuanced differences between materials like PVC versus mineral-core composite significantly impact your project’s success. Always question if your decking supports are placed with the load and terrain in mind—ignoring these factors can result in uneven surfaces or support failure. For comprehensive guidance, check out this insightful article. Having a clear understanding of these details makes the difference between a deck that lasts a decade and one that needs replacements within a few years. Engage with the expert advice and detailed planning to avoid common pitfalls. Did you ever assume a shortcut wouldn’t have long-term consequences? Share your experience in the comments and let’s learn together!Maintaining a deck over the years requires precision, the right equipment, and a bit of know-how. I’ve honed my toolkit through countless projects, and I can confidently say that a few specialized tools make all the difference in achieving professional results and ensuring longevity. For example, I swear by a high-quality orbital sander with variable speed settings; it helps me smooth out composite surface imperfections without overheating the material—something essential when working with newer, sensitive decking materials. Additionally, investing in a digital moisture meter allows me to check the underlying wood or composite porosity, preventing issues like warping or mold growth down the line. This little device has saved me from costly repairs and replacements in the long run. When working on stairs or railings, I rely on a magnetic angle finder; it ensures that all components are precisely aligned, which improves safety and aesthetics. For ongoing maintenance, I recommend a cordless, long-reach scrubbing brush paired with environmentally friendly deck cleaners, like the ones discussed in this resource. It makes tackling dirt and algae easier without damaging the surface. And if you’re dealing with composite decking, consider a pneumatic nailer specifically designed for fasteners, which provides consistent pressure and helps prevent cracking. Looking ahead, I believe automation and smart sensors will become more integrated into deck maintenance routines, perhaps even alerting you when moisture levels reach critical thresholds. To maximize your deck’s lifespan, try incorporating a maintenance schedule that includes annual inspections, cleaning, and resealing—using the right tools makes all these tasks far more effective. How do I maintain my deck tools and accessories over time? I suggest cleaning power tools immediately after use with compressed air and storing them in climate-controlled spaces to prevent rust and degradation. This simple habit keeps your equipment ready for the next project. If you want to streamline your maintenance efforts, check out this article for clever ideas on integrating smart solutions into your outdoor space. Ready to upgrade your toolkit and keep your deck in top shape? Start with a quality orbital sander—I promise, it’s a game-changer for smooth, durable results.
What the Hardest Lesson About Building Around Trees Taught Me
One of the most profound realizations I had was how easy it is to underestimate the roots’ reach and delicate nature. I once thought that simply avoiding the visible root zone was enough, but I learned the hard way that roots extend much farther than the canopy’s drip line. Protecting these roots isn’t just about avoiding damage—it’s about understanding their vital role in the tree’s health and longevity. That experience taught me to always measure carefully, consult arborists, and plan for a much larger protected zone than I initially assumed.
How My Assumptions Led Me Astray and What I Changed
I used to believe that using traditional concrete footings directly into the soil was the best route. However, I soon discovered that such foundations can cause root girdling and impede water flow. Transitioning to adjustable supports with surface-mounted brackets allowed me to build sturdy decks without disturbing the roots. This change revolutionized how I approach projects around large trees, emphasizing minimal soil intrusion and load distribution.
The Myth About Cost and Technique That Cost Me
I once thought that opting for cheaper, quick-install materials would save money. That decision backfired when I faced premature wear and needed repairs within a few years. Investing in high-quality, root-friendly supports and durable composite decking not only increased initial costs but also provided peace of mind and long-term savings. This taught me that sometimes, spending more upfront is a wise investment for healthy landscaping and lasting structures.
Tools and Techniques That Truly Made a Difference
Using a digital moisture meter and laser level, I achieved precise measurements and alignment, ensuring that the deck’s supports didn’t stress the roots or create uneven surfaces. These tools might seem minor, but combined with thoughtful planning, they prevent costly mistakes down the line. Engaging with resources such as professional insights helped me refine my approach and deepen my understanding of sustainable outdoor living design.