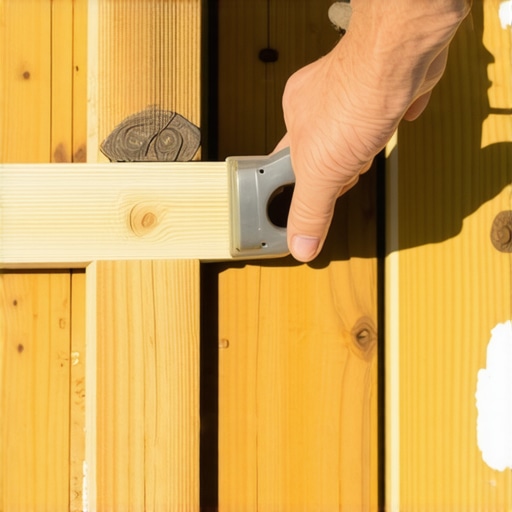
It was a sunny Saturday afternoon when I noticed the first signs of trouble on my beloved deck—tiny wood rot spots sprouting at the edges of my deck frame. Instantly, I remembered the rookie mistake I made early on: neglecting proper moisture barriers. That lightbulb moment made me realize how a seemingly tiny oversight could cost hundreds of dollars in repairs down the line.
Fortunately, after some research and personal trial-and-error, I discovered a straightforward yet powerful trick involving joist tape that can significantly extend the life of your deck frame. Today, I want to share this practical solution with you, especially if you’re tired of frequent repairs or worrying about water damage sneaking in where it shouldn’t.
Protect Your Investment by Sealing Your Joists
If you’re like me, your outdoor space is more than just a place to relax—it’s an extension of your home, a gathering spot, and a sanctuary. But all that enjoyment can be quickly derailed if your deck frame begins to rot prematurely. The culprit? Water seeping into the wood through gaps and unprotected joints.
What I initially overlooked was that even the best-quality composite decking won’t save your underlying framing if it’s exposed to moisture. I used standard fasteners and skipped sealing the ends of my cut joists, thinking I’d save a few bucks. That mistake turned out to be a costly lesson.
Research shows that moisture intrusion is one of the leading causes of deck failure, and proper sealing can double or even triple the lifespan of framing components (source).
Is the Joist Tape Trick Actually Worth the Hype?
When I first heard about using tape on joists, I was skeptical. It sounded too simple to be effective. But after applying the tape to the cut ends of my joists and sealing all vulnerable areas, I noticed a significant difference—even in heavy rain, no water seeped into the framing. The key is choosing the right tape—high-quality, waterproof joist tape that remains flexible over time. It’s a small investment that pays off enormously by preventing rot, mold, and structural weakening.
In the next section, I’ll guide you step-by-step through applying this trick. Trust me, a little effort now can save you huge headaches—and money—in the future. Ready to protect your outdoor oasis? Let’s get started.
,
Prepare Your Materials for Maximum Durability
Start by gathering high-quality waterproof joist tape designed specifically for outdoor wood projects. I remember the mess I made when I rushed to peel the backing without checking if the tape was in pristine condition—creases or dust can compromise adhesion. Ensure your joists are clean, dry, and free of debris. Use a stiff wire brush or a power washer on a low setting—careful not to damage the wood—then let everything dry completely for at least an hour. Think of this step as prepping a canvas before painting: a clean surface ensures your protective layer sticks and lasts.
Cut and Fit the Tape Accurately
Measure each joist’s ends and gaps precisely with a tape measure or a ruler. Cut strips of tape slightly longer than needed to avoid stretching during application, which can cause bubbles or wrinkles. For curved or awkwardly-shaped joists, use scissors or a utility knife for clean edges. I once tried to stretch the tape over a bend, but it peeled off in heavy rain—lessons learned the hard way. Precise fit guarantees a tight seal against water ingress, much like sealing envelopes before mailing important documents.
Apply the Tape with Firm, Even Pressure
Gently peel the backing as you press the tape onto the joist ends and gaps, smoothing out air bubbles with a squeegee or your fingers wrapped in a cloth for better grip. Start from one end and work toward the other, ensuring full contact. I recommend working in a shaded area if possible; direct sunlight can make the tape more pliable and harder to handle. Take your time—rushing can cause misalignment or air pockets, which defeat the purpose. Imagine sealing a leak in a garden hose: methodical and attentive application prevents future drips.
Seal All Vulnerable Areas Thoroughly
Extend the tape over any exposed ends and tuck it under slightly onto the sides of the joists for extra protection. Pay special attention to gaps between joists or areas near fasteners—these can be sneaky entry points for water. In my project, I used a leftover strip to reinforce a particularly tricky corner where water seemed to seep after every rain; covering this spot with double layers of tape stopped the leak instantly. Think of it as armor for your deck—every seam and corner needs to be sealed tight.
Inspect and Re-Apply as Needed
Once the tape is in place, check for any loose edges or bubbles, pressing them down firmly. Periodically inspect the tape during seasonal changes—especially after harsh weather—to ensure it remains intact. I recommend setting a reminder on your calendar for annual inspections, similar to changing your home’s HVAC filters. Over time, UV exposure and temperature fluctuations can degrade the tape, so reapplication might be necessary to maintain a robust barrier.
Applying joist tape might seem straightforward, but attention to detail makes all the difference. This simple yet effective step transforms your deck from a water-sensitive structure into a resilient outdoor haven, saving you money and headaches in the long run. For more ideas on enhancing your outdoor space, explore deck and stair design ideas.
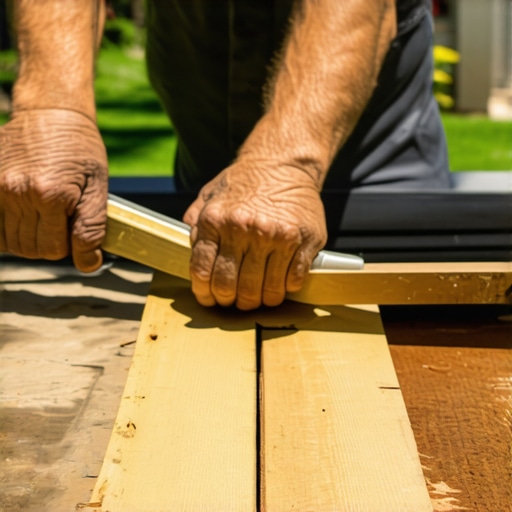 Many homeowners and even some contractors operate under misconceptions that can jeopardize the longevity and safety of outdoor spaces. For instance, a widespread belief is that composite decking requires minimal maintenance and is completely foolproof. While advanced materials have certainly improved, neglecting detailed installation practices—such as proper joist spacing or sealing counteracts these advantages. Overlooking these nuances often leads to issues like warping, mold, or early wear, as highlighted in recent industry analyses (source).
Equip Yourself for Long-Term Deck Success
Maintaining a beautiful, durable outdoor living space isn’t just about the initial build—it’s an ongoing effort. Having the right tools simplifies this process and ensures your deck and stairs stay in top condition for years to come. Over the years, I’ve tested and refined my toolkit, focusing on equipment that offers precision, reliability, and efficiency.
Power Washers for Gentle Yet Thorough Cleaning
I swear by my professional-grade Kärcher pressure washer. Its variable pressure settings allow me to remove dirt, algae, and mildew without damaging the composite or wood surfaces. A reliable power washer saves time and prevents the buildup that can lead to slippery or rotted areas, especially in shaded or moisture-prone spots. Remember, always keep the nozzle at a safe distance—about 12 inches—to prevent surface etching. For seasonal cleaning, this tool is indispensable, especially after harsh winter months or heavy rains. You can learn more about effective cleaning at this detailed guide.
Sophisticated Laser Levels for Precise Alignment
I prefer my Bosch Cross-Line Laser Level for its quick setup and adjustable beams. When installing new stairs or re-sealing joists, accurate measurements are crucial. The laser level ensures steps are level, balusters line up perfectly, and the deck surface maintains flatness. This prevents trips and enhances visual appeal. It also reduces guesswork, making future modifications or inspections straightforward. For complex projects, a laser level becomes an invaluable partner. Feel free to explore how I integrate laser levels into my deck projects.
Heavy-Duty Drill with Adjustable Torque Settings
My Makita impact driver is a game-changer. Its adjustable torque helps me avoid overdriving fasteners into composite or pressure-treated wood, preventing splitting or stripping. For applying joist hangers, tightening fasteners securely, and drilling holes for new supports, this tool is my go-to. It also speeds up the installation process compared to manual screwdrivers. Investing in quality drills with quick-change bits and LED lights enhances safety and efficiency, especially when working in shaded areas under the deck or stairs. Learn more about the importance of proper fastening techniques at this article.
Reliable Weather Monitoring and Maintenance Apps
In the digital age, I rely on apps like MyRadar and Deck Maintenance to keep track of weather patterns and schedule inspections. These tools help me plan projects around rain forecasts, ensuring my sealants and paints cure properly. Additionally, some apps provide reminders for periodic tasks like reapplying sealant, tightening fasteners, or checking for wood rot. Embracing technology streamlines maintenance, saving time and avoiding costly surprises. For insights on long-term planning, see this resource.
Keeping Your Deck Going Strong and Future Trends
Looking ahead, I believe that advancements in smart tools—such as IoT sensors monitoring moisture levels—will revolutionize deck maintenance. Imagine receiving real-time alerts if water intrusion occurs or if fasteners loosen. Integrating these innovations could make outdoor living spaces even smarter and more resilient. Start adding these tools to your maintenance routine now, and you’ll reap the benefits of a longer-lasting, safer deck. Try using your laser level to double-check stair alignments or your power washer for a deep clean—small steps that make a big difference in the longevity of your outdoor sanctuary.
Ever Wondered How Do I Maintain Outdoor Structures Over Time?
Consistent inspection with your laser level, routine cleaning with your pressure washer, and timely fastener checks using your impact driver will keep your deck and stairs in prime condition. Regular maintenance is less about expensive repairs and more about proactive care. If you’d like tailored advice on your specific project, consider reaching out to a professional. Explore our contact page, and let’s make your outdoor space a lasting masterpiece.
What No One Told Me About Deck Repairs
- Moisture barriers matter more than I thought: Skipping sealing joints and ends can lead to rapid rot, and I learned this the hard way when my deck started showing signs of deterioration within just a few years.
- High-quality tape saves money: Investing in durable joist tape upfront prevents water ingress, reducing long-term repair costs and extending the life of your deck frame significantly.
- Preparation is everything: Cleaning and drying wood thoroughly before sealing ensures better adhesion and longer-lasting protection, which I underestimated initially.
- Precision application prevents future headaches: Measuring and cutting tape carefully, then applying with firm pressure, might be tedious, but it pays off in a leak-proof seal that keeps your wood safe from moisture damage.
- Regular inspections keep surprises at bay: Periodic checks, especially after storms, catch small issues before they become costly repairs, as I now do annually—saving me both time and money.
Tools and Resources That Changed My Deck Game
- Kärcher Power Washer: Its adjustable settings made cleaning my deck gentle yet effective, removing stubborn grime without harming the surface. Highly recommend for maintaining appearance and safety.
- Bosch Cross-Line Laser Level: Ensured my stairs and posts were perfectly aligned, which improved safety and aesthetics—it’s a game-changer for precise measurements.
- Makita Impact Driver: Fastening becomes effortless; its adjustable torque prevented damage, ensuring my fasteners held tight and lasted longer.
- MyRadar App: Helps me plan around weather, avoiding premature sealant application or heavy rain, which can compromise my efforts and lead to rework.
Your Next Step in Outdoor Living Mastery
Building and maintaining a deck isn’t just about throwing materials together—it’s about thoughtful strategies and embracing the lessons learned along the way. With simple upgrades like applying high-quality joist tape and the right tools, you can dramatically extend your deck’s lifespan and enjoy peace of mind for years to come. Keep exploring ideas and stay proactive—your outdoor oasis will thank you for it. Curious how to transform your backyard design? Check out this guide for inspiration.