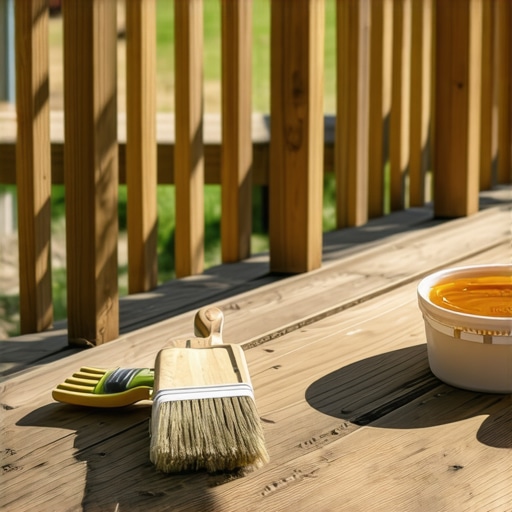
I remember the day I decided to give my deck a fresh stain—planning everything meticulously, I thought I was ready for a weekend of transformation. But halfway through, I realized I had overlooked one annoying detail: staining between the narrow spaces of the railing balusters. That tiny gap seemed to mock my efforts, splattering stain just about everywhere except where I wanted it. Frustration set in. It felt like a small detail but ended up turning into a big mess, making me question if I’d ever master this seemingly simple task.
The Hidden Challenge of Staining Between Railing Balusters
This experience was a lightbulb moment. The truth is, finishing a deck isn’t just about selecting the right stain or sealing the surface. It’s in those tight, tricky spots—like between the balusters—that most homeowners struggle. These areas are often overlooked during staining, leading to uneven finishes, drips, and even premature wear. The good news? With a little patience and some insider tips, you can achieve a professional-looking result that lasts. Today, I’ll share the methods I discovered to tackle this specific challenge, saving you time, stain, and frustration.
Skeptical? Here’s Why It’s Worth the Effort
Early on, I made the mistake of ignoring the importance of preparation, thinking I could just squeeze the stain into those tiny gaps. Turns out, that’s a recipe for mess and wasted stain. I’ve learned that taking the right approach isn’t just about aesthetics—these thin spaces protect your deck from water penetration and wood decay. Properly stained, they extend your deck’s lifespan. According to industry experts, neglecting these details can lead to rot and costly repairs—something I experienced firsthand when I ignored this step during my first attempt. Want to avoid that mistake? Keep reading.
If you’ve ever faced this battle with staining those narrow spots, you’re not alone. But don’t worry—by the end of this guide, you’ll have a clear method to keep those tricky areas neat and protected. Ready to get into the nitty-gritty of stain application? Let’s dive into the tools and techniques that will make this task easier and more effective.
And if you’re considering a deck upgrade or want to ensure your outdoor space remains beautiful and durable, don’t hesitate to reach out to a professional for advice or help. A seasoned deck builder can transform your outdoor area with expertise that ensures longevity and style. Now, let’s get started with the tools you’ll need to master this crucial step.
.
Choose the Right Tools for Precision
Start with a high-quality, angled brush—think of it as a sniper’s rifle for tight spots. During my project last summer, I used a 1-inch angled brush to get into those narrow baluster gaps, which made a huge difference in control. Also, keep a small paint pad or foam brush on hand for larger, slightly tighter areas. Never underestimate the value of these simple tools—they’re your best allies against uneven staining.
Prep Your Workspace and Deck Surface
Before staining, clear the deck and mask off adjacent areas. Use painter’s tape along the edges of the balusters to protect against accidental drips. During my work, I laid down drop cloths and taped the nearby joists; this sped up cleanup and kept stains where they belonged. Proper prep minimizes mess and allows you to focus entirely on those tricky spots.
Application Technique: Steady Hands and Small Steps
Dip your brush lightly into the stain, avoiding overload to prevent drips. Begin by applying the stain along the sides of the balusters, using a gentle, wiggle motion—think of it like frosting a narrow cake. Work slowly, making small, deliberate strokes to fill the gaps uniformly. In my experience, working in small sections prevents errors and ensures the stain penetrates evenly.
Use the ‘Feathering’ Method for a Smooth Finish
After applying the stain, feather out the excess by lightly dragging the brush outward from the gaps. This technique blends the stain with the surrounding wood, preventing buildup and unsightly lines. During my last staining session, I noticed that a feathered edge gave a seamless look that mimicked professional results. It’s especially useful for composite decking, where uneven stains can be very noticeable.
Clean Up as You Go—No Excuses
Keep a damp cloth or rag nearby to wipe excess stain immediately from the brush or accidental drips. For stubborn spots, a cotton swab dipped in stain remover can help tidy up. Remember, timely cleaning prevents dried drips that ruin the smooth appearance and require additional sanding or stripping.
Repeat and Check Your Work
Apply multiple light coats rather than one heavy one. After the first layer dries (usually 2-4 hours), inspect the gaps for missed spots or uneven coverage. Repeat the process if necessary, especially in those hard-to-reach areas. Once you master this, you’ll appreciate how a few careful passes can transform your deck’s appearance. For ideas on enhancing outdoor spaces beyond staining, explore innovative outdoor living ideas.
Key Technique: The ‘Roll and Tip’
For wider gaps or flat surfaces adjacent to narrow spots, use a small roller to apply stain, then immediately use a brush to ‘tip’ or smooth out the application. This combination ensures even coverage and minimizes lap marks, especially on composite decking where uniformity is crucial. I’ve found this method effective after experimenting with various techniques during multiple deck projects.
Learn From Experience
In my first attempt, rushing through the narrow spots led to uneven patches and wasted stain. By focusing on slow, deliberate strokes and blending techniques, I achieved a professional look that lasted longer. Remember, patience and the right tools turn a frustrating task into an achievable routine. If you’re contemplating larger upgrades or want to make sure your project is up to code, consider consulting a professional deck builder for expert advice.
When it comes to designing and constructing outdoor spaces, many people believe that mastering the basics is enough. However, the truth is, even seasoned professionals can fall prey to subtle pitfalls that undermine the durability and aesthetics of a deck. One widespread misconception is the oversimplification of material choices, especially with composite decking. While many think that all composites are created equal, advanced users know that not all brands perform similarly over time, particularly regarding fade resistance and stain retention. According to recent studies by the Wood Preservation Research Centre, choosing a high-quality composite with UV inhibitors can significantly extend its lifespan, saving you money and frustration.
What Advanced Deck Builders Know About Proper Drainage Practical tips often overlook the importance of establishing proper drainage before starting construction. A common mistake is neglecting the slope and underlying grading, which can lead to water pooling around or underneath the deck. This oversight accelerates wood rot and promotes mold growth, issues that might not be immediately visible but are detrimental long-term. An expert approach involves meticulously planning slope and incorporating drainage systems such as under-deck gutters or gravel beds. Ignoring these nuances can undo years of effort and costly repairs down the line. For advice on integrating effective drainage solutions, professional consultation is invaluable. Remember, a deck is an investment that depends heavily on long-term maintenance strategies, not just initial appeal. Curious about how to design a deck that resists water damage effectively? You might want to explore innovative outdoor living ideas with composite decking.Advanced Mistake: Underestimating Structural Complexity
Many assume that building sturdy stairs or balconies is straightforward, but overlooking the structural intricacies can lead to serious safety hazards. For instance, improper joist spacing or inadequate support beams can cause squeaking, sagging, or even collapse. A common myth is that using the same fasteners everywhere is sufficient; in reality, different deck elements require specialized fastening techniques to bear weight and resist weathering. Leveraging insights from standards like the International Building Code (IBC) can prevent these issues. As I advocate in designing safe and stylish stairs, consulting with a professional ensures structural integrity, especially when planning complex or elevated decks. Have you ever fallen into this trap? Let me know in the comments. Recognizing these nuanced details makes the difference between temporary beauty and lasting functionality.
How do I keep my outdoor living space in top shape over time?
Keeping a deck, especially one with composite materials and intricate stairs, in prime condition requires the right tools and a strategic approach. My go-to equipment starts with a high-quality electric power washer. I prefer models with adjustable pressure settings—like the Simpson Cleaning PS1495—that allow me to remove dirt and grime without damaging the surface. For detailed cleaning between deck boards or stairs, I lean on a compact rotary tool with a soft-bristle brush attachment. It’s perfect for reaching stubborn corners without harming the material.
In addition, I swear by a good deck-specific cleaner that’s safe for composite surfaces. Brands like Mold Armor’s Clean Mold Remover & Disinfectant are effective, but I also recommend testing any chemical on a small patch first. To protect my work area, I use spray paint guard tape to mask off delicate adjacent areas, preventing accidental stains or overspray. For routine maintenance, having a handheld leaf blower helps keep debris from settling on the surface, reducing wear over time.
Looking ahead, the future of deck maintenance seems to be heading towards smart, IoT-enabled sensors that monitor moisture levels and suggest optimal cleaning schedules. This proactive approach can extend the lifespan of your deck materials significantly, especially in humid climates.
What about long-term results? How do I ensure my deck stays beautiful and safe for years?
Consistency is key. I schedule maintenance checks twice a year, ideally in spring and fall, using the same trusted tools and cleaners. Regular inspections help catch issues early—like loose screws on stairs or slight warping of composite boards—before they become costly repairs. When addressing structural elements such as stairs or fasteners, I recommend consulting professional guidance to ensure safety and durability.
In my experience, investing in high-quality fasteners and supports—like stainless-steel screws and aluminum supports—prevents corrosion and ensures stability. Additionally, applying a protective finish designed for composite decking, such as a UV-resistant sealant, can drastically slow fading and staining, keeping your outdoor space looking vibrant for years. An interesting trend emerging is the use of automatic cleaning systems integrated directly into the deck—imagine scheduling cleanings with a smart app, reducing your manual effort significantly.
Try this advanced tip to boost your deck’s lifespan
One technique I’ve adopted is applying a joist tape—a specialized, weather-resistant adhesive film—on all exposed wood supports before installing decking boards. This simple step acts as a moisture barrier, preventing rot and extending the structural integrity of your deck. I learned about this from industry experts and have seen tangible long-term benefits, especially on decks in shaded or high-humidity environments. Incorporate this into your maintenance routine for impressive results, and consider exploring detailed guides to perfecting this method.
The Unexpected Lessons Behind Flawless Deck Staining
One of the most valuable lessons I learned is that patience trumps speed when working on intricate deck details. Rushing through tight spots like between balusters often leads to messy results and extra work later. Taking the time to develop a steady hand and employing the right tools made all the difference in my projects, transforming frustration into satisfaction. Additionally, investing in high-quality brushes and practicing controlled strokes helps you achieve consistent coverage, avoiding those annoying drips that can ruin your finish.
My Go-To Tools That Make a Difference
Over time, I’ve curated a toolkit that turns a challenging staining job into a manageable task. An angled brush with stiff bristles allows for precise application in narrow gaps, while foam brushes are perfect for quick touch-ups. A small, rechargeable detail sander can smooth out uneven surfaces before staining, ensuring your work lasts longer. Trusting these tools comes from experience—I’ve found they help me save stain and prevent rework, especially in those hard-to-reach areas. Want to see what gear I swear by? Check out this resource for more insights into deck maintenance tools.
Turning Frustration Into Finishing Flourish
One thing I wish I’d known earlier is the importance of conditioning your wood before staining. Applying a wood brightener or cleaner to the deck surface not only prepares it for better stain absorption but also reveals hidden splinters and repairs that need attention. Embracing a methodical approach—like working in small sections with feathering techniques—ensures a professional, even finish. Mastering this process has not only improved my decks’ appearance but also extended their lifespan, saving me money over the years. Remember, a well-stained deck isn’t just about looks; it’s about long-term protection and peace of mind.
Embrace the Challenge: Your Deck’s Future Looks Bright
Don’t let the prospect of staining those tiny gaps deter you from creating a beautiful, durable outdoor space. The key lies in the right mindset, proper tools, and a bit of patience. When you master these finer points, your deck will not only look stunning but also stand strong against weathering for years to come. Whether you’re considering a full upgrade or routine maintenance, taking the time to perfect your technique pays off in increased enjoyment and value. Ready to elevate your outdoor living? Explore ideas for inspiring outdoor spaces and get inspired to make your deck the envy of the neighborhood.
What challenging corners have you struggled with when staining your deck? Share your experiences below—I’d love to hear your stories and tips!