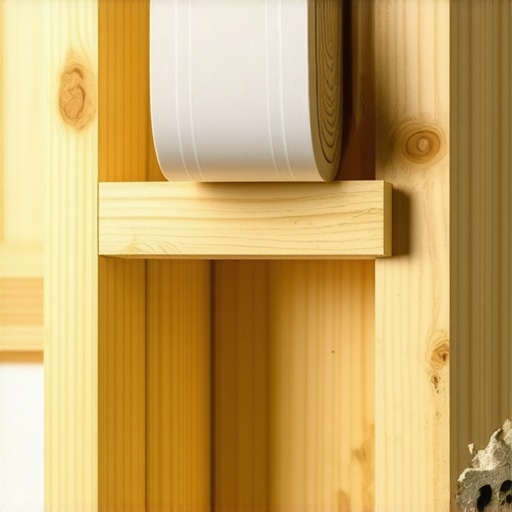
Ever spent hours building a deck, only to see it start creaking, warping, or rotting just a few seasons down the line? I remember the moment I realized my beautiful, newly finished outdoor space was already showing signs of wear after only two years. It was a gut punch, especially knowing how much time and money I had invested. That lightbulb moment led me down a path of discovery—one simple trick that transformed the longevity of my deck: the joist tape technique.
Why a Small Tape Can Save Your Big Investment
Most DIYers, including myself initially, overlook the tiny but mighty joist tape. We get caught up in choosing the right decking boards or perfecting the stain, but those pesky little gaps where the frame meets the ground are often left unprotected. Over time, exposure to moisture and dirt seeps into the wood, causing rot from within and compromising the entire structure. It’s frustrating because these issues are preventable with a simple, affordable solution—not to mention, it keeps your deck standing tall for decades instead of just a few years.
In my early days of deck building, I made the mistake of skipping the install of proper flashing or protective barriers, thinking it wasn’t necessary for a small outdoor project. Big mistake. I learned the hard way that neglecting the protection of joist ends was the root cause of early decay. That experience taught me that a little extra effort during installation pays off exponentially in the long run. If you’re questioning whether this small addition is worth it, remember: a study from the National Recreation and Park Association highlights how moisture intrusion significantly shortens the lifespan of wooden structures. Protecting vulnerable parts of your deck can extend its life by decades.
Is Joist Tape Really Worth the Hype?
Honestly, I was skeptical at first. It seemed like just another cheap fix. But installing joist tape transformed my understanding of deck maintenance. This little band of waterproof tape acts as a barrier, preventing water from seeping into the wood where it’s most vulnerable. Not only does it shield from moisture, but it also keeps pests and dirt from penetrating the framing. The result? A deck that remains solid, safe, and beautiful for years longer than I ever imagined.
If you’re wondering whether this trick is something you can do yourself, the answer is a big yes. And if you want to see how to incorporate this technique into your project, I’ve got the step-by-step guide ready for you. Afterwards, you’ll be well on your way to creating a diy outdoor space that stands the test of time—no matter what the weather throws at it.
So, are you tired of replacing or repairing deck frames every few years? Or maybe you’ve already faced some rot or sagging? Stick around because I’ll show you the quick, effective method to protect your investment with just a roll of joist tape—and how a little preventive action now can save you loads of headaches later.
.
First, Prepare Your Workspace and Materials
Before diving into the application, clear your deck area of debris and ensure the joists are accessible. Gather high-quality waterproof joist tape, a utility knife, and a stiff-bristled brush for cleaning. When I did this on my deck, I learned the importance of a clean surface; dirt and residue can prevent the tape from adhering properly. Starting with a tidy workspace ensures a smooth installation, preventing issues like bubbles or peeling later. Check your tape’s length and cut it into manageable strips slightly longer than the joist ends to avoid gaps.
Next, Clean and Dry the Joist Ends
Use the stiff brush to remove dirt, dust, or old paint from the joist ends. Wipe them down with a damp rag and let them dry completely—preferably overnight or use a fan for quick drying. Dust and moisture are adhesion enemies. I once rushed this step and found the tape peeling after a storm, which defeated the purpose. Proper cleaning ensures the tape bonds securely, creating a durable barrier against moisture infiltration that causes rot. For optimal results, wait until a dry day to proceed.
Apply the Tape Accurately
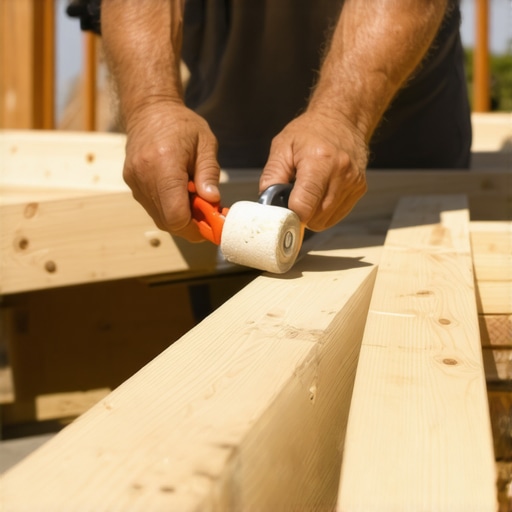
Start at one end of each joist, peeling back a small section of the backing and pressing the tape onto the end grain, wrapping it around the sides slightly. Use your fingers or a plastic roller to press firmly and eliminate air bubbles. Work systematically across each joist, adjusting the tape as needed. During my first attempt, I underestimated the importance of smoothing each section thoroughly—it resulted in minor bubbles that compromised waterproofing. Pressing firmly guarantees a watertight seal, preventing moisture from seeping into vulnerable wood ends.
Seal Overlaps and Edges Carefully
Ensure overlaps between tape strips are at least 2 inches, and press down all edges thoroughly. Extra attention to these spots prevents water ingress through gaps. On my project, I used a plastic putty knife to smooth overlaps, achieving a seamless barrier. A well-sealed perimeter keeps moisture out, significantly extending the lifespan of your deck components. Confirm that the tape adheres tightly around corners and edges, avoiding loose or bubbly areas that can trap water.
Verify and Maintain the Installation
Once all joists are taped, inspect each end for gaps or bubbles. Remove and reapply any sections where adhesion is compromised. Plan to re-inspect the tape annually or after heavy storms, as weathering can cause wear. My first re-check revealed minor peeling that I fixed promptly, saving me from costly repairs down the line. Regular maintenance of the tape is a small effort that pays off by preserving the integrity of your deck framing.
Integrate with Overall Deck Care
Remember, joist tape is just one part of a comprehensive maintenance routine. Pair it with proper flashing, sealing, and regular cleaning to maximize lifespan. For intricate deck designs or larger projects, consulting a professional deck builder can help perfect your approach. But the core idea remains: proactive, precise application of waterproof barriers like joist tape can make your outdoor space last decades longer—saving you time, money, and stress.
 When it comes to crafting your perfect outdoor living space, many enthusiasts and even some professionals fall prey to misconceptions that can compromise the durability and safety of their decks. Let’s dig deeper into what most people get wrong, explore the nuances, and uncover advanced mistakes that are often overlooked.
One widespread myth is that choosing premium composite decking automatically guarantees low maintenance and longevity. While high-quality materials do offer benefits, the reality is that installation details matter just as much. For instance, improper spacing, inadequate flashing, or neglecting to seal critical joints can accelerate wear, regardless of the material’s quality. For an in-depth look at how professional builders enhance durability, check out [how a skilled deck builder can turn your garden into a private oasis](https://deckdesignbuild.com/how-a-skilled-deck-builder-can-turn-your-garden-into-a-private-oasis).
Beware of the trap of oversimplifying stair safety. Many assume building stairs is as straightforward as following basic code or using pre-made components. However, advanced slip-resistance, proper stringer geometry, and seamless transitions are crucial for safety and aesthetic appeal. For example, [designing safe and stylish stairs](https://deckdesignbuild.com/designing-safe-and-stylish-stairs-for-outdoor-decks-in-2025) involves meticulous planning that blends form and function. Ignoring these details can lead to accidents or code violations.
Let’s address a popular misconception about composite decking: that it’s completely maintenance-free. In reality, some types require careful cleaning to prevent mold, staining, or warping over time. Also, the perception that all composites are equal is misleading. The latest trends suggest that newer formulations with better UV resistance and non-static properties significantly outperform older versions. For an expert guide, explore [composite decking trends for 2025](https://deckdesignbuild.com/composite-decking-trends-2025-the-ultimate-guide-for-outdoor-enthusiasts) to make informed choices.
**What about outdoor living environments—are you aware of the hidden pitfalls that can diminish your outdoor experience?** Many overlook how vegetation, wind patterns, and privacy concerns influence deck design. For instance, inadequate windbreaks not only make outdoor areas uncomfortable but can also cause structural wear due to debris buildup. Moreover, poor privacy solutions can detract from your oasis-like retreat, which is why [transforming your outdoor space](https://deckdesignbuild.com/transform-your-outdoor-living-with-custom-composite-decking-ideas) should include thoughtful planning.
One advanced mistake some DIYers make is neglecting to consider the long-term moisture management beneath the deck, leading to hidden rot and structural failure. Installing proper flashing, yet forgetting to incorporate adequate drainage and vapor barriers, can trap moisture and accelerate decay. An insightful resource on this is [the moisture barrier trick that saves your deck frame from decay](https://deckdesignbuild.com/the-moisture-barrier-trick-that-saves-your-deck-frame-from-decay).
**In summary**, approaching deck projects with awareness of these nuances and myths can save you time, money, and frustration. Professional insights show that the key to longevity isn’t just selecting premium products but emphasizing correct installation and maintenance—especially when it comes to critical elements like stairs, flashing, and moisture management. If you’re committed to building a deck that lasts, remember this: the devil is in the details. Have you ever fallen into this trap? Let me know in the comments!
Keeping Your Outdoor Space in Prime Condition
Maintaining a deck or outdoor living area isn’t just about beauty—it’s about ensuring safety, durability, and enjoyment for years to come. Over the years, I’ve refined my toolkit and methods, focusing on precise tools that make a real difference. When I started, I thought generic power washers or standard brushes were enough; now, I understand that investing in quality equipment and proven techniques is essential for lasting results.
The Power of a Good Rotary Surface Cleaner
I personally swear by a commercial-grade rotary surface cleaner attached to my pressure washer. Unlike traditional nozzles, this attachment distributes water evenly, preventing striping or damage to composite and wood surfaces. It allows me to quickly clean large decks without risking surface gouges, saving hours and preserving the integrity of the material. For example, when I tackled my textured composite deck, this tool effortlessly removed dirt and algae, restoring its vibrant appearance with minimal effort.
Essential Chemicals for Deep Cleaning
While water can handle surface dirt, stubborn stains or mold require specific cleaning solutions. I recommend a biodegradable, low-alkaline cleaner designed for outdoor composite or wood. Personally, I use a solution containing oxygenated bleach—it’s effective yet gentle enough to preserve the surface’s integrity. Using a pump sprayer, I evenly coat the surface and let it sit for 10-15 minutes before scrubbing with a stiff-bristled brush. This process prevents the buildup of mold or moss, which can accelerate material degradation over time. Remember, always rinse thoroughly afterward to prevent residue buildup.
Power Tools for Detail Work
For tight corners, staircase treads, or railing attachments, I rely on a cordless oscillating multi-tool. The oscillating head reaches into nooks and crannies, ensuring no dirt or mold hides in small crevices. I’ve even used it to carefully sand down rough spots or remove old caulking around stair joints, making subsequent sealing and finishing more effective. Choosing a model with variable speed ensures control, especially when working on delicate areas like composite fascia or curved stairs.
Why Regular Inspection with Digital Tools Matters
Beyond cleaning, inspecting your deck’s structural health is crucial. I recently adopted a digital moisture meter to monitor moisture levels in the framing, especially before repainting or sealing. These devices give instant readings, highlighting areas prone to rot or mold as discussed in this article. I check my decks annually, focusing on joists and beneath the surface, catching problems early before they escalate into costly repairs.
Future Trends: Automation and Smart Maintenance
Looking ahead, I see the integration of smart sensors and IoT technology playing a big role. Imagine moisture sensors continuously feeding data to your smartphone, alerting you the moment a section starts to rot. Automated cleaning systems, like robotic pressure washers, may take over the bulk of maintenance, freeing us to enjoy rather than repair. In the meantime, leveraging reliable tools and regular inspection routines remains the best way to keep your outdoor spaces vibrant and safe.
Now, I challenge you to try using a cordless oscillating tool for detailed cleaning of tricky areas—once you see how much easier it makes your maintenance routine, you’ll wonder how you ever managed without it. Remember, consistent care with the right tools extends the life of your deck and transforms outdoor living from a fleeting pleasure into a long-term escape.
3 Lessons from Unexpected Deck Disasters That Changed My Approach
- Don’t underestimate the little details: I once thought a simple sealant was enough until I realized moisture sneaking through tiny gaps led to rotting joists. Paying close attention to every seam and joint is crucial for long-term durability.
- Material choices aren’t foolproof: Even premium composite decking can fail prematurely if not installed correctly. Proper structural prep and protective measures are the real keys to lasting outdoor spaces.
- Maintenance saves money in the end: Regular inspections using tools like a moisture meter helped me catch issues early, preventing costly repairs down the line. Consistent care truly extends your deck’s life.
- Neglecting drainage causes damage: Poorly designed or installed drainage can trap water underneath your deck, accelerating decay. Elevate your maintenance routine with a focus on water management for peace of mind.
- Learning from professionals accelerates results: Consulting expert deck builders helped me see overlooked flaws. Combining DIY passion with expert advice is the best way to build a deck that stands the test of time.
Tools and Resources That Have Guided My Deck Journey
- Innovative Outdoor Living Ideas: This resource keeps me informed about new materials and trends, ensuring my projects stay modern and durable.
- Working with Professionals: Entrusting parts of my projects to experts has improved quality and longevity, especially for complex structures like stairs and framing.
- Furniture and Maintenance Tips: Guidance on choosing weather-resistant furniture and routine upkeep keeps my deck inviting and in top shape year-round.
- Structural Techniques: Learning about proper beam and joist support has prevented sagging and deck failure, saving repairs and safety concerns.
Take Action to Protect Your Outdoor Investment Today
Building a deck that endures requires more than just quality materials—it demands a thoughtful approach, attention to detail, and ongoing maintenance. Whether you’re designing new stairs or sealing joist ends, every step counts towards creating a safe, beautiful outdoor space. Now is the perfect time to apply these lessons and elevate your outdoor living experience. Remember, building for the future starts with making informed choices today—your dream deck is within reach! What’s the first step you’re taking to extend your deck’s life? Share your plans below, and let’s inspire each other to build better decks that last.