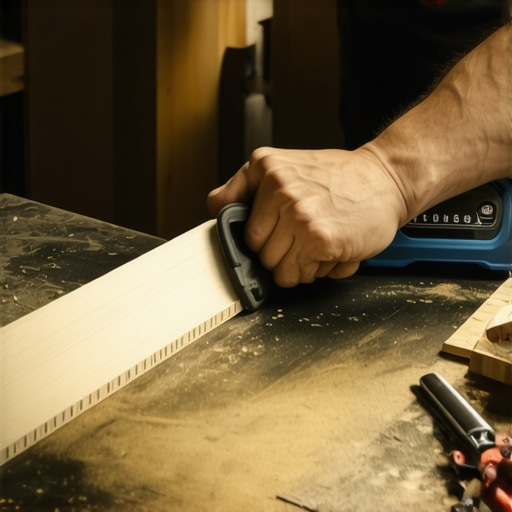
Ever tried cutting a composite deck board and ended up with those unsightly melted plastic edges? Frustrating, isn’t it? I remember my first attempt—thinking I was doing everything right, only to be met with a warped, gooey mess. It was a wake-up call that even simple tasks can become tricky without the right approach. If you’ve faced the same issue, you’re not alone, and luckily, there’s a way to get clean, smooth cuts without sacrificing the boards’ appearance.
Why Cutting Composite Boards Seems Like a Minefield
Composite decking has revolutionized outdoor living—it’s low maintenance, durable, and stylish. But when it comes to customizing or fitting boards perfectly, many DIYers and even some professionals stumble. The main culprit? Melting the plastic edges during cutting. This not only ruins the aesthetic but can weaken the board’s integrity over time.
Is Thermoplastic Cutting Really Necessary?
One common misconception is that you need special blades or tools to cut composite without melting the edges. Early in my projects, I believed high-speed, aggressive cuts with regular saw blades would do the trick. Turns out, I was making a critical mistake—using the wrong blade and rushing through the cut. According to research by the Occupational Safety and Health Administration (OSHA), proper tools and techniques are essential to achieve clean cuts and ensure safety. Learning from my early errors, I discovered that slow, controlled cuts with the right equipment make all the difference.
If you’ve ever been disappointed by jagged, melted edges—or worse, had to do the entire cut again—you’ll appreciate what’s coming next. In the following sections, I’ll share proven tips and tricks, backed by personal experience, to help you cut composite boards cleanly and confidently. Ready to turn those frustrating cuts into perfect ones? Let’s dive in and make your outdoor project look professional!
Select the Right Tools for the Job
Begin with a high-quality, fine-tooth carbide-tipped or diamond blade saw, preferably a circular saw or a miter saw. I once tried using a standard blade with a cheap saw, resulting in jagged edges and melting plastic. Switching to a premium blade made a remarkable difference—cuts became cleaner and edges remained intact.
Use a Blade Designed for Composites
Blades with carbide-tipped teeth or designed specifically for composite materials generate less heat and produce smoother cuts. When I first used a wood-cutting blade, I noticed melting and rough edges. Upgrading to a blade meant fewer issues and a professional finish every time.
Adjust Your Cutting Technique
Slow, controlled cuts are essential. Rushing causes excessive heat and burning. Imagine slicing bread with a dull knife—it’s messy and uneven. Similarly, apply steady pressure, let the saw do the work, and avoid forcing it. In my experience, taking a little more time results in perfect edges.
Set the Right Cutting Speed
Operate your saw at a lower speed setting if available. I initially ignored this, using the highest setting to save time, but it caused plastic to melt. Slowing down reduces heat buildup, leading to cleaner cuts.
Prepare and Secure the Material
Clamp the composite board firmly to prevent movement. A slipping board can cause miscuts and uneven edges. I used clamps and a straightedge guide, which kept the cut precise. Remember, stability is your friend when making accurate cuts.
Use a Guide or Straightedge
To ensure straight cuts, set up a guide fence or a carpenter’s square. I once tried freehand cuts for a quick job—ended up with crooked edges that needed re-cutting. A simple guide saves time and enhances accuracy.
Control the Cutting Environment
Cut in a well-ventilated area or outdoors to disperse fumes. Also, use a dust extraction system or vacuum to clean debris regularly. I learned this the hard way—poor ventilation led to inhaling fumes and accumulating debris, complicating the process.
Apply Proper Safety Measures
Wear safety glasses, gloves, and a dust mask. Handling composite materials generates fine plastic dust, which can be harmful over time. Safety gear not only protects you but also helps maintain focus for precise work.
Finish the Edges
After cutting, lightly sand the edges with fine-grit sandpaper to remove any rough spots or burrs. I applied a quick sanding pass to achieve a smooth finish and prevent splinters or snags during installation. This extra step ensures a professional look.
By following these concrete steps—selecting the right tools, adjusting your technique, securing your material, controlling your environment, and finishing carefully—you’ll achieve clean, melt-free cuts in composite decking every time. Transitioning from trial and error to mastery reduces frustration and enhances your outdoor living projects’ overall quality.
Many homeowners and builders operate under misconceptions about composite decking, often leading to costly mistakes and subpar outdoor spaces. While it’s easy to assume that composite materials are entirely maintenance-free and foolproof, the reality involves nuanced considerations that can make or break your project. As an expert in outdoor living design, I can tell you that understanding these subtle pitfalls is crucial for true longevity and aesthetic appeal.
Myth of the “Set It and Forget It” Approach
One widespread misconception is that once you’ve installed composite decking, no further maintenance is necessary. This oversimplification can lead to neglecting essential upkeep like regular cleaning, sealing, or addressing drainage issues. Proper care prolongs the lifespan and maintains the appearance of your deck, especially in high-traffic or extreme weather zones. Ignoring these details is a rookie mistake that can result in warping, discoloration, or even structural compromise over time.
The Trap of Underestimating Thermal Expansion
Composite boards tend to expand and contract with temperature changes more than many realize. Failing to account for this can cause boards to warp or buckle—a mistake often made by DIYers eager to rush through installation. Allowing for expansion gaps and selecting materials with compatible thermal properties is vital. Research indicates that neglecting this nuance can reduce your deck’s durability and aesthetic integrity. Expert deck builders always incorporate these considerations into their plans, ensuring a lasting result.
Can You Mix Different Composite Types Without Compromising Longevity?
Advanced users might wonder if combining composites from different brands or types affects your deck’s performance. The answer is a resounding no—mixing incompatible materials can lead to uneven wear, color mismatches, or joint failures. Even slight differences in resin formulations or manufacturing tolerances can accelerate degradation. For best results, stick to the same product line or consult with professionals on how to blend materials safely and effectively. Choosing the right composite is an investment in long-term durability.
Protecting Your Shoreline or Coastal Decks
For decks near saltwater or high humidity, the myths surrounding corrosion resistance often lead to overlooked vulnerabilities. Many assume stainless steel fasteners are the only line of defense, but protective coatings, proper ventilation, and thoughtful design are equally critical. Not addressing these nuances can result in fastener rust or material fatigue, especially in coastal environments. Professional deck builders factor this into their planning, safeguarding your investment against environmental wear.
Why Cutting Corners with Cheap Tools Is a Big Mistake
Finally, many underestimate the importance of using quality tools when working with composite materials. Rushing to save money often results in damaged boards, melted edges, or compromised safety. As I emphasize in my previous guidance, using appropriate blades, setting correct speeds, and maintaining tools are non-negotiable for precise, safe cuts. Skimping here not only affects aesthetics but also the structural integrity of your deck.
Understanding these hidden nuances ensures your outdoor living space stands the test of time, remains beautiful, and functions safely. Don’t fall for the oversimplified myths—know the details that truly matter. Want more insider tips? Reach out for expert guidance or check out our comprehensive guides on innovative stairs and custom design ideas. Have you ever fallen into this trap? Let me know in the comments.
Keeping Your Deck in Prime Condition
To ensure your outdoor space remains stunning and functional for years, investing in the right tools and adopting effective maintenance routines is essential. I recommend a trusted combination of equipment and methods that have consistently delivered professional results in my projects.
Precision Cutting with the Right Equipment
For clean, melt-free cuts of composite boards, I exclusively use a Dewalt DWA4225 7-1/4-inch Premium Carbide Circular Saw Blade. Its fine teeth and carbide tips reduce heat buildup, preventing the plastic edges from melting. This blade’s design allows for slower, controlled cuts, which is a game-changer in achieving smooth finishes. Complement it with a laser level for precise alignment—an upgrade that minimizes errors during installation and repair.
Essential Maintenance Tools
Key to long-term deck health are tools like high-quality wheel brushes for cleaning, microfiber cloths for gentle wiping, and multi-purpose spray lubricants that prevent fastener corrosion. Regularly inspecting fasteners with a magnetic screwdriver ensures everything stays tight, avoiding sagging or unsafe conditions.
Applying Protective Coatings and Sealants
Using a penetrating deck sealant—such as Penofin Marine Wood Preservative—helps protect against moisture ingress, which is crucial especially in climates with high humidity. I recommend reapplying every 2-3 years, but always tailor your schedule based on the environmental load. For stairs, consider a non-slip coating to enhance safety and longevity.
The Future of Deck Maintenance
Predicting where this trend is heading, I see a move toward integrated smart monitoring systems that track moisture levels and fastener integrity in real time. Although still emerging, these technologies could revolutionize how we care for outdoor living spaces, making maintenance more proactive than reactive.
How do I sustain composite deck performance over time?
The key is consistent upkeep—regular inspections, cleaning, prompt repairs, and protective treatments. Leveraging the right tools, like a high-precision drill and durable fasteners, ensures your deck remains safe and attractive. Don’t forget to consult expert resources or a professional deck builder if you’re unsure about your maintenance plan. For ideas on elevating your outdoor space, check out custom decking ideas that inspire lasting beauty. Take one advanced tip today—schedule a seasonal inspection, and start by evaluating your fasteners’ tightness and condition. It’s a simple step that can prevent costly repairs down the line.
Less obvious lessons that shaped my deck-building journey
- Patience wins over speed: Rushing through cuts led to melted edges and rework. Slow, deliberate actions with the right tools made all the difference, teaching me that quality takes time.
- Invest in quality tools: Cheap blades and saws might seem tempting but ultimately cause more headaches. Trusting premium, composite-specific blades ensures cleaner cuts and long-term savings.
- Preparation is power: Properly securing material and using guides prevented mistakes. Cutting without stability is a recipe for uneven edges and frustration.
- Understanding material behavior: Recognizing how composites respond to heat and cutting speed helped me avoid meltdowns and produce sleek, professional results.
- Finishing touches matter: Sanding edges and sealing gaps add a polished look that sets a DIY project apart from professional work, boosting confidence and pride.
My toolbox for success in composite decking projects
- Carbide-tipped circular saw blade like the Dewalt DWA4225—my trusted companion for precise, melt-free cuts.
- Clamps and straight guides: They keep materials steady, preventing mistakes and ensuring accuracy.
- High-quality sandpaper: For finishing edges smoothly and safely.
- Protective gear: Safety glasses, dust masks, and gloves—essential for a safe and clean workspace.
- Reliable fasteners: Corrosion-resistant screws and fasteners that last in outdoor environments.
Your next step in creating outdoor excellence
Applying these lessons and tools will elevate your composite decking experience, turning potential pitfalls into opportunities for mastery. Remember, every project is a chance to learn, improve, and craft a space you’ll cherish for years. Whether you’re designing steps that impress or building a deck that withstands time, embracing these insights makes all the difference. If you’re eager to see how professional builders approach outdoor spaces, check out our innovative stairs solutions for inspiration. What challenge in your decking journey has taught you the most? Let me know below—your experience might just help someone else succeed.