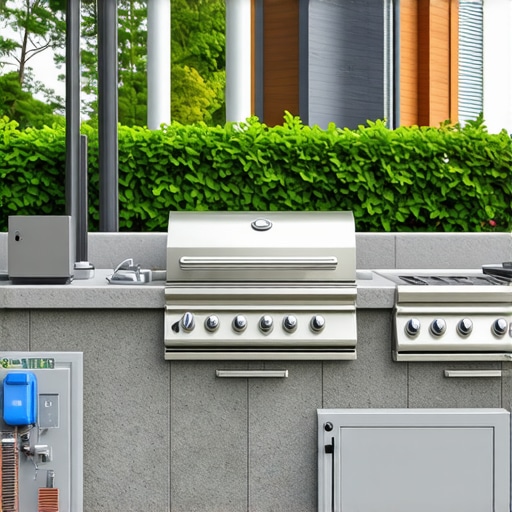
I remember the moment clearly—my outdoor gathering was in full swing, lights glowing, music softly playing, when suddenly, everything flickered out. Turns out, I’d overlooked a crucial detail: my outdoor kitchen was sharing the same electrical circuit as a handful of other outdoor outlets and lights. The surge was too much for a single breaker, and once it tripped, I was left scrambling in the dark, quite literally.
That experience taught me a hard lesson about outdoor electrical setups. If you’re like most homeowners dreaming of a perfect outdoor kitchen, you might not realize that your electrical system could be your biggest headache—or your best defense. The key? Installing a dedicated sub-panel. Today, I’m going to walk you through why this small upgrade can make a world of difference, and how you can avoid the pitfalls I faced early on.
Making Sense of Power: Why Your Outdoor Kitchen Needs Its Own Heart
A dedicated sub-panel acts like a separate heart for your outdoor appliances, lighting, and outlets. Instead of drawing from the same circuit as your house, it provides a separate, consistent power source—reducing the risk of overloads and tripped breakers. This isn’t just about convenience; it’s about safety and longevity. When I finally installed my own sub-panel, I noticed immediate benefits—fewer outages, more reliable power, and peace of mind.
Think about the appliances and gadgets you want to include—pizza ovens, refrigerators, lighting, even a hot tub or water feature someday. All of these require substantial electrical capacity. According to the National Electrical Code, dedicated circuits are essential for outdoor kitchens to prevent fire hazards and ensure proper operation. Skipping this step can lead to outages, damage, or, worse, safety issues that can endanger your loved ones.
For inspiration and detailed guidance, I recommend checking out [this comprehensive overview](https://deckdesignbuild.com/transform-your-outdoor-living-with-custom-composite-decking-ideas) on transforming your outdoor space, which includes discussions on electrical safety and planning. Ensuring your system is up to code isn’t just smart—it’s necessary.
Before we dive into the specifics of how to install your own sub-panel, I want to ask: Have you ever experienced an electrical outage during a backyard gathering? Or maybe you’re just unsure if your current setup is sufficient? If you have, you’re not alone — and you’re in the right place to learn how to fix it.
Plan Your Electrical Layout Before Drilling
Start by sketching your outdoor space, noting where appliances, lighting, and outlets will go. Use online tools or consult a professional to determine the electrical load demand. I once made the mistake of placing outlets far from the main panel, forcing me to run lengthy wires—causing unnecessary complexity and expense. Measure carefully, and decide the optimal location for your sub-panel to keep wiring short and efficient.
Choose a Suitable Location for the Sub-Panel
Select a dry, accessible spot on your exterior wall, ideally near your kitchen area. Consider future expansion, like adding a hot tub or additional lighting. The sub-panel should be protected from the elements—install it inside an weatherproof enclosure if necessary. An outdoor-rated box with proper grounding ensures safety and longevity, preventing issues like corrosion or moisture entry.
Gather Tools and Materials
You’ll need a breaker panel (with sufficient capacity), appropriate gauge wiring, conduit or cables, grounding rods, and safety gear. During my first install, I underestimated the wire gauge needed for heavy appliances—leading to overheating. Always refer to local electrical codes or a licensed electrician for specifications. Having the right tools, like a conduit bender and wire strippers, speeds up the process and minimizes mistakes.
Turning Theory into Action
Once planning is complete, turn off the main breaker to prevent accidents. Mount your sub-panel securely against the wall, ensuring it’s grounded properly. Run the wiring from your main panel to the sub-panel, protecting it with conduit if outside or exposed areas. Inside, connect the wires to appropriate bus bars—hot wires to the breaker, the neutral wire to the neutral bar, and the ground wire to the grounding bus. Use a voltage tester to verify connections before restoring power. My first attempt was messy—wires tangled, connectors loose—but double-checking each connection prevented future outages.
Testing and Final Checks
Turn on the main power, then energize the sub-panel. Use a breaker tester or multimeter to confirm consistent voltage at each outlet or appliance circuit. Label each breaker clearly to avoid confusion later. Now, your outdoor kitchen has a dedicated power source—reducing overload risks and trip hazards. Proper installation not only safeguards your equipment but means fewer frustrating outages during summer cookouts.
Stay Compliant and Safer
Always consult local electrical codes or hire a licensed electrician for installation. Improper wiring poses fire hazards and can void insurance coverage. I once skimped on a professional inspection—until a small fault caused a short circuit. Investing in proper permits and inspections ensures your setup is safe and compliant, giving you peace of mind for years to come.
Many homeowners assume that choosing composite decking harnesses all advantages with virtually no downsides, but in my experience, there are nuanced pitfalls that even savvy DIYers often overlook. A common misconception is that all composite decking is created equal—many believe that premium brands eliminate concerns like scratching or fading. However, this isn’t entirely accurate; variations in formulations and manufacturing processes can lead to unexpected issues, especially when not aligned with your specific climate or usage patterns. For instance, I once installed a popular capped polymer decking in a high-humidity coastal area and faced rapid mold growth due to inadequate surface breathability, illustrating that material choice isn’t a one-size-fits-all solution. To deepen your understanding, I recommend reviewing expert insights, such as those from professional deck builders, emphasizing the importance of selecting materials based on environment and expected wear. A crucial trap to avoid involves neglecting the detailed care and cleaning routines required for composite decks. While marketed as low-maintenance, many users fail to realize that improper cleaning agents or infrequent maintenance can cause discoloration and surface degradation over time. This oversight often results in a deck that looks worn well before its expected lifespan.
What Advanced Factors Should I Consider When Planning Outdoor Stairs and Railing Systems?
For those aiming for safety and style, understanding the subtle complexities in stair and railing design can save costly corrections later. For example, choosing the correct overhang for stairs isn’t merely about aesthetics; it influences water runoff and slip resistance. Overhanging steps too little or too much can create tripping hazards or accumulate debris. Additionally, selecting materials for railing posts involves considering not just visual appeal but also load-bearing capacity under environmental stress. Using local studies or guidelines from reputable sources like innovative outdoor stair ideas can guide you towards compliant, durable solutions tailored to your conditions. Many DIY enthusiasts overlook the importance of precise measurements and professional-grade fasteners, leading to wobbly or unstable railings—a safety risk. It’s worth investing in mounting hardware rated for outdoor conditions and consulting building codes beforehand. Have you ever fallen into the trap of ignoring nuanced details like proper fasteners or overhangs? Let me know in the comments. Transitioning from deck materials to structural elements, selecting the right builder plays a pivotal role in ensuring your outdoor living space endures. A seasoned *outdoor living* specialist can interpret subtle environmental and design factors that a novice might miss, ensuring both safety and beauty. To explore this further, I recommend perusing insights from professional deck builder tips. Remember, a well-conceived design combined with meticulous execution can transform your backyard into a personal sanctuary, well worth the effort beyond surface appearances. Keep in mind that ensuring longevity and safety involves paying attention to these often-hidden nuances—so when planning or building, think beyond the obvious. Have you ever overlooked an advanced detail that later caused trouble? Share your experience below and let’s learn together.# Keep Your Outdoor Living Beautiful and Durable
Maintaining your composite decking and outdoor features isn’t just about aesthetics; it’s about ensuring safety, longevity, and enjoyment for years to come. The right tools and routine practices can make the difference between a deck that ages gracefully and one that falls into disrepair.
## Invest in Quality Power Tools for Precision and Efficiency
Having the right equipment is essential. I personally swear by a high-quality cordless drill with adjustable torque settings—this gives me control when securing fasteners into composite boards without causing damage. For cutting, I prefer a fine-toothed circular saw equipped with a blade optimized for composites. It reduces chipping and ensures smooth edges. Additionally, a telescoping deck inspection mirror allows me to spot hidden areas prone to moisture accumulation or algae growth, which DIYers often overlook.
## Use Specialized Cleaning and Maintenance Products
Remember, composite decks are marketed as low-maintenance, but neglecting cleaning routines accelerates fading, staining, and surface degradation. I recommend a gentle cleaner formulated specifically for composite surfaces, such as those containing non-abrasive, biodegradable agents. Regularly using a soft-bristle deck brush prevents the buildup of dirt and mold. For stubborn stains or algae, a diluted vinegar solution or a commercial deck cleaner tested for composites works well.
## Establish Routine Inspection Practices
Inspect your deck biannually, focusing on joist and railing stability, fastener integrity, and surface condition. Address any loose screws or brackets immediately. I also check for any signs of warping or cracking in the fascia, which can indicate underlying issues like improper flashing or moisture intrusion—highlighted in this guide on sturdy handrails. Regular preventative maintenance conserves your investment and maintains safety.
## Trend Predictions for Outdoor Maintenance
Looking ahead, the trend in outdoor maintenance tools is leaning toward smart technology. Imagine power washers with integrated sensors that monitor water pressure and automatically adjust for optimal cleaning without damaging the surface. Additionally, drone inspections may become commonplace for checking hard-to-reach areas, minimizing risk and saving time.
## How do I keep composite decks functioning over time?
The key lies in consistent upkeep with the right tools. Employ a durable, adjustable cordless drill for fastening, utilize composite-compatible cleaning solutions, and schedule regular inspections to catch issues early. Don’t forget, consulting comprehensive guides like this resource on decking ideas can provide additional insights into tailored maintenance routines. I challenge you to try using a soft-bristle deck brush combined with a maintenance schedule—it’s a simple step that yields significant results in preserving your outdoor oasis.
What the Pros Won’t Tell You About Outdoor Deck Perfection
– I underestimated the importance of ventilation in composite decking, which led to surface mold and discoloration in my humid climate. Proper airflow is a silent hero that keeps your deck looking fresh.
– I learned the hard way that not all fasteners are created equal—using the wrong type caused corrosion and wobbly railings. Investing in high-quality, weather-resistant hardware saved me headaches later.
– The biggest eye-opener was realizing that seamless integration of stairs and decking requires meticulous measuring and professional tools. Cutting corners here compromises safety and aesthetic appeal.
– I finally discovered that a detailed maintenance routine, including gentle cleaning solutions and routine inspections, extends the life of composite decking far beyond expectations.
Tools and Resources That Elevated My Outdoor Spaces
– My go-to guide has been this comprehensive resource on deck design. It offered step-by-step insights that demystified professional techniques.
– A quality cordless drill with adjustable torque has been essential, allowing precise fastening without damaging the composite surface.
– I rely on bonding and sealing products recommended by trusted brands, ensuring my deck stays resistant to weather elements.
– For flawless measurements, a laser level is indispensable—it made aligning stair risers and railing posts effortless compared to traditional methods.
Shape Your Outdoor Dream with Confidence and Care
Your outdoor living space is more than just a deck; it’s a canvas for family memories and personal expression. When you pay attention to the nuanced details—like proper fasteners, ventilation, and maintenance—you’re investing in a durable, beautiful sanctuary. Don’t let small oversights undermine your efforts. Embrace the learning curve, seek reliable guidance, and take pride in your craftsmanship. Your perfect outdoor retreat awaits, and every thoughtful step brings it closer to reality.
What challenge did you face when installing or maintaining your outdoor deck? Share your story below—I’d love to hear and maybe help you troubleshoot!
,