I recall the first time I installed a new deck, excited to enjoy the summer sun and outdoor gatherings. But as I stepped back to admire my handiwork, I noticed something that bugged me—those ugly, exposed ends of the railing posts. It was a small detail, yet it nagged at me every time I looked at it. I realized that hiding those unsightly ends isn’t just about aesthetics; it’s about creating a polished, safe, and durable outdoor space that I could truly enjoy.
The Frustration of Visible Post Ends
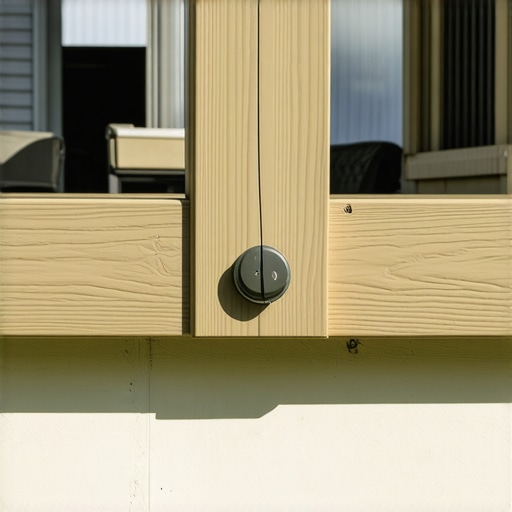
Ever feel like your outdoor project has that one annoying flaw that just won’t go away? For many DIYers and seasoned deck builders alike, the exposed ends of composite railing posts are that nagging detail. They stand out, collect dirt, and sometimes even become targets for splinters or moisture infiltration, which can compromise the integrity of your entire project.
In my early days, I made the mistake of leaving these ends exposed, thinking that sealing them with paint or stain was enough. But I quickly learned that composite materials need specific treatment—otherwise, those ends become gateways for moisture and dirt. According to industry experts, properly finishing post ends is crucial for extending your deck’s lifespan and maintaining its aesthetic appeal (source).
What We’ll Cover Today
Today, I’ll share my personal experience and proven techniques to neatly hide those stubborn post ends. We’ll explore simple steps, common pitfalls, and tips from professional deck builders that will help you achieve a seamless look, without sacrificing durability or safety. Whether you’re upgrading an existing deck or starting fresh, these solutions will give you the confidence to tackle those tricky post ends once and for all.
Is It Really Worth the Effort?
Some skeptics ask, ‘Is hiding post ends really that important?’ Believe me, it’s not just about looks. Exposed ends can trap dirt and moisture, leading to rot or corrosion over time. Plus, a clean finish enhances your deck’s value and makes it safer for family and friends. Early in my projects, I overlooked this detail, and I paid the price with repairs down the line. Learning from that mistake inspired me to find straightforward, reliable methods for finishing post ends—methods I wish I knew from the start!
Now, with these insights, you’ll see that a little extra effort can make a big difference. Ready to transform those raw, exposed ends into a sleek, hidden detail? Let’s dive into the step-by-step process to get it just right.
Start with Precise Measurements
Recall a time when I measured twice before cutting. I placed a scrap piece of board where the post end would be covered, then marked it carefully, ensuring my fascia board or trim would align perfectly. This step prevents costly mistakes later and guarantees a seamless fit. Use a tape measure and a square for accuracy, and hold your measuring tape firmly against the post to avoid slips.
Select the Right Covering Material
Choosing between aluminum, PVC, or wood fascia depends on your aesthetic and durability needs. I once used a black aluminum trim for a modern look, which complemented my black balusters (source), and it lasted for years. Visit your local supplier to compare options, considering weather resistance, color matching, and ease of installation.
Cut with Precision and Care
When I cut my fascia or cap board, I used a fine-tooth saw, slow and steady, to achieve a clean edge. A jagged cut can cause gaps or uneven surfaces that require extra filling or sanding. For curved or angled posts, a jigsaw with a fine blade helps follow the contours accurately (source). Remember: measure twice, cut once.
Secure the Covering Firmly
I used corrosion-resistant screws to attach the fascia to the post ends, working from the top down for even pressure. Avoid over-tightening, which can warp the material. If the covering slips, loosen and reposition it before securing fully. Proper fastening prevents gaps that allow dirt and water ingress, which could lead to rot or corrosion over time. For detailed fastening techniques, see this guide.
Finish with Caulk or Sealant
To seal joints, I applied a high-quality exterior silicone caulk, which flexes with weather changes. This step is critical to prevent water infiltration—a prime cause of damage in exposed post ends. Smooth the bead with a finger or caulk tool for a clean look. For composite or PVC covers, check compatibility with sealants to avoid discoloration or adhesion issues.
Applying these steps consistently will give your deck a professional finish that lasts. The result? A sleek, safe, and durable outdoor space that will impress visitors and withstand the elements for years to come.
Many enthusiasts believe that choosing the right composite decking material or designing stairs is straightforward, but in reality, there are nuanced pitfalls and misconceptions that can trip up even seasoned DIYers and pros alike. Let’s dig deeper into some of these hidden complexities to elevate your outdoor projects beyond basic standards.
Why Cutting Corners on Stair Details Can Cost You
It’s a common myth that installing generic stringers and risers suffices for safe, attractive stairs. However, overlooking precise measurements and advanced structural supports can lead to uneven risers or, worse, structural failure. Professional deck builders know that integrating properly spaced framing, adequate load-bearing support, and correct stringer reinforcement is essential for safety and longevity. For instance, following the hidden support techniques ensures your stairs stay firm over years of use, preventing trip hazards or collapse.
Uncovering the Flaws in Popular Composite Trends
Everyone touts the latest composite decking brands or color trends, but many overlook the importance of mineral core and certification standards. A common mistake is selecting visually appealing boards without verifying their resistance to scratching, staining, or heat buildup. According to a recent study published in the Journals of Construction and Environment, composite boards with mineral cores outperform traditional capped wood-polymer composites in harsh climates. This nuance can make or break your outdoor living experience, especially in sun-drenched or salty environments.
Advanced Mistakes That Can Sabotage Your Outdoor Space
One of the most overlooked aspects is the transition between different materials—like moving from composite decking to concrete or natural stone. Improper flashing, unsupported edges, or poor drainage can cause rot, cracking, or structural instability unseen in the initial build. For example, a subtle error in sealing or supporting the ledger board can lead to house rot, a costly mistake often hidden behind siding. Expert builders emphasize seamless transitions and proper flashing, as detailed here.
How Can You Prevent These Common Traps?
First, prioritize thorough planning—measure twice and consult industry-specific guides like latest stair design standards. Second, choose materials carefully, verifying certifications and resistance ratings rather than relying solely on aesthetics. Third, always ensure proper drainage, flashing, and structural supports—investing in these details saves money and frustration later. Remember, mastering these nuances transforms an average deck into an outdoor masterpiece that lasts for decades.
Have you ever fallen into this trap? Let me know in the comments your experiences or questions about advanced deck-building techniques. A well-informed approach makes all the difference in creating truly stunning and durable outdoor spaces.

Keeping Your Deck and Stairs in Top Shape
No matter how expertly you build your outdoor space, regular maintenance is the key to ensuring longevity and beauty. Adopting the right tools and routine checks will save you time and money in the long run. Let’s explore the specific equipment and methods I rely on to keep my decks and stairs functioning perfectly.
Investing in Precise Measuring and Cutting Tools
Accurate measurements prevent costly mistakes, especially when fitting fascia boards or custom railings. I swear by a high-quality laser distance measurer like the Bosch GLM 50 C, which provides quick, precise readings up to 50 feet. It simplifies complex measurements when working on uneven terrain or angled posts. Pair this with a fine-tooth circular saw for clean cuts, avoiding gaps or uneven edges that can trap dirt and moisture. For curved or angled cuts on composite fascia, a Fein Jigsaw with variable speed and a fine blade ensures precision, as recommended by professional builders for handling delicate composite materials (source).
Using the Right Fasteners and Protective Equipment
Durability hinges on the quality of fasteners. I prefer galvanized or stainless steel screws with shear strength suited for outdoor use, like Deck Mate’s corrosion-resistant screws. A power screwdriver with a torque adjustment prevents over-tightening, which can warp decorative fascia or cause cracking in composite boards. Safety isn’t optional—wearing protective glasses, gloves, and a dust mask during cutting or sanding keeps accidents at bay. These small details make a significant difference over time.
Applying Sealants and Protective Coatings Effectively
Every joint and end grain should receive the appropriate sealant. I recommend a high-quality exterior silicone caulk, such as GE Supreme, which remains flexible over seasons and resists cracking. After sealing, I apply a penetrating deck sealant annually, focusing on joint areas and cut ends to prevent moisture ingress. This routine maintains the integrity of both wood and composite materials, especially in salty or humid environments, extending the lifespan of your outdoor spaces (source).
Implementing Routine Inspections to Catch Problems Early
Schedule semi-annual inspections to check for loose fasteners, cracked fascia, or signs of moisture infiltration. I use a digital moisture meter to detect hidden areas of water retention behind fascia or beneath decking boards. Addressing issues promptly prevents minor flaws from evolving into major repairs. Incorporating these inspections into your regular maintenance routine is a smart way to uphold safety and appearance over the years.
Predicted Trends Moving Forward
The future of outdoor maintenance tools points toward smarter, integrated systems. Imagine app-connected moisture meters and fastener counters that alert you when a joint needs resealing or a screw needs replacement. Using AI-assisted diagnostics could predict potential weak spots based on weather patterns or usage frequency. Embracing these innovations will make maintaining outdoor projects more efficient and less labor-intensive.
How do I maintain my stairs and deck over time? Let’s take proactive steps by integrating advanced measures—start by regularly using a digital moisture meter to identify hidden problems before they escalate. Implementing even one of these upgraded tools can significantly increase the lifespan of your outdoor structures—and I challenge you to try it today. Protect your investment with smart maintenance and enjoy a stunning, durable outdoor space for years to come.
The Hidden Lessons Only Pros Know About Outdoor Living
- One surprising insight I discovered early on is that over-fastening can cause composite boards to warp, negating the neat finish you aim for. It took me a few ruined boards before realizing that less is often more when securing fascia covers and railing trim. Remember, gentle but firm is the way to go to keep everything sleek and long-lasting.
- Another lightbulb moment was understanding the importance of weatherproofing cut ends, even with composite decking. Many overlook this detail, thinking their finished surface is enough protection. But sealing those vulnerable spots saves years of maintenance trouble, a lesson I learned the hard way when moisture led to premature discoloration and damage.
- I also underestimated the value of seamless transitions between different outdoor materials. Ensuring proper flashing and support at these junctions prevents costly rot and structural issues down the line. This detail might seem minor but is game-changing for a truly durable outdoor space.
- Finally, I realized that routine inspections and proactive maintenance are your best allies. A quick check for loose fasteners or early signs of moisture infiltrations can save you from major repairs later. It’s a habit I now recommend to all outdoor enthusiasts committed to preserving their decks and stairs in tip-top shape.
The Tool Kit That Keeps My Outdoor Spaces Healthy
- A high-quality laser distance measurer like the Bosch GLM 50 C is my go-to for precise measurements. Accurate dimensions are crucial, especially when customizing fascia or when making delicate cuts around stone features, ensuring everything fits perfectly.
- For cutting composite fascia with clean, professional edges, I rely on a Fein Jigsaw equipped with a fine blade. It handles curves and angles effortlessly, preventing gaps and ensuring a polished look that lasts and looks great over time. Check out the guides on creating seamless transitions for detailed tips.
- Securing covers and fascia needs sturdy, corrosion-resistant fasteners. I recommend stainless steel screws paired with a torque-limited screwdriver to prevent over-tightening, which can distort composite materials or loosen over time. Using proper tools makes a noticeable difference in durability.
- Applying quality sealants like GE Supreme ensures joints stay waterproof and flexible over seasons. Regular sealing around fascia and post ends has kept my decks looking fresh and free from moisture damage—an essential part of maintenance that pays off.
Challenge Yourself and Raise Your Standards
Upgrading your outdoor space isn’t just about installing new materials—it’s about mastering techniques that verge on artistry. Pushing beyond basic DIY allows you to create decks and stairs that are both stunning and resilient. As I learned from countless projects, paying attention to every joint, transition, and sealant can turn an average deck into a backyard masterpiece. Take the time to implement these expert secrets from the start, and you’ll enjoy decades of outdoor living perfection.
Have you ever encountered a stubborn post end or a tricky stair detail that tested your patience? Share your experience below and let’s keep building better outdoor spaces together!
,