It was a moment that felt oddly trivial but suddenly hit me like a wake-up call—walking out onto my newly built deck, I noticed how the corners glared at me with a cheap, rushed look. I had spent weeks planning, choosing the perfect composite decking, and even hiring a reputable builder. Yet, those mitered corners, sloppy and uneven, undermined the entire aesthetic. That lightbulb moment made me realize something: the little details, especially around the borders, make or break the final look.
Transform Your Outdoors: The Power of Clean, Seamless Edges
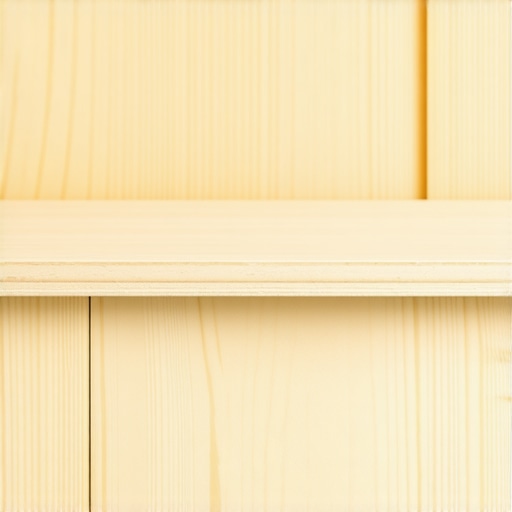
When it comes to outdoor living spaces, the impression often hinges on subtle touches. Solid board rims offer a sleek, polished boundary that elevates the entire deck, making it look professionally finished and inviting. Unlike mitered corners, which can sometimes look jagged or uneven if not meticulously crafted, solid rims provide a continuous, uniform appearance that’s both modern and timeless. This visual consistency is one reason why many professional designers and experienced builders opt for solid borders.
Are you worried that installing solid board rims is too complicated or expensive? Believe me, I had the same doubts initially. I made a few mistakes early on, such as underestimating the importance of precise measurements and proper fastening techniques. These slip-ups cost me time and money, but they also taught me invaluable lessons. Today, I want to share exactly how you can avoid these pitfalls and achieve that stunning, seamless look that makes your deck stand out.
Worried That Solid Borders Are Overkill? Here’s Why They’re Worth It
I used to think that mitered corners were sufficient because they seemed neater at first glance. But I learned the hard way that shortcuts often lead to uneven joints and gaps over time, especially with weather exposure. For instance, I initially skipped detailed planning and didn’t account for expansion gaps, which caused my corners to warp and loosen. A professional deck builder will tell you that proper installation of solid borders not only looks better but also increases the durability of your deck. Want to see how a seasoned expert can turn your outdoor space into a showstopper? Check out [this article](https://deckdesignbuild.com/transform-your-space-expert-deck-builder-tips-for-stunning-outdoor-living) for great insights.
If you’re considering upgrading your deck with a border that truly enhances its appearance and longevity, understanding the pros and cons of each method can make all the difference. So, let’s explore why solid board rims are the way to go and how you can get started on your own project.
Set Precise Measurements Before Cutting
Start by measuring the perimeter of your deck accurately, accounting for expansion gaps—about 1/4 inch between boards. Use a tape measure and chalk line to mark your cut lines on the solid decking material. For my recent project, I double-checked measurements to prevent misalignments, which saved me hours of adjustments later.)
Choose the Right Materials for Your Borders
Select high-quality, weather-resistant composite or pressure-treated lumber that matches or complements your existing deck. I opted for a capped composite board because of its durability and low maintenance, aligning with my outdoor living goals. Proper material choice ensures longevity and a seamless look, which is critical for borders.
Prepare Your Workspace and Safety Gear
Clear the work area and gather safety equipment like goggles, gloves, and ear protection. Secure the deck to avoid movement during installation. When I worked through this step, I also set up a work table nearby, which streamlined cutting and fastening processes.
Use the Correct Tools and Fasteners
Utilize a circular saw with a fine-tooth blade for clean cuts, and an impact driver or screwdriver for fasteners. Galvanized or stainless steel screws are best to prevent corrosion. I learned that pre-drilling holes on my first experience prevented splitting and made fastening easier.
Install the First Border Piece
Begin along a straight edge, placing the board flush against the rim or existing border. Secure with fasteners spaced every 16 inches and slightly inset from the edges. During my last project, starting at a corner helped establish a reference and kept everything aligned.
Maintain Consistent Gaps and Alignment
Use a spacer or the width of a screw to maintain uniform gaps between boards, essential for drainage and expansion. Check alignment regularly with a level. I found that periodically stepping back helped spot misalignments early, preventing cumulative errors.
Work Around Corners and Obstructions
Cut boards at miters for tight corners or use coping saws for intricate shapes. When I reached a tricky corner, I carefully scribed the cut line onto the board, which resulted in a snug fit without gaps—saving time on adjustments.
Finish with Seamless Fastening and Cover Plates
Use hidden fasteners or face-screwing techniques for a smooth appearance. Cover screw heads with plugs or caps for a polished look. My previous experience with visible screws taught me that aesthetic details matter, making the deck look professionally finished.
Inspect and Adjust for Final Fixes
Once installed, walk the border to check for any uneven or loose boards. Tighten fasteners as needed. I also touched up any gaps with filler material to ensure a uniform, clean edge—economically boosting curb appeal and longevity.
Maintain Your Borders for Longevity
Apply a protective sealant suitable for your border material and climate. Regular inspections and cleaning extend the life of your solid rims, keeping your outdoor space stunning for years. During my last maintenance routine, I realized that proactive upkeep prevented early deterioration.
Even experienced DIY enthusiasts can fall prey to misconceptions when it comes to outdoor deck design. Most people assume that installing stairs or choosing composite decking is straightforward, but the nuances are often overlooked, leading to costly errors. For example, many believe that all composite boards behave the same under sun exposure, but in reality, some brands stay cooler and retain color better, as detailed in [composite decking trends](https://deckdesignbuild.com/composite-decking-trends-2025-the-ultimate-guide-for-outdoor-enthusiasts).
A common myth is that mitered corners are sufficient for a professional look, but the truth is that precise, solid borders significantly boost durability and aesthetics, especially considering weather-related expansion and contraction. Skipping proper planning here can result in uneven edges or warping—warnings shared extensively by seasoned deck builders on our site.
Furthermore, many underestimate the importance of correct stair measurements. An incorrect riser height or inconsistent stringer cuts can cause safety hazards and create an uneven walking surface. Advanced builders avoid these pitfalls by understanding the importance of the 7-inch riser rule, which ensures steps are both safe and comfortable for every user, as explained [here](https://deckdesignbuild.com/the-7-inch-riser-rule-for-stairs-that-fail-home-inspections-every-time).
A crucial mistake often overlooked involves the structural integrity of stairs—people focus on aesthetics without considering load distribution and proper fastening techniques. The subtle nuances in choosing hidden fasteners or using the right joist spans directly influence long-term stability. For more insights on building resilient stairs, check out [this guide](https://deckdesignbuild.com/creating-seamless-transitions-stairs-as-key-elements-in-outdoor-living).
Another trap is neglecting proper drainage and ventilation around your deck and stairs. Without adequate airflow and water management, even the best materials can deteriorate prematurely. External experts recommend integrating under-deck drainage systems and understanding how airflow affects composite longevity.
Lastly, don’t assume that all decks are the same. Climate, usage, and materials require tailored solutions that a generic approach won’t address. Collaborating with a professional or at least gaining deep knowledge—as shared in [professional deck builder tips](https://deckdesignbuild.com/transform-your-space-expert-deck-builder-tips-for-stunning-outdoor-living)—can save you from common pitfalls.
Have you ever fallen into this trap? Let me know in the comments. Remember, paying attention to these hidden nuances and misconceptions can significantly enhance the safety, longevity, and aesthetic appeal of your outdoor living spaces.
Keep Your Decks and Stairs in Prime Condition with Precision Tools
Maintaining a deck, especially one clad with composite materials, demands the right tools to ensure longevity and safety. I swear by a high-quality cordless impact driver—I use the Milwaukee M18 Fuel Impact Driver because of its remarkable torque and battery life, which significantly speeds up fastening tasks when installing fascias or securing deck boards. Additionally, a fine-tooth circular saw, like the DeWalt DCS575, guarantees smooth, accurate cuts on tough composite materials, reducing waste and rework. Using specialized tools not only saves you time but also preserves the structural integrity of your outdoor projects.
Choosing the Right Fasteners
Durability hinges on fastener quality; I recommend stainless steel screws, such as the Starborn Smart-Bit Fasteners, for their corrosion resistance—crucial in outdoor, high-humidity environments. Pre-drilling combined with these fasteners prevents splitting and loosening over years of exposure.
Enhance Your Workflow with Software
Designing detailed plans with tools like SketchUp helps prevent measurement mishaps, ensuring precise fits and aesthetically pleasing borders. Switching to digital planning aligns with the trend towards more professional, durable outdoor builds.
Long-Term Results Require Regular Inspection and Maintenance Routines
Adopting a systematic approach to maintenance ensures your outdoor living space endures. I schedule bi-annual inspections, focusing on fastener tightness, surface integrity, and drainage performance. Applying sealants like Sikkens Cetol for wood components or protective coatings for composite borders guards against weathering. Consistency is key—think of it as an investment in your home’s outdoor appeal and safety.
How do I maintain my outdoor structures over time?
Start by cleaning with a gentle, composite-specific cleaner such as SlipDoctors Clean & Seal, avoiding harsh power washers that can damage surfaces. After cleaning, reapply protective sealants or coatings tailored for your specific materials and climate. For instance, in saltwater-adjacent environments, a salt-resistant sealant extends the life of your materials. Implementing these practices consistently will save you costly repairs and preserve the aesthetic appeal of your outdoor space.
Scaling Up with Professional Tools and Best Practices
If you’re considering expanding your deck or building new stairs, investing in a laser level, like the Bosch GLL3-330CG, ensures your posts and borders are perfectly aligned, even on uneven terrain. Develop your skills with tutorials from expert builders, and don’t hesitate to consult a professional deck builder for precision work.
Technological advancements are making outdoor maintenance easier and more reliable. I foresee the trend moving toward integrated sensors that monitor weather exposure and suggest maintenance schedules, further extending the lifespan of decks and stairs. For now, mastering precise measurements, choosing high-quality materials, and establishing a regular maintenance routine will give you the best long-term results. Ready to take your outdoor project to the next level? Try implementing a digital planning tool coupled with a reputable impact driver—you’ll be amazed at how these steps simplify upkeep and improve durability.
Lessons Hidden in Plain Sight That Changed My Approach
One unexpected lesson was realizing that perfect corners don’t just look neat—they extend the lifespan of your deck. I once rushed my border installation and overlooked expansion gaps, leading to warping and gaps over time. That lightbulb moment taught me to measure twice and plan ahead, saving headaches later.
Another insight was how choosing the right fasteners can make or break your project. I used the wrong screws initially, which rusted quickly and compromised the look. Switching to stainless steel-made me appreciate the importance of quality hardware in outdoor durability.
Finally, I learned the hard way that seamless borders aren’t just aesthetic—they protect your deck from water infiltration and weather damage. Investing extra time in precise measurements and professional techniques is worth every ounce of effort, especially when you see how much longer your deck stays beautiful and safe.
Tools and Resources That Truly Make a Difference
- Milwaukee M18 Fuel Impact Driver: Its power and battery life make fastening and adjusting a breeze, especially when working with composite boards. Trust me, it speeds up the process and reduces fatigue.
- DeWalt DCS575 Circular Saw: Clean, accurate cuts on tough materials like capped composite are effortless, ensuring tight joints and a professional look.
- SketchUp Software: A visual plan helps prevent measurement errors and visualizes border layouts before cutting, making your project smoother.
- Sealants like Sikkens Cetol: Regular maintenance with high-quality sealants can extend your deck’s life substantially. I rely on them for my borders and decks to keep them looking fresh.
Turning Small Details Into Lasting Confidence
Building a stunning, durable outdoor space isn’t about grand gestures alone—it’s the sum of tiny, deliberate steps. Each measurement, fastener choice, and finishing touch adds up, transforming your deck from a simple structure into an outdoor oasis that withstands time and weather. Don’t hesitate to refine your skills and seek expert advice; it’s a worthwhile investment for years of enjoyment. Want to elevate your project? Connect with seasoned professional deck builders or explore innovative ideas to make your outdoor living truly special.