I still remember the cold morning I decided to finally build my dream deck. I had all the plans laid out, the materials ready, and an eager vision of outdoor gatherings. But as I laid the first few planks, I realized something was off—my ground was uneven, and no matter what I did, the deck looked crooked. That lightbulb moment hit me hard: a level deck isn’t just about measurement—it’s about understanding the ground beneath and making intentional adjustments.
This initial mistake taught me a vital lesson: building on uneven terrain requires more than standard framing—it’s about strategies, patience, and some insider tricks that I wish I knew from the start.
Today, I want to share how I cracked the code to create a perfectly level deck on uneven ground, something I once believed was nearly impossible without extensive site prep or costly leveling. If you’ve ever faced a similar challenge, keep reading. We’re going to explore actionable DIY tips and professional insights that can turn your uneven yard into a stunning, stable outdoor space.
The Importance of Proper Foundation in Deck Building
Does an uneven ground really threaten your deck’s lifespan?
Absolutely. I used to think that a little slope or irregular soil was no big deal. Turns out, if your foundation isn’t solid and properly adjusted, your deck can settle unevenly, warp, or even become dangerous over time. According to experts, improper footing is among the leading causes of deck failure after years of weather exposure and foot traffic. That’s why setting a level foundation from the start is crucial, especially when working with uneven terrain.
Early in my project, I underestimated how much ground irregularities could affect the final look and safety. I once skipped the step of assessing soil stability, thinking soil is soil—big mistake. That oversight led to wobbling after just a few seasons. You can read more about how a skilled deck builder approaches foundational stability in this guide to professional outdoor projects.
If you’re tired of your deck looking like it’s leaning or shifting with each rain, you’re not alone. Many DIYers face similar frustrations. But don’t worry—understanding your ground and implementing proper techniques can save you hours of future repairs and headaches. Ready to learn how to level your deck even on the trickiest terrain? Let’s dive into the practical steps, starting with assessing your site.
Assess the Site and Prepare Your Tools
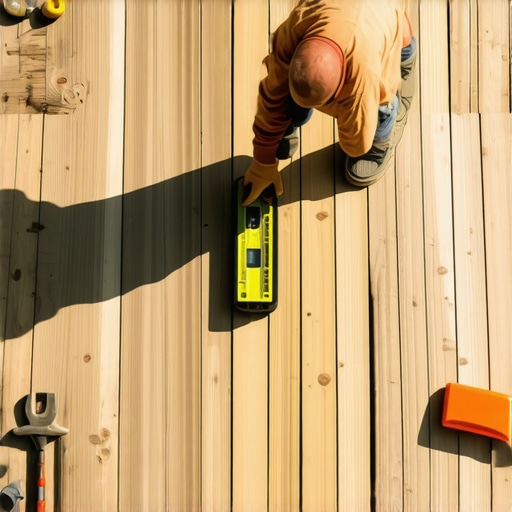
Begin by inspecting the terrain thoroughly. Use a long level or a string line to identify high and low spots. Imagine your yard as a uneven chessboard, where you need to even out the pieces to build a stable structure. Gather essential tools: shovels, a sledgehammer, adjustable jacks, gravel, a tamper, and a high-quality level. I once tackled a sloped backyard, and spending time measuring with a laser level was crucial; it revealed subtle dips that eye alone missed.
Dig and Reinforce to Create a Solid Base
Remove soil from high spots and add gravel or compacted soil to low areas. Think of this step like adjusting furniture legs to prevent wobbling—each adjustment adds stability. When I built on a slope, I excavated the high side, then filled and compacted gravel to bring it level with the lower part. Compacting the gravel thoroughly with a tamper prevents future settling, much like packing down sand before laying pavers. This creates a reliable foundation for your ledger board or beams.
Use Adjustable Post Supports or Shims to Fine-Tune Leveling
Install adjustable post bases or use shims under beams or joists to achieve precise leveling. Visualize this as fine-tuning a guitar string—small adjustments make a big difference. In practice, I installed temporary supports, then used a carpenter’s level to check each span. When I detected slight tilts, I inserted shims behind post bases, which are like tiny wedges, to lift or lower. This method ensures your deck frame remains perfectly level before fastening permanently.
Secure the Frame and Check for Stability
Once all supports are adjusted, fasten the beams and joists tightly. Verify levelness again after tightening, as tension can shift supports. Think of this step as tightening a bicycle seat—initially loose parts settle once secured. In my project, I kept rechecking with a 4-foot level, adjusting shims where needed until the frame sat perfectly. This careful process prevents future issues like uneven decking or warping.
Install Composite Deck Boards Carefully
Lay your chosen composite decking material, following manufacturer instructions. Since composite boards expand and contract with temperature, leave proper gaps—about 1/8 inch—similar to how a car tire needs room to breathe. I once installed composite planks on a hot day; leaving these small gaps prevented buckling during temperature swings. Use hidden fasteners for a clean look, ensuring secure attachment without compromising the surface.
Inspect and Maintain Your Deck
Regularly check for shifts or loose fasteners, especially after heavy rains or snow. A well-maintained deck is like a finely tuned instrument—performing best when cared for. I recommend periodic rechecks with a level and prompt tightening of any loose components. This vigilance keeps your outdoor space safe, stable, and beautiful for years to come.
Many DIY enthusiasts and even seasoned builders often believe that choosing the right materials or following a basic blueprint guarantees a safe, attractive outdoor staircase. However, the nuanced failures behind common stair and deck mistakes reveal deeper issues that can compromise safety and aesthetic appeal. For instance, a prevalent misconception is that standard stringer spacing and riser heights are universally applicable. In reality, variations in ground settling, material expansion, and load distribution demand an advanced understanding of structural dynamics. According to experts, neglecting these nuances can lead to premature deterioration and potential safety hazards, especially when using composites that expand and contract differently than wood. For example, improper installation of stair fasteners can cause rattling and loosening over time, undermining stability. Additionally, many assume that composite decking is maintenance-free, but improper installation—like inadequate spacing for thermal expansion—can cause warping and buckling, especially under extreme temperature fluctuations. Another hidden nuance is the importance of seamless transitions between stairs and outdoor living spaces; overlooking this can diminish functionality and visual flow, but professional builder tips advocate for precise measurements and considered design choices, as detailed in our guide to outdoor stair integration. For advanced builders, understanding the subtleties of drainage, fastener corrosion resistance, and tailored framing techniques can make the difference between a durable project and one plagued by issues. For instance, addressing drainage at stair landings prevents water accumulation that accelerates rot, a tip supported by recent research highlighting moisture’s role in material degradation. Don’t fall into the trap of oversimplification—investing in proper framing, material selection, and installation techniques elevates your project from DIY to professional-grade. If you’re eager to perfect your outdoor stairs or decking, explore our comprehensive tips on designing safe and stylish stairs for outdoor decks in 2025. Have you ever fallen into this trap? Let me know in the comments.
Maintaining a durable and beautiful outdoor space requires the right equipment and methods. Over the years, I’ve tested and refined my toolkit to ensure every project, from stairs to composite decks, stands the test of time. Investing in quality tools not only streamlines the process but also saves you headaches down the line. Let’s delve into the essential gear I personally rely on for
Unforeseen Lessons That Changed My Approach to Deck Building
One of the most eye-opening lessons I learned is that patience and meticulous site prep trump quick fixes. For instance, I once tried to speed through leveling by skipping gravel compaction—only to face years of warping and squeaky boards. Now, I understand that every uneven surface requires a tailored solution, and rushing leads to costly setbacks. Additionally, I discovered that even small miscalculations in shimming can compound over time, emphasizing the value of double-checking with a high-quality level at every step. Finally, the importance of understanding soil stability became crystal clear—so investing in soil testing or consulting with professionals can pay dividends in ensuring a long-lasting, safe deck that remains level through seasons of shifting ground.