It was a sunny Saturday afternoon when I finally started my outdoor project—adding a wrap-around step to my deck. I was eager to elevate my outdoor living space, imagining warm evenings and lively gatherings. But within hours, I faced a frustrating realization: my carefully measured step was lopsided, wobbly, and worst of all, not level. The more I tried to fix it, the more it seemed to defy my efforts. Sound familiar?
Why Level Wrap-Around Steps Can Feel Like an Impossible Puzzle
Building a wrap-around step that stays perfectly level isn’t just about hitting the right measurements. A common mistake I made early on was underestimating how uneven ground and shifting soil could throw off even the best plans. I thought I could simply frame it neatly, but the ground beneath was less cooperative. As I quickly learned, uneven footing can cause your steps to tilt, wobble, or worse—become dangerous.
The key to success is understanding that a level, sturdy wrap-around step is a blend of precise measurements, solid foundation work, and smart framing techniques. When I finally started paying close attention to these details, everything changed. And trust me, this isn’t just my opinion—professional builders emphasize the importance of proper foundation support for long-lasting, level steps. In fact, you can find expert advice on this topic [here](https://deckdesignbuild.com/creating-seamless-transitions-stairs-as-key-elements-in-outdoor-living).
I want to help you avoid the same pitfalls. Whether you’re tackling a small project or a large outdoor remodel, knowing what to watch out for and how to stabilize your foundation will save you headaches later. But before we dive into the techniques, I want to address a common concern I hear from beginners: “Is this level of precision really necessary?” Well, the truth is—absolutely. A level step not only looks better but also functions safely.
So, if you’ve ever faced the sinking suspicion that your stairs might be, well, crooked, keep reading. I’m going to share the proven methods I used to build a wrap-around step that stays perfectly level and secure, even on tricky ground. Ready to transform your outdoor space with confidence? Let’s go.
Set a Solid Foundation for Your Wrap-Around Step
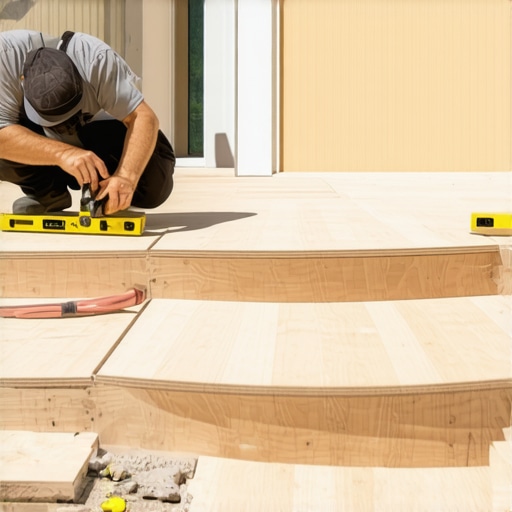
Start by choosing the right location and clearing the ground thoroughly. Use a transit level or laser level to identify high and low spots, much like a sailor charts a course across unpredictable waters. For uneven terrain, pour a concrete footing or install adjustable deck piers, which act as adjustable legs, providing a stable base and preventing future wobbling. I once used adjustable piers when building my own deck on slopey ground, and it made leveling the entire structure straightforward.
Accurate Measurements Are Your Best Friend
Measure the width, depth, and rise of each step precisely, especially when creating a wrap-around design. Use a framing square to ensure the stringers are cut at consistent angles. Think of this like stitching together a quilt—you want all pieces to fit snugly. Remember, even a tiny measurement error compounds over multiple steps, so double-check before making cuts. I recommend marking all cuts with a pencil and verifying with a tape measure multiple times before proceeding.
Cutting and Installing the Stringers
Cut your stringers using a circular saw, making sure to follow the marks precisely. Use a framing square to keep the cut lines straight and consistent. When installing, attach the stringers securely to your ledger board and support beams with hurricane ties or metal brackets. For my project, I used a jig to cut multiple stringers at once, which saved time and ensured uniformity. Proper attachment prevents wobbling and maintains alignment for the entire stair assembly.
Ensuring Leveling Throughout the Process
As you assemble, constantly check the levelness with a spirit level and a laser level for accuracy across the entire perimeter. Place shims under the stringers if necessary; these small wedges act like tiny balancing weights, helping to fine-tune the position. In one instance, I used adjustable shims beneath a corner to correct a slight tilt caused by uneven ground, resulting in a perfectly level finish. This step is crucial for a smooth, comfortable surface that won’t feel uneven underfoot.
Framing the Treads and Risers
Attach the treads (the horizontal part you step on) securely to the stringers, using corrosion-resistant fasteners. Make sure each tread overhangs the riser slightly for safety and aesthetics. Use a carpenter’s square to check the overhang and alignment. I installed a temporary level during this stage to verify the consistency of treads across the entire curve; it helped catch slight deviations early, which I corrected before completing the final attachment.
Finishing Touches for a Professional Look
Finish the edges with trim or flashing to prevent water infiltration, which can cause wood rot or deterioration over time. Seal all joints meticulously, especially at the corners of the wrap-around, to protect against moisture. Remember, a well-sealed and finished step not only looks professional but also extends its lifespan. For example, I applied a waterproof sealant along the joints and around fasteners, which has kept my stairs looking new for years.
Additional Tips to Simplify Your Build
Using composite decking materials can save maintenance time and resist weathering. When working with composites, drill pilot holes to prevent splitting and use fasteners compatible with your chosen boards. For a sleek, modern appearance, consider hidden fasteners, which eliminate visible screws and improve safety by providing a smooth surface. You can find a variety of innovative ideas for outdoor living spaces here.
Remember that precise planning, measurement, and secure attachment are the keys to a level, stable wrap-around step. Taking your time at each phase prevents costly mistakes and results in a beautiful, functional addition to your outdoor space.
Many DIYers and even some professionals operate under the assumption that following basic measurements and materials guarantees a flawless outdoor staircase or deck. However, this overlooks several critical nuances that can make or break the longevity and safety of your project. Let’s dig deeper into some common myths and advanced mistakes that can trip up even experienced builders, along with expert insights that shed light on what truly matters.
Why Equal Riser Heights Might Not Be Enough
One widespread belief is that measuring riser heights accurately is enough to ensure comfortable stairs. While correct measurements are essential, the real-world complication often comes from ground unevenness and soil shifting over time. A riser at one end might be perfect during installation but, if the ground underneath settles differently, it can result in uneven treads, causing tripping hazards. Professional builders use techniques like adjustable stringers or custom shimming—not just calculation—to maintain consistent rise and run throughout the life of the stairs. This advanced nuance ensures safety and comfort, especially for high-traffic outdoor stairs. For innovative ideas on deck elevations and stair safety, check out [top stairs design tips](https://deckdesignbuild.com/elevate-your-home-top-stairs-designs-for-modern-outdoor-spaces).
The Myth of Composite Decking Being “Maintenance-Free”
Many fall into the trap of thinking composite decking requires zero upkeep. Sure, composite boards are low-maintenance compared to traditional wood, but neglecting proper installation and regular inspection can lead to premature deterioration. Hidden fasteners, for example, are often touted as a maintenance-free solution, but if they’re not installed correctly—using the right screws or preventing water infiltration—they can cause boards to loosen, warp, or rot at the edges. Additionally, some homeowners ignore subtle water pooling or debris trapping under composite boards, leading to mold and mildew. The real expert take is that correct installation and periodic cleaning are crucial, regardless of material. Learn more about [hidden fastener mistakes](https://deckdesignbuild.com/why-hidden-fasteners-fail-more-often-in-cold-climates) that can compromise your deck’s integrity.
Advanced Mistakes That Ruin Outdoor Living Spaces
A common oversight is neglecting proper drainage and ventilation, especially around stairs and deck joints. For instance, failing to include a slight slope or proper flashing can cause water to pool, accelerating rot and deterioration. Moreover, the assumption that a structurally sound deck can withstand all weather conditions without additional protective measures is false. Building codes often require specific clearances and vapor barriers that many overlook, leading to long-term damage. Expert builders emphasize integrating drainage systems and vapor barriers from the start, as discussed in [best practices for waterproofing](https://deckdesignbuild.com/the-best-decking-patterns-for-large-boring-spaces). These nuances—often unseen during initial construction—determine the durability and safety of your outdoor living space.
Have you ever fallen into this trap? Let me know in the comments. Mastering these subtle aspects can save you time, money, and frustration, turning your outdoor project into a longstanding oasis that truly stands the test of time.Maintaining your outdoor stairs, decking, and other elements of your outdoor living space requires the right equipment and a strategic approach. As a seasoned DIY enthusiast and experienced deck builder, I rely on specific tools that make the job smoother and more precise. For instance, a high-quality digital level, like the **Bosch Cross Line Laser Level**, ensures that your steps and decking are perfectly aligned, saving you time and frustration. I personally use this tool because its laser projects clear, long-lasting lines that are visible even in bright sunlight, making it ideal for outdoor projects. Additionally, a **clamp meter** helps detect any electrical faults if you’re installing or maintaining lighting systems—something all outdoor living projects should incorporate for safety.
When it comes to cleaning and maintenance, I swear by a **power washer** with adjustable PSI settings. It’s invaluable for removing dirt, mold, and algae from composite decking surfaces without damaging the material. Regularly inspecting fasteners with a **magnetic screwdriver** allows me to identify and tighten loose screws, preventing wobbling and ensuring safety over time. For sealing and water-proofing, I prefer brush applicators with long handles, which give me control and reach on large surfaces—especially when applying waterproof sealants or paints.
Predicting where outdoor living trends are headed, I believe the integration of smart monitoring systems will become more mainstream. Sensors capable of detecting ground movement or moisture levels can alert homeowners to issues before they become costly repairs. This proactive approach aligns with the shift toward more intelligent outdoor spaces.
How do I maintain outdoor stairs and decking over time?
Regular upkeep starts with routine inspections for loose fasteners, rotting wood, or mold. Applying protective sealants annually or biannually keeps composite and wood surfaces looking fresh and extends their lifespan. Using a **moisture meter** helps check the effectiveness of your sealants and guides reapplication schedules. Also, performing gentle cleaning with a power washer, aligned with manufacturer recommendations, preserves the integrity of composite surfaces like those discussed in [composite decking trends](https://deckdesignbuild.com/composite-decking-trends-2025-the-ultimate-guide-for-outdoor-enthusiasts). For complex issues or extensive upgrades, collaborating with a professional deck builder ensures your outdoor space remains safe and beautiful for years to come. So, try incorporating a digital laser level into your next project—it’s a game-changer for achieving flawless alignment and a professional finish. For expert advice on project planning, visit our [outdoor living transformation tips](https://deckdesignbuild.com/transform-your-space-expert-deck-builder-tips-for-stunning-outdoor-living).
Throughout my journey into outdoor living projects, I’ve learned that building a seamless, level wrap-around step is less about perfect measurements and more about understanding ground behavior and smart construction techniques. My biggest revelation was the importance of a solid foundation—tools like adjustable deck piers and precise leveling can turn a wobbly, uneven staircase into a smooth, durable feature that invites gatherings for years to come. Remember, investing in quality tools and paying close attention to detail during each phase makes all the difference, and scratching just below the surface often reveals the secret to lasting stability. As I discovered, the devil truly is in the details—so don’t rush, be meticulous, and your outdoor steps will reward you with safety and style for decades. For more insights on professional outdoor space transformations, check out our expert tips for transforming your outdoor space.
Insider Lessons That Changed My Approach to Outdoor Stairbuilding
- Ground shifts are inevitable: I used to think precise measurements were enough. Now I understand that ground movement requires adjustable supports and ongoing inspections to keep stairs level over time.
- Don’t underestimate the slope: Starting with a leveling plan that considers natural terrain prevents future wobbling. A simple tool like a laser level becomes a game-changer here.
- Foundation first, beauty second: A solid base using concrete footings or adjustable piers is non-negotiable. Without it, all your careful framing could become unstable.
- Detailing pays off: Small touches, such as proper shimming and waterproof sealing, extend the life of your stairs and maintain their appearance.
My Go-To Arsenal for Building Beautiful, Safe Stairs
- Laser levels: For quick, accurate leveling, I trust the laser levels recommended by experts. They reduce guesswork in uneven terrain and save time.
- Adjustable deck piers: They allow for on-the-fly corrections, especially on slopes, ensuring your stairs remain perfectly level over their lifespan.
- High-quality fasteners and waterproofing sealants: These are the unsung heroes that keep your outdoor stairs safe and durable against weather.
- Inspection tools like moisture meters: Regular checks prevent issues before they become costly repairs.
Building Confidence for Your Next Big Project
But beyond tools and techniques, I’ve realized that the real key to success is confidence—trust in your planning, patience during execution, and willingness to learn from each step. Don’t rush the process; building outdoor stairs that last requires intentionality and care. When you embrace the nuances of ground support and precision measurement, you open the door to creating outdoor spaces that not only look stunning but also withstand time and nature’s whims. So, are you ready to start your own perfect wrap-around staircase? Share your plans below—what’s holding you back or what excites you most about this project?