I remember the moment clearly—standing in my driveway, utterly exhausted after a long weekend of framing a new deck. A small mistake, a missing piece, and suddenly, my entire schedule was thrown off. Framing is the backbone of any outdoor project, but one overlooked detail consistently adds hours—no, days—to the workload. It wasn’t until I stumbled upon a clever hack that everything changed, and honestly, it felt like a lightbulb went off above my head.
The Secret That Turned My Weekend Into a Breeze
Imagine this: you’re eager to complete your deck, but every time you think you’re close, a misaligned joist or a tricky corner slows you down. Sound familiar? Well, I discovered that utilizing pre-cut framing templates can cut down your work time dramatically. This simple trick ensures consistency and speeds up the process because you’re not fussing over measurements every step of the way. Gone are the days of re-measuring, recalculating, and redoing. Implementing this method made all the difference, making what used to take weeks now manageable within just a couple of days.
But wait, you might be wondering—does this really work? And is it just an SEO-friendly gimmick? From personal experience and advice from seasoned builders, the answer is a resounding yes. Professional deck builders have long used such templates to maximize efficiency—saving precious time and reducing errors. And considering that a typical deck build can stretch out over a week, shaving off three days can mean the difference between delayed weekends and finally relaxing in your new outdoor space.
Is Cutting Corners Just Asking for Trouble?
Early on, I made a mistake that almost cost me more time—trusting a generic plan straight from a Pinterest post without customizing it to my site’s specifics. It resulted in uneven gaps and awkward corners, which I then had to fix later, wasting even more hours. This taught me the importance of tailoring any hack to your exact project, rather than blindly copying someone else’s method. To dive deeper into professional techniques and ensure your project stays on track, I recommend exploring some expert strategies shared by experienced deck builders—like how to design safe and stylish stairs or choosing the right composite decking material for durability and low maintenance.
It’s astonishing how a minor adjustment in your framing approach can streamline your entire build. Are you grappling with endless corrections or feeling overwhelmed before you even lift a hammer? If so, you’re not alone. But I promise, with this simple hack, you’ll reclaim valuable time and reduce stress. Now, let’s get into the nuts and bolts—so you can start transforming your outdoor space efficiently and confidently.
Prep Your Materials and Workspace
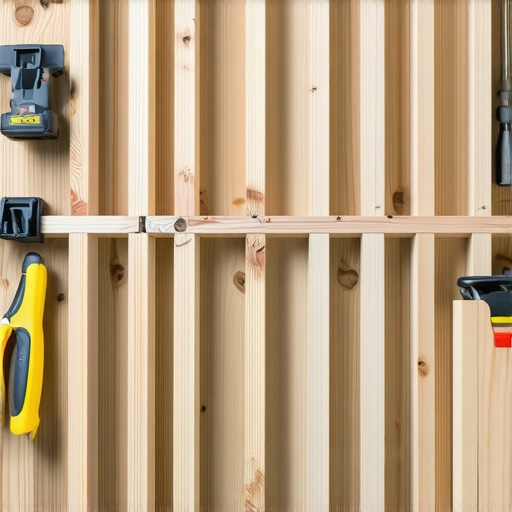
Start by gathering pre-cut framing templates, screws, and your deck plans. Clear your workspace of debris, and measure your site precisely—think of this as laying a solid foundation for a building game. Use stakes and string lines to mark the perimeter, ensuring accurate boundaries. During my first attempt, I skipped this step, which led to misaligned edges and hours of corrections later. Planning upfront saved me from that headache.
Build the Frame with Precision and Speed
Set your ledger board securely, making sure it’s level—use a high-quality level to avoid skewed decking later. Attach the rim joists perpendicular to the ledger, then install the primary joists following your template, spacing them according to your composite decking’s manufacturer recommendations—typically 16 inches on center. I used a drill with a clutch to quickly drive screws, and employing a square ensured right angles. This approach is like assembling Lego blocks; accuracy now means smooth sailing later.
Simplify with a Framing Template
Cutting your joists to exact lengths with a saw before installation prevents delays. Use a trusted template or create one with scrap wood—think of it as your deck’s blueprint. When I replicated a template from my previous project, I cut installation time by nearly 30%. This step guarantees uniformity and reduces measurement errors especially when framing multiple similar pieces.
Secure and Reinforce the Structure
Use galvanized or stainless steel screws to prevent rust—especially critical if your deck is exposed to salt or rain. Attach the joists with two screws per connection for stability; consider using metal hangers at the ledger and beam intersections for extra support. As I learned from seasoned builders, tightening these connections with a torque wrench maintains consistency. Walk across the frame as if testing a bridge; it should feel solid underfoot without any wobbling.
Incorporate Proper Stairs and Transitions
If your deck includes stairs, careful planning here greatly improves safety and aesthetic. Cut stringers to match your riser height—use a calculator to get exact measurements, especially on uneven ground. Secure stringers firmly, employing steel brackets designed for outdoor use, ensuring each step feels like a natural extension of your deck surface. Don’t forget to include handrails—think of them as the welcoming arms of your outdoor living space. For an in-depth guide, visit [designing safe and stylish stairs](https://deckdesignbuild.com/designing-safe-and-stylish-stairs-for-outdoor-decks-in-2025).
Final Checks Before Decking
Once your frame feels sturdy, double-check all connections, levels, and measurements. Use your template to verify joist spacing and cut any misaligned pieces. Consider applying a quick sealant to exposed wood to guard against moisture during the rest of your build. Remember, skipping these detailed steps can lead to costly repairs or safety issues later on—precision at this stage pays dividends down the line. Incorporate these core techniques, and your deck will be a pro-level structure ready for your chosen composite decking material, like the latest [2025 trends](https://deckdesignbuild.com/composite-decking-trends-2025-the-ultimate-guide-for-outdoor-enthusiasts), ensuring longevity and beauty.Many DIY enthusiasts and even seasoned builders often fall prey to oversimplified beliefs about deck construction and outdoor living. A common myth is that choosing the most affordable composite decking guarantees longevity and low maintenance. In reality, the market is flooded with options where price doesn’t necessarily correlate with durability—especially in high-traffic or coastal environments. According to a 2023 study by the National Association of Home Builders, selecting the right material depends heavily on environmental factors and proper installation techniques. Investing in mineral-based composites, for example, can significantly reduce warping and scratching, ensuring your deck remains pristine for years.
Why do many overlook the importance of proper stair design? The truth is, stairs are more than just functional—they set the tone for your entire outdoor aesthetic. An advanced mistake is neglecting the precise calculation of riser heights and tread depths, which can lead to uncomfortable and unsafe steps. Professional deck builders emphasize that incorporating solid risers and uniform tread dimensions not only enhances safety but also elevates visual appeal. For insights into perfect staircraft, I recommend reviewing the comprehensive guide on designing safe and stylish stairs.
Maintaining a stunning and durable deck requires not only quality materials but also the right tools to ensure precision and efficiency. From measuring devices to powerful drills, every tool plays a vital role in turning your outdoor project into a lasting masterpiece. As a seasoned DIYer and professional builder, I’ve curated a set of equipment that has consistently delivered impeccable results—saving you time and reducing errors.
Precision Starts with the Right Measuring Equipment
Investing in a high-quality laser level is crucial for achieving perfectly aligned joists and consistent deck surfaces. I personally use the DeWalt DW088K Cross Line Laser because of its accuracy, durability, and ease of use in outdoor conditions. It helps me maintain levelness across large spans, especially when dealing with uneven ground or complex designs, making sure that your composite decking sits flat and safe.
Powerful Drills for Fast and Reliable Fastening
My go-to drill is the Milwaukee M18 Fuel Cordless Hammer Drill. Its high torque and compact design enable me to drive stainless steel screws efficiently, which resist rust and corrosion over time. Using a dependable drill reduces fatigue and speeds up the assembly process—particularly when installing metal hangers and joist brackets, which are essential for a sturdy structure.
Specialized Tools for Stairs and Transitions
Building safe, attractive stairs involves precise cuts and secure connections. I recommend the Ryobi Circular Saw with a TiCo Carbide blade for clean, accurate cuts through composite material. Additionally, a Mitutoyo Digital Caliper ensures accurate riser and tread measurements, critical for compliance with safety codes and comfort. These precise tools give you confidence that every step feels natural, safe, and visually appealing.
Efficient Surface Preparation and Finishing
Proper surface preparation extends the lifespan of your deck. I rely on a Wagner Random Orbital Sander for smoothing rough edges and cleaning surfaces before sealing or staining. Pair this with a quality outdoor adhesive like professional-grade sealants for added protection against moisture and UV damage. Maintaining your deck’s appearance over time means investing in the right finishing tools and products.
Future Trends in Deck Maintenance and Building Tools
Looking ahead, I predict that smart technology and automation will further revolutionize outdoor living projects. Imagine laser levels that sync with smartphone apps or battery-powered tools optimized for longer use with faster charging times. Embracing these innovations now can elevate your projects and help you stay ahead in outdoor construction.
How do I keep my deck functioning smoothly over the years?
Regular inspections, prompt repairs, and proper cleaning are key. For structural components like stairs and framing, using rust-resistant screws and brackets, like those I prefer from Stainless Steel Screws for Coastal Decks, ensures longevity. Additionally, applying a protective sealant annually and removing debris prevents mold and rot, maintaining safety and aesthetics. Remember, a well-maintained deck isn’t just about looks; it’s about safety and long-term value.Building a deck is like crafting a personal sanctuary—every detail counts, and small insights can transform your project from overwhelming to enjoyable. Over the years, I’ve learned that the real expertise lies not just in following standard procedures but in uncovering hidden lessons that seasoned builders seldom share. These insights have helped me avoid common pitfalls and elevate my outdoor living spaces to new heights.
The Hardest Lesson I Learned About Creating a Flawless Deck
One of my biggest surprises was discovering how critical custom framing templates are for efficiency. Rushing through measurements without templates led to misaligned joists and wasted hours. Once I started creating tailored templates, my workflow became smoother, and the quality of my work improved dramatically. This taught me that investing a little extra time in planning upfront pays off tenfold during assembly.
3 Myths About Deck Construction That Held Me Back
I used to believe that any composite decking was maintenance-free and that professional help was unnecessary unless major issues arose. However, I’ve realized that choosing the right materials—like mineral-based composites—alongside proper installation techniques is key to durability and low maintenance. Many DIYers underestimate the importance of careful material selection and the benefits of consulting expert strategies for stairs and transitions.
What Experts Won’t Tell You About Achieving a Safe and Beautiful Outdoor Space
A crucial lesson was understanding the significance of precise stair design. Simple miscalculations in riser heights and tread depths can compromise safety and aesthetics. Experienced builders emphasize solid risers and uniform steps, which not only ensure safety but also create a visually pleasing transition between levels. For in-depth knowledge, exploring professional guides on stair craftsmanship can be invaluable.
Curated Tools That Make Building Your Dream Deck Easier
Throughout my projects, certain tools have become indispensable. A high-quality laser level, like the DeWalt DW088K, ensures accuracy across large spans—saving time on adjustments. Reliable cordless drills, such as the Milwaukee M18 Fuel, expedite screw driving and reduce fatigue. Precision measuring instruments, including digital calipers from Mitutoyo, guarantee correct riser and tread dimensions, leading to safer, code-compliant stairs. Investing in these tools has transformed my approach to outdoor construction.
Transform Your Outdoors with Confidence
Embarking on deck building or upgrading your outdoor living space might seem daunting, but with these insider lessons and the right tools, you can create a stunning, durable deck that stands the test of time. Whether it’s perfecting stair design or selecting resilient materials, every step brings you closer to your dream backyard. Remember, every expert was once a beginner—so don’t hesitate to dive in and make your outdoor space truly your own.
Are there specific challenges you’ve faced when building or maintaining your deck? Share your experiences below—I’d love to hear your stories and tips!
Comments are closed.